

Adding Bluetooth to your IoT project usually means developing native applications to interact with your devices. However, the new Web Bluetooth API specification allows web browsers to communicate directly with Bluetooth Low Energy devices. While the specification is not finalized yet, we can already experiment with it using Chrome on macOS, Linux, Windows, and Android.
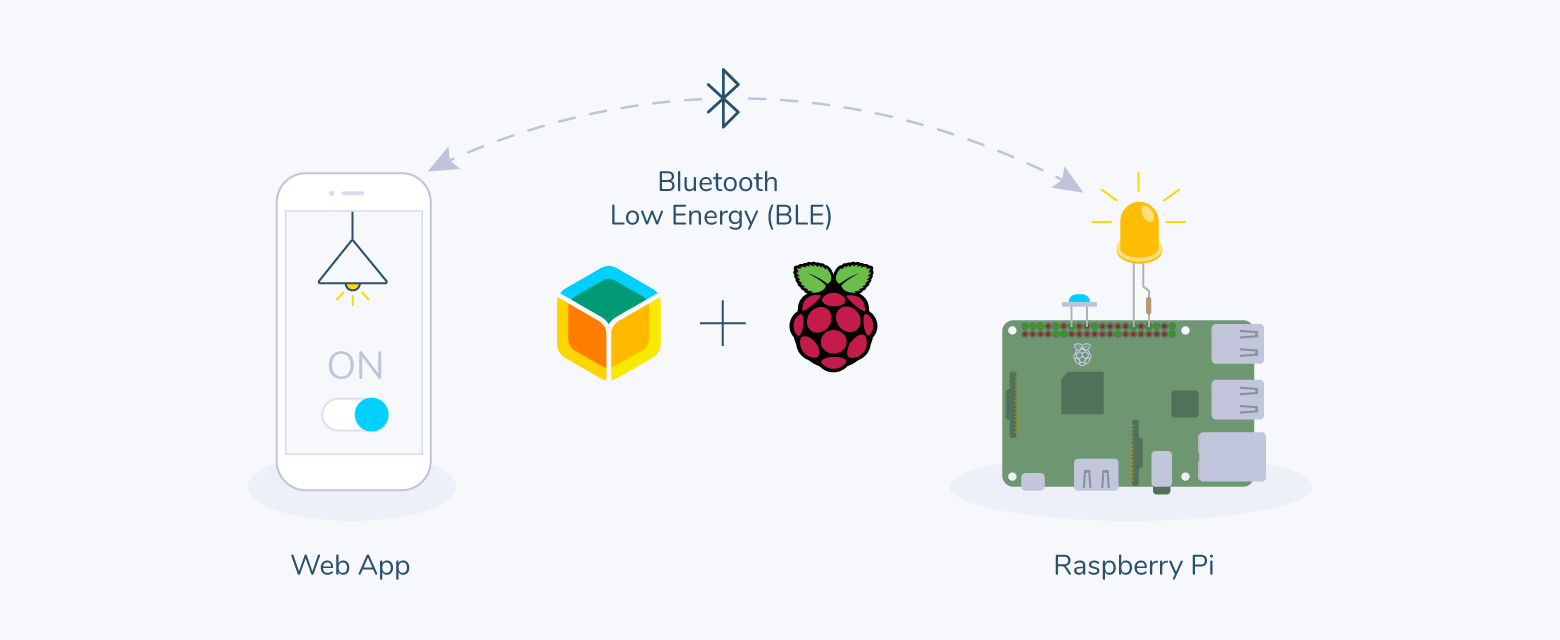
In this article, we will demonstrate how to use bleno – a Node.js library, to implement Bluetooth Low Energy (BLE) peripherals on a balenaOS-powered device and use a web app to communicate with it from a browser.
But first, let’s understand some basic BLE concepts. Or, skip ahead if you are familiar with BLE and want to get to the project.
What is BLE?
Bluetooth Low Energy (BLE), formerly known as Bluetooth Smart, is a subset of the classic Bluetooth specification designed to provide communication with low power consumption. It is helpful to understand some specific concepts and terminology when developing BLE applications.
Generic Access Profile (GAP)
The GAP defines how BLE devices communicate with other BLE-enabled devices. In the context of a BLE network, a device can be:
- A peripheral device: these are typically low power and resource-constrained devices that advertise themselves and wait for a central device to connect to them. The Raspberry Pi acts as a peripheral device in this project.
- A central device: these are typically smartphones or powerful devices that initiate a connection with peripheral BLE devices. For our demo, a laptop or an android smartphone with the latest Chrome web browser will act as the central device. The Web Bluetooth application loaded through the browser initiates a connection with the Raspberry Pi.
A peripheral device can connect to only a single central device at a time. Once a connection has been established, peripheral devices stop advertising themselves. A central device, on the other hand, can connect to several peripheral devices and can relay messages among peripheral devices.
Generic Attribute Profile (GATT)
Once BLE devices have established a connection, the Generic Attribute Profile (GATT) dictates how data is exchanged over the connection. Devices can adopt different roles:
- GATT Server: These are typically peripheral devices that have attributes that the client can make requests to.
- GATT Client: Send requests to the GATT server. They can read or write to attributes on the server.
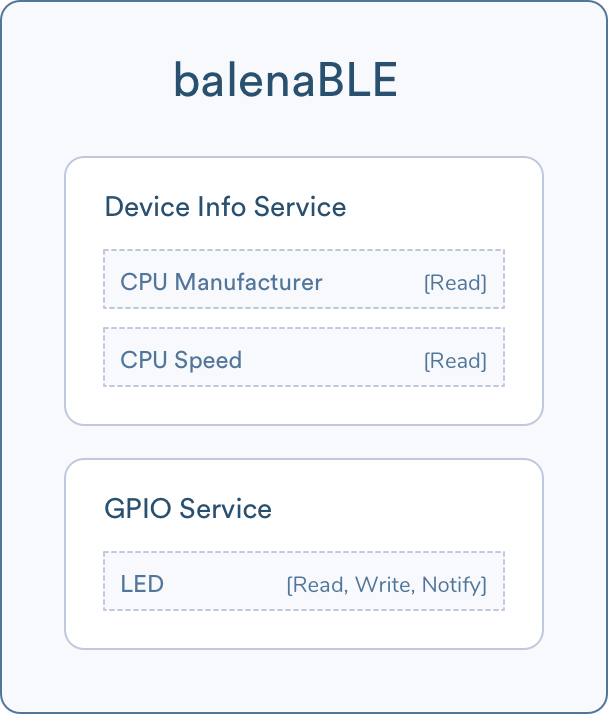
Services
A GATT server offers one or more services. Some services can be grouped into profiles. There are several predefined profiles and services by the Bluetooth SIG. For example, the Blood Pressure Profile contains the Blood Pressure Service and the Device Information Service.
Each service is identified by a Universally Unique Identifier (UUID). For officially adopted BLE Services, the UUID is 16-bit, while custom services are 128-bit. A service like Online UUID Generator or UUIDTools.com can be used to generate custom UUIDs.
Characteristics
Services, in turn, contain one or more characteristics. They are also identified by either 16-bit or 128-bit UUIDs. A Characteristic has a value, which is an array of bytes and a collection of Descriptors.
Depending on the properties of the Characteristic, a GATT Client can read or write its value, or register to be notified when the value changes. A GATT Descriptor provides further information about a Characteristic’s value.
Our Use Case
For the purpose of our demo, we are going to use Bluetooth to control an LED connected to a Raspberry Pi. A physical push button is also attached to the Raspberry Pi and allows toggling the LED on and off. Our Web Bluetooth application will be able to receive notifications when the physical button is pressed.
The Raspberry Pi will be configured as a peripheral device called balenaBLE with the following services and characteristics:
Hardware required
- A balenaOS supported device with BLE e.g Raspberry Pi A+/3B/3B+/Zero W
- An SD card
- Power supply
- LED
- Resistor (above 50 Ohms)
- A pushbutton
- A laptop or Android smartphone with BLE running the latest Chrome web browser
Software required
- balenaEtcher to write balenaOS to an SD card
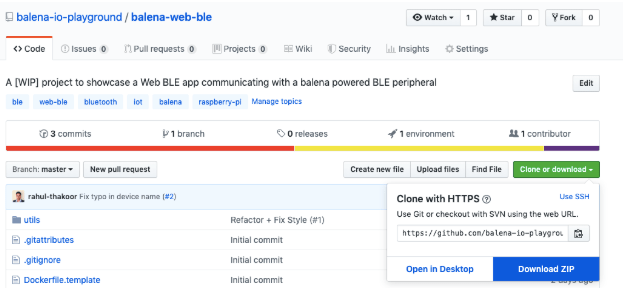
- The balena-web-ble project from Github
- balena CLI tool – to be installed on your computer, allowing you to install the project code on the balena device
Walkthrough
Setup the balena device
- Sign up for a free balenaCloud account
- Create a balenaCloud application
- Add a device and download the balenaOS disk image from the dashboard
- Flash your SD card with the balenaOS disk image and boot the device
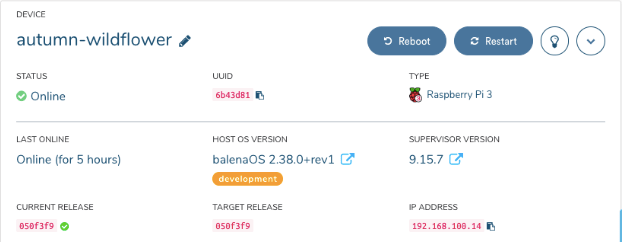
- After a few seconds, it should connect to the internet and show up on the balenaCloud dashboard.
Deploy the project code
Once the device is connected and showing in the dashboard, it is time to deploy the application that will create a BLE peripheral device.
- Download the project from \~~ https://github.com/balena-io-playground/balena-web-ble/ \~~ https://github.com/balenalabs-incubator/balena-web-ble and unzip the file. If you are familiar with git, you can also use
git clone
- Using the above-mentioned balenaCLI, run the command
balena push <appName>where<appName>is the name of the application you created within the balenaCloud dashboard earlier. For this example project, we will use thebalena push web-blecommand.
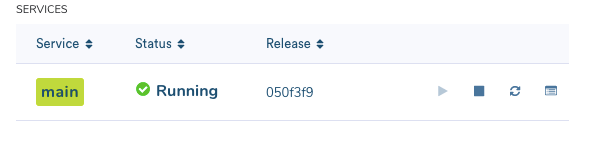
If all went well you’ll see the balena unicorn mascot and the code you’ve just pushed will automatically be distributed to the devices in your application.
You should also see the main service running on the dashboard:
Set up Raspberry Pi
Connect the LED as follows:
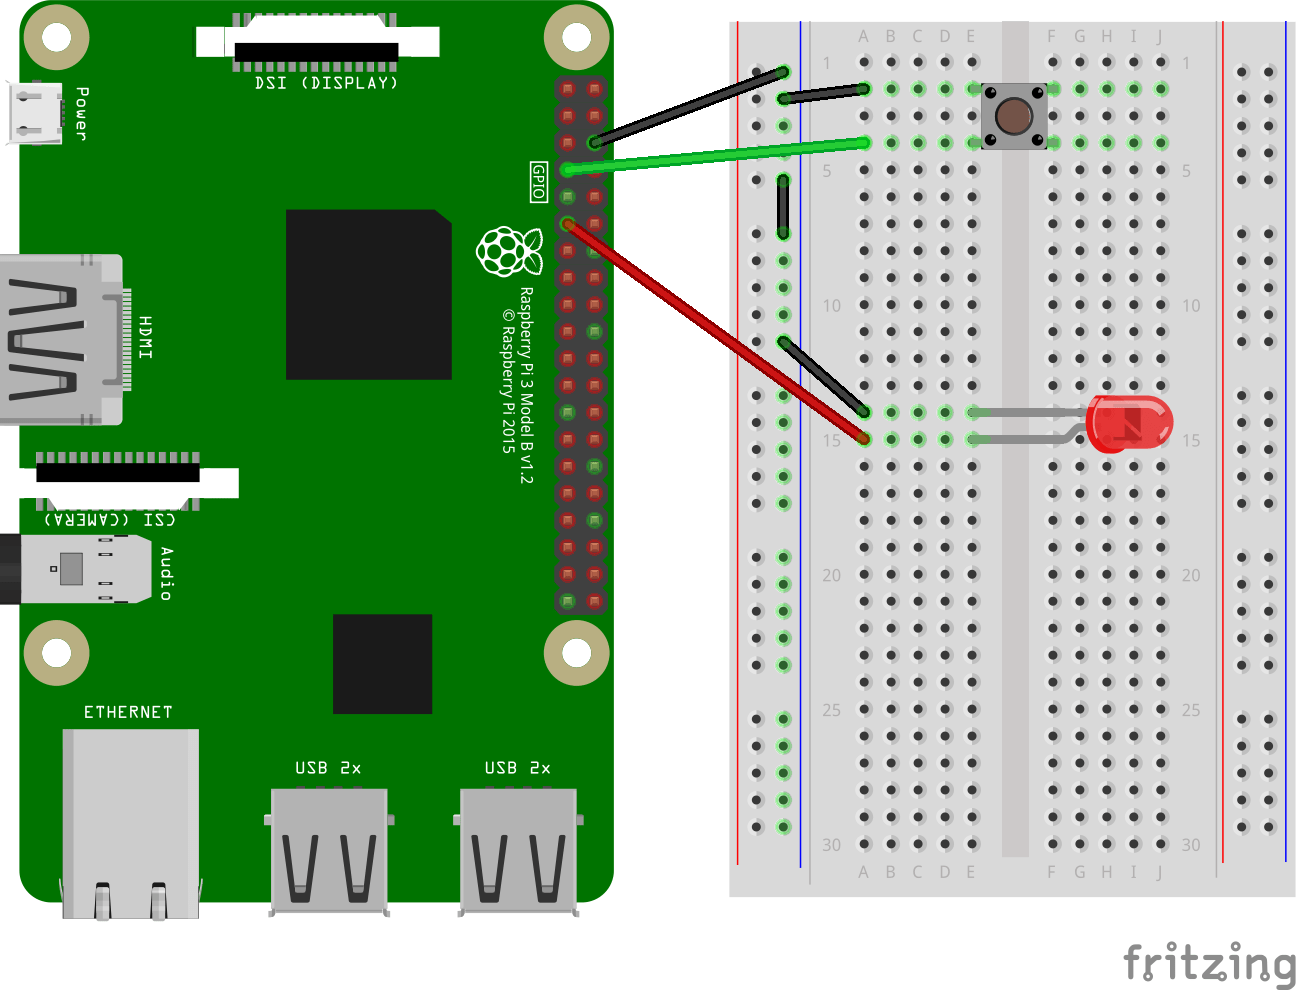
By default, the project uses GPIO 17 for the LED and GPIO 4 for the pushbutton . If you want to use a different pin, you can configure the LED_PIN and BTN_PIN environment variables in the dashboard. For example, if you want to use GPIO 27 for the LED instead:
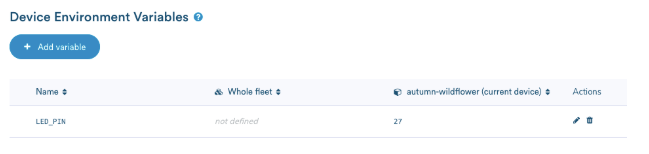
Note: After configuring the environment variable, the main service will be restarted
Load the Web Bluetooth App
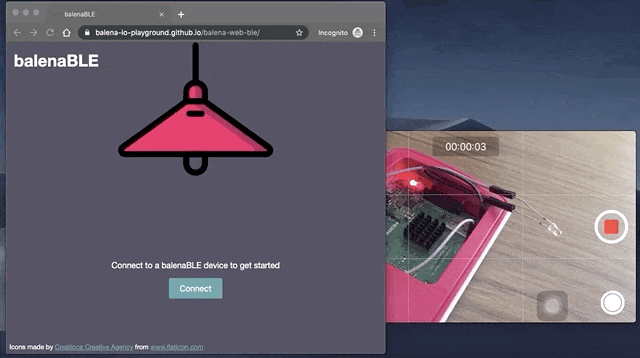
You can download and run the web app yourself from the repo or you can try our hosted version here.
Load the web app on your laptop or android device in the Chrome browser.
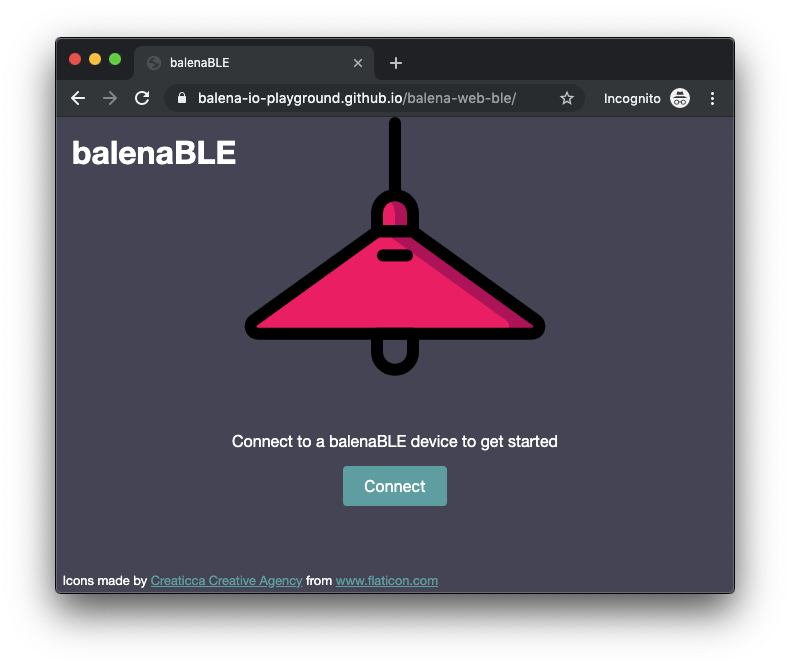
Turn on Bluetooth on your smartphone or laptop. Click on the “Connect” button which will trigger device scanning. After connecting, you can see the device’s CPU information and will be able to toggle the LED on or off.
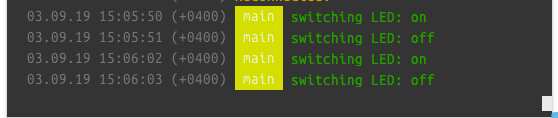
You can also see the device logs in the dashboard as the light is toggled.
You can also use the pushbutton to control the LED. The Web Bluetooth application will be notified and reflect the actual state of the LED on the UI.

The Web Bluetooth API is available in secure contexts only in the web browser. For development purposes, the Web Bluetooth is available from the
localhost. The web app here has been deployed on Github Pages which provides HTTPS access by default.
Going Further
This project uses the bleno library to create a BLE peripheral device. Feel free to explore the API and experiment with other BLE properties and characteristics to make your own custom BLE peripheral device.
You can then customize the web app accordingly to suit your use case. The relevant files are index.html and ble-client.js in the project.
Wrap Up
In this post, we set up a Raspberry Pi as a Bluetooth Low Energy peripheral device and used Web Bluetooth to control it from a web app. This project can easily be adapted to suit your use case. The following resources might be helpful when developing your own BLE application:
- The Web Bluetooth specification
- Bleno library
- Web Bluetooth Generator
- Bluetooth Low Energy
- Web Bluetooth browser compatibility
- Bluetooth GATT: How to Design Custom Services & Characteristics
Thanks for reading! If you decided to test out this project or build your own, we’d love to hear how it went. Similarly, if you get stuck or have any questions, let us know in our forums at https://forums.balena.io, on Twitter @balena_io, on Instagram @balena_io or on Facebook.