
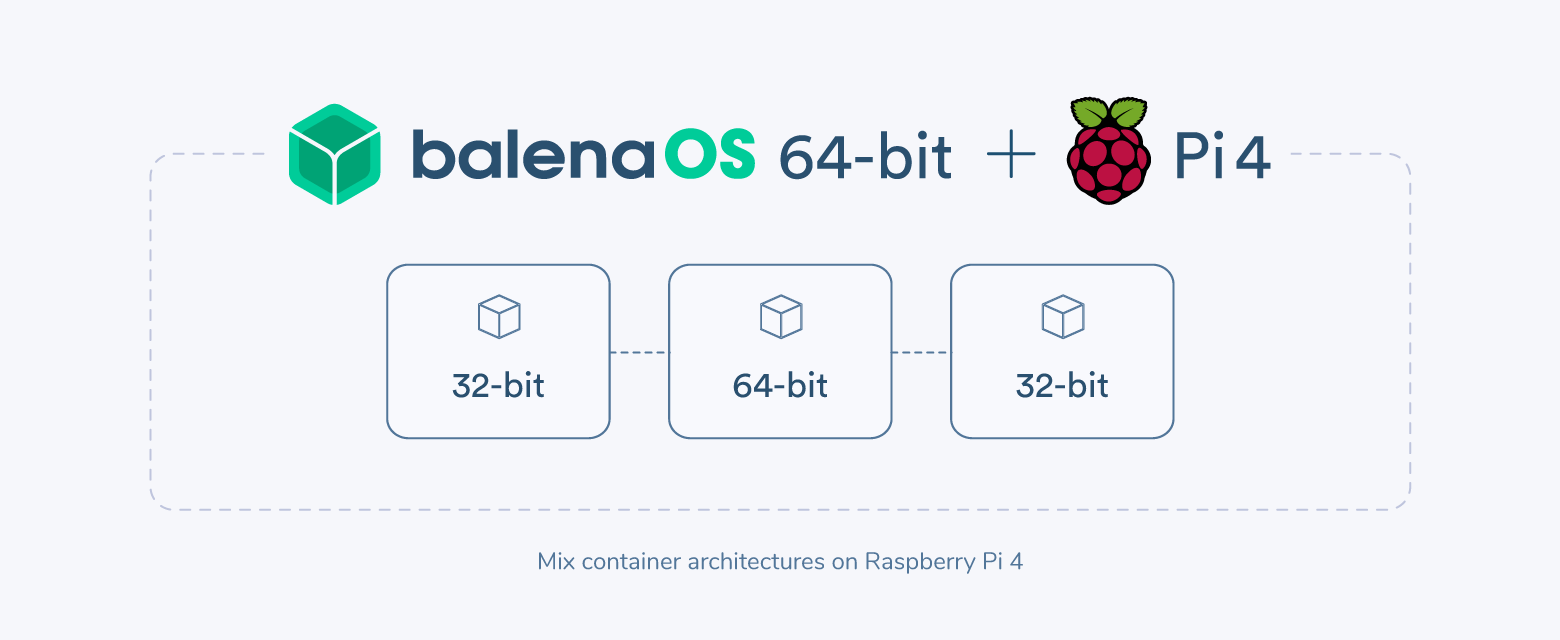
Ever wished it was possible to run both 32-bit and 64-bit containers on your Raspberry Pi 4 simultaneously? Well thanks to the 64-bit version of balenaOS, it is!
This tutorial will show you how to build a basic weather chart, displaying the current temperature and humidity of your chosen city, whilst logging the data in a MongoDB database.

This project has been put together to demonstrate the power of 64-bit balenaOS, however, it features a variety of different technologies and once completed should provide you with a great foundation on which you can expand and develop other projects using the Raspberry Pi 4.

What you will need
- A Raspberry Pi 4 B with SD card and power supply
- A download of the project from GitHub
Software to flash an SD card (balenaEtcher) - A free balenaCloud account to setup and manage the Pi
- Download and install the balena CLI tools – to be installed on your computer, allowing you to install the project code on the Raspberry Pi 4
About the project
This project is comprised of three containers:
- A MongoDB database instance with persistent storage, in which we will store all data. Many users have been waiting for the release of a 64-bit balenaOS as MongoDB only works in this architecture, thus making it perfect for our example project.
- A Python 3 application that fetches the weather information from the darksky.net API and saves it to the database every minute (by default).
- A Node.js application, built using ExpressJS and VueJS provides a front end. The application fetches the data from the mongo database and displays it in a chart, which is refreshed automatically every minute. Note that to demonstrate the multi-architecture feature, the Node.js server for this project is 32-bit.
Setting up the software
The process of setting up the software has been greatly simplified by the use of balenaCloud and Docker. This means you don’t have to manually install or configure packages, you just have to create an application, add a device and flash your SD card, and push the code from your computer using the balena CLI tools.
We’re not going to go into great detail about this process in this post, but you can follow the instructions until you have provisioned your device. Make sure you select the new Raspberry Pi 4 as the default device type when creating a new application.
 Push the code
After you have provisioned your device, the next step is to push the code to balenaCloud, which will automatically distribute it to all of the devices in your application; just the Raspberry Pi 4 you added earlier at this point! We’ll need to download the code from GitHub, then push the project using the balena CLI tools. I’ve summarised this process below, but if you need more information we have a detailed deployment guide available in our docs.
Go to the GitHub repository and download a copy of the code to your computer.
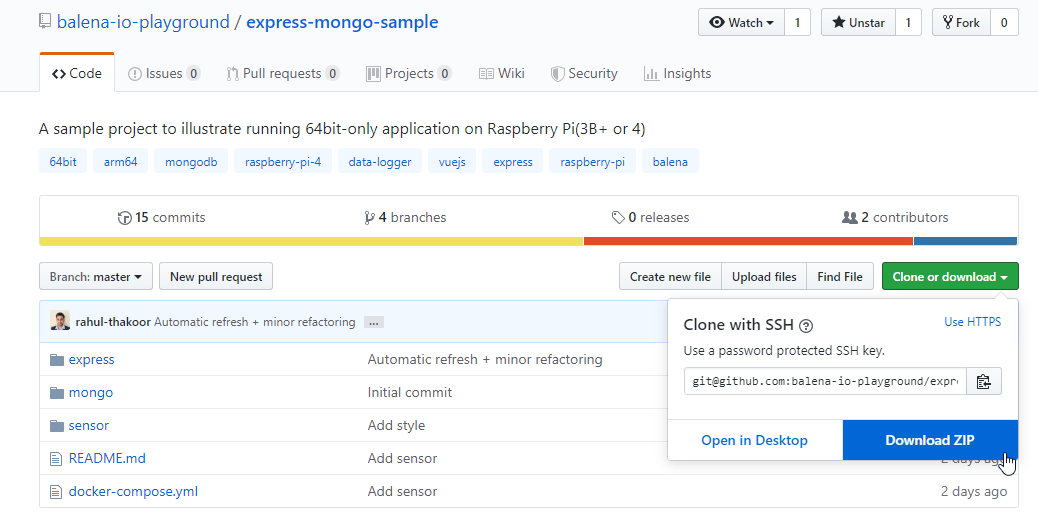
Once you have installed the balena CLI tool on your computer, from the project directory, execute balena push <appName> where <appName> is the name of the application you created within the balenaCloud dashboard earlier. For example: balena push mongodb-example.

You should now see the balena unicorn mascot and the code you’ve just pushed will automatically be distributed to the devices in your application.
With your hardware provisioned and the code deployed, the next step is to configure the environment variables required to run the application. You can do this while you’re waiting for your Raspberry Pi to download the application.
 Add configuration variables
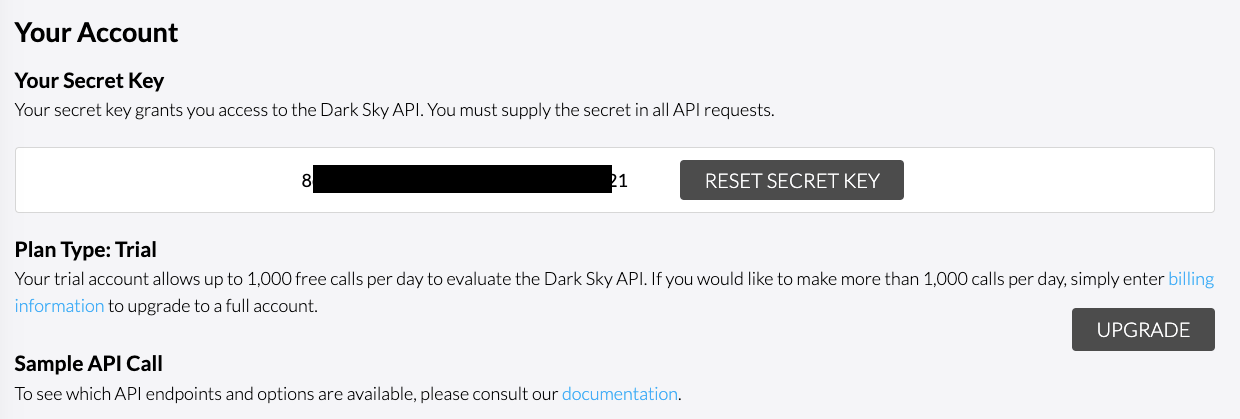
Instead of manually editing configuration files, you can configure the API key and change any variables at any time using the balenaCloud dashboard. We have great documentation on how to set environment variables if you need it.
To generate a new API key, create an account at darksky.net. After you log in, you should be able to see your API key(your secret key) as below:
You will also need the latitude and longitude for your chosen city. For example, to retrieve the weather for Lisbon, Portugal the latitude and longitude can be 38.7253 and -9.15 respectively.
You will need to set the API_KEY and CITY_LATLNG environment variables. The CITY_LATLNG should be in the following format: <latitude>,<longitude>. Eg 38.7253,-9.15. The FREQ variable can also be set to determine how often the data is updated from Dark Sky. It is set to 1 by default.

At this point, everything should be good to go, and you should be able to access the website hosted on your device by going to the device dashboard and enabling PUBLIC DEVICE URL.
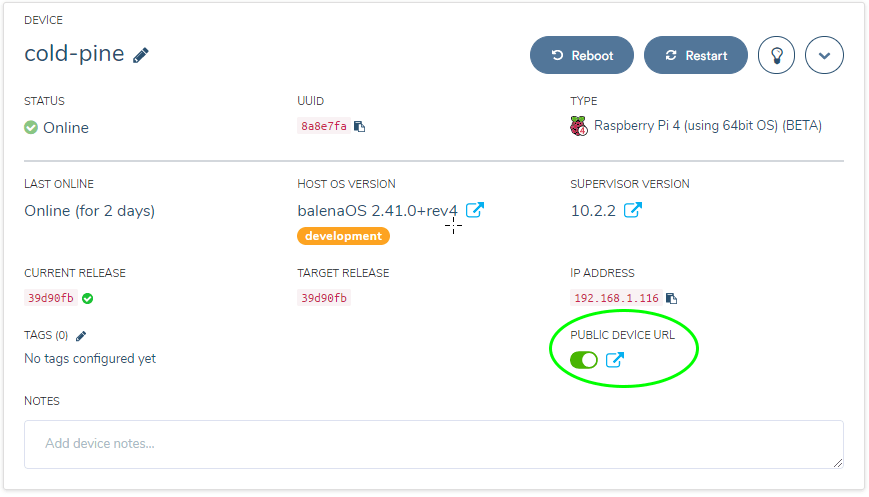
Simply click on the icon under PUBLIC DEVICE URL, and a new browser tab will open and display your chart. In this example we used Lisbon; your page will display something similar to the image below.

Project complete!
We hope you found this example project useful and interesting. If you do decide to give it a go or have other ideas on how to use balenaOS with the Raspberry Pi 4, we’d love to hear from you! As always, you can find us in the forums at https://forums.balena.io, on Twitter @balena_io, on Instagram @balena_io or on Facebook.
I tried following this tutorial, but it requires an API key for https://darksky.net
Unfortunately, this service is no longer supported and isn’t accepting new sign ups: Dark Sky API: Register
I am having trouble running a 32 bit app on a 64 bit device and was hoping this would serve as a proof of concept.