
For those who have just tuned in, we’re working on a new improved version of what we call the Beast. In our last post, we shared our goals for the Beast as a demonstration platform for resin.io, but also mentioned that we’d like to open the design up for use by any- and everyone to hack. You can join in our discussions in the chat room. We want to see the Beast used in ways that we couldn’t imagine…
Our little monster is coming along nicely. We unpacked and expanded the wishlist from last week’s post and extracted a few technical requirements as well as attributes to steer the design in the right direction. What we realised is that in order to strike a balance between customisability vs. simplicity we had to choose what to standard and define, and what to leave open to customisation.
Last week we put out a taste of the mechanical direction we’re taking. But before we jumped into CAD we got strategic about the overall system design. In terms of the overall system design, our original wish-list boiled down to a clear set of requirements:
- We hate wires and want as few of them as possible (and we’re certainly not alone here). If we have to have them, we want them short and invisible.
- We want demo-friendly modularity and scalability, so the system should function just as well with one device as it does with 200.
- We want hackability, so all components should be accessible to the average hacker.
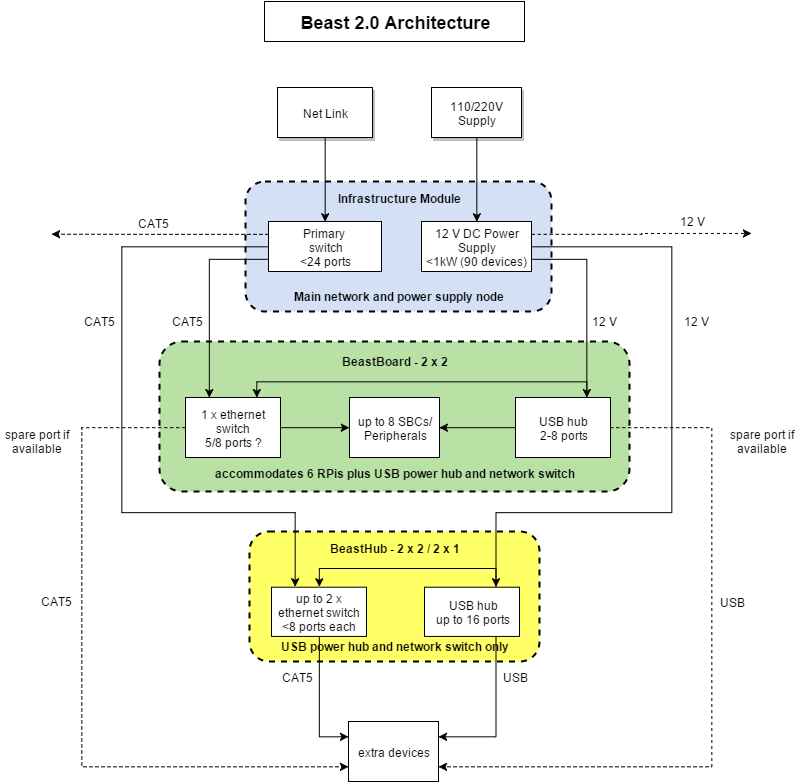
This guided us to a system architecture concept that is truly modular, consisting of identical units that can stand alone, or link up in clusters; cuts down on wiring and utilises only consumer-grade components. The big commitment was to make each tile a networking and power distribution hub with only one power and network cable input. First prize would be to daisy-chain both power and ethernet between adjacent tiles. Tidy.
Of course, coming up with concepts is easy, executing them in the real world… less so. Nevertheless, after juggling the various requirements we feel like we’re on the right track. Here’s what we have so far…
BeastTile → BeastBoard
Our primary goal for the Beast was to support our beloved Raspberry Pi, so we’ve used that as the driver, while trying our best not to exclude other unforeseen applications.
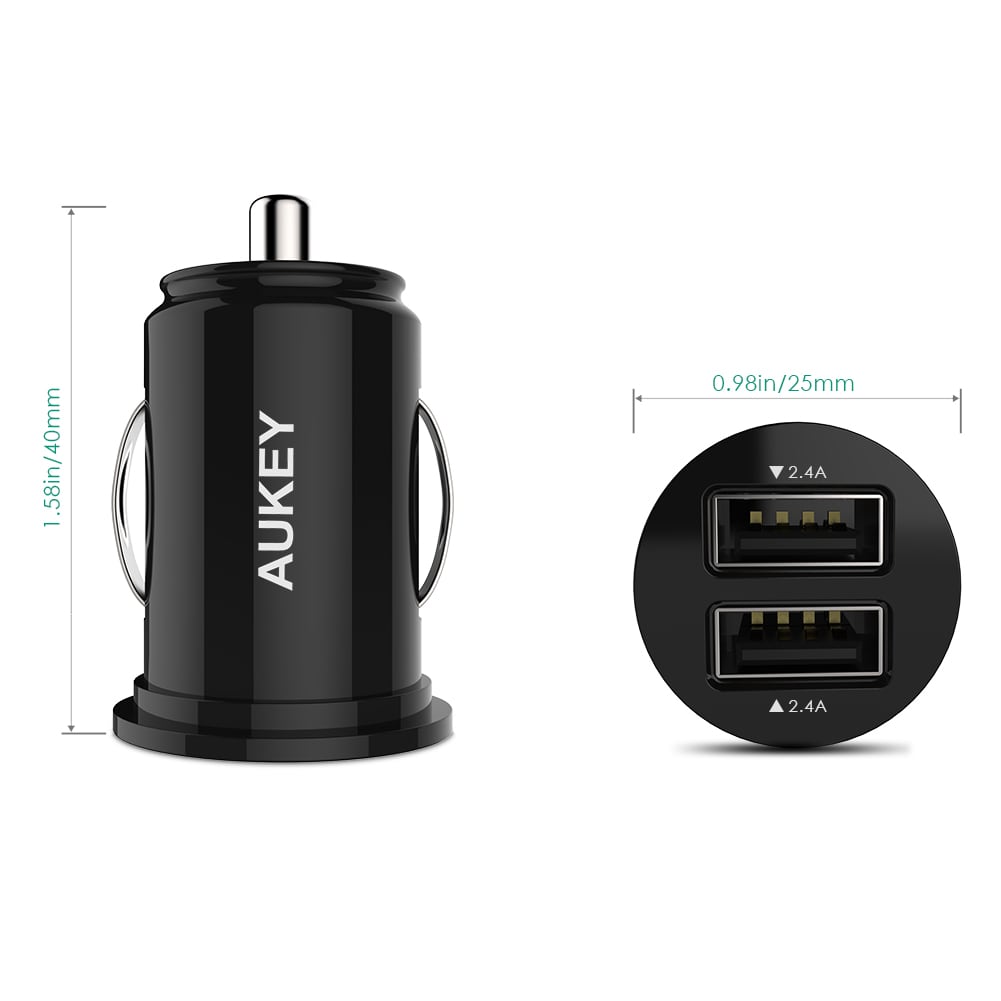
The BeastTile is the name for the generic tile that forms each Beast. It’s box-structure gives it strength (we want to stack them up to 2 m, maybe more), and also provides a useful open core in which we can house our ethernet switches and USB hubs – though you can put anything in there that you like. We’ve left two opposite ends open and undefined for access to the core, and if we want to get fancy, custom face plates. The 160 x 160 x 35 mm core can accommodate an 8-port ethernet switch (like the Netgear and 8-ports worth of USB charging sockets (like the Aukey 2-port car charger). If we don’t need it, we can lose the switch, but we wanted to know it would fit if we need it to.
The BeastTile chassis is constructed out of laser cut acrylic (though we want to experiment with other materials as well) so it’s easily manufacturable by anyone with access to a laser cutter, and it fits together like a jigsaw. Just add glue (polymethyl methacrylate adhesive, rather).

The rods on the right and lower edge clip into the hook features and provide a versatile hinge to link tiles. We’ve still got to prototype the clip-on feature but we’re hopeful (the biggest worry is that acrylic doesn’t like to bend and will fatigue over time – that’s why we’re keen to try other materials). If we’re not happy with it we have some other ideas up our sleeve as a backup.
The top face in the image above has a bunch of holes and slots which are intended for mounting and cable management.
So that’s the generic tile, but where do we put the Pis..?

Introducing the BeastBoard (we’re not sure about names yet), a cluster of 6 Raspberry Pis, mounted on a custom-designed front panel. We abstracted the front panel from the chassis so you can design it to suit your needs. Like the core, you can put anything you want on the front panel, and it connects to the chassis using the plentiful mounting holes provided. For our layout, we’ve mirrored the Pis around the centreline, forming a single central channel for routing cables to the top and bottom edges, where they’ll wrap around and lead to the switch and power supply housed in the core. But again, you could do it a myriad other ways, and that’s the fun part.
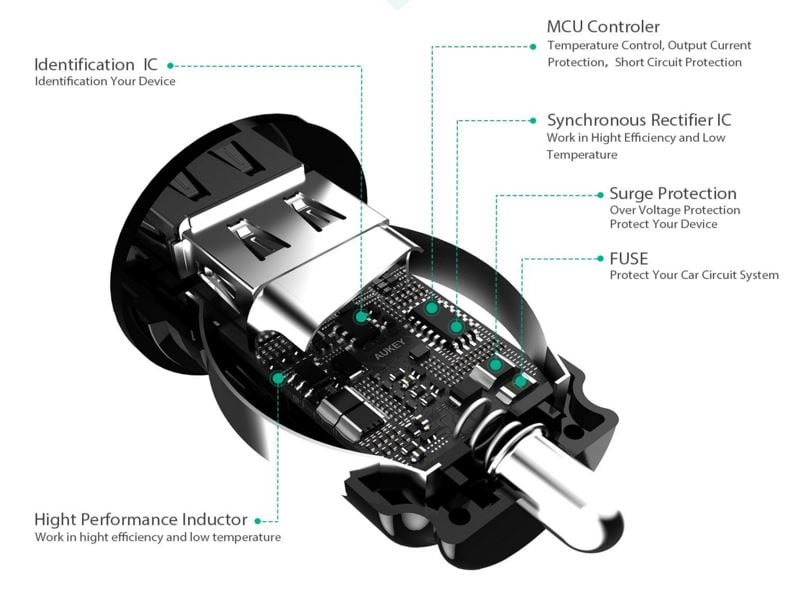
We’ve chosen to use the core space to mount the power supply components. It seems that USB car chargers are the most cost-effective and compact way to get 2 amps worth of USB power, but again, we’d love to hear about a better option. We’re leaning toward the Aukey 2-port car charger. The cigarette lighter socket format is great for mounting in a laser cut profile, but we haven’t decided exactly how to make the electrical connections.
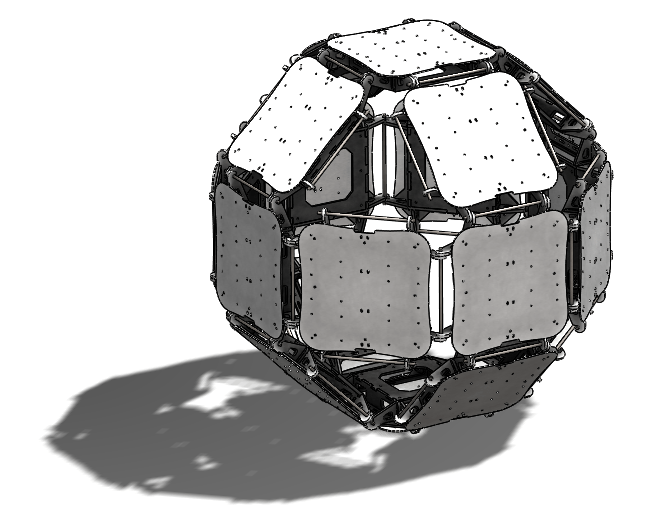
We’re looking forward to building some cool structures with the BeastTile. The hinged joints work over a range of -90 to +120 degrees, so you can assemble everything from a triangular column to an inside-out cube. While some might not love it’s ribbed, boxy aesthetic, it’s growing on us. Plus, we want to stack these babies high and we want them to last, so over-engineer is the name of the game. We’re expecting to learn a lot from the first build about strength and longevity.


That’s as far as we’ve come since last week. There’s a lot of detail to be fleshed out and we’re getting there, but we like to be challenged, so feel free to shake us up a bit. What structures would you most like to see? What have we overlooked? Where could we be more ambitious? What would you put on the front? What would you put inside?
Put forward your ideas in the chat room
What’s next..?
We’re still working on methods of locking the hinge at set points and rigidising large structures. For example, we’re excited about the ability to build very large structures using tent-pole-like lattices and dropping the tiles into place afterwards. Now that the basic design is maturing, there’s a lot of fun to be had in these details and possibilities.