
The resin.io platform is designed to make it as easy as possible to develop, update and monitor code on remote devices, whether your fleet contains one device or thousands. Those with growing fleets know that as the size of the fleet increases, the more difficult it becomes to organize and sort your devices and to find specific devices as needed. To address this, we’ve added two incredibly useful features to the dashboard: filters and tags.
Follow along as we demonstrate how filters and tags work together to make the device list a powerful tool for fleet management.
Our demo fleet
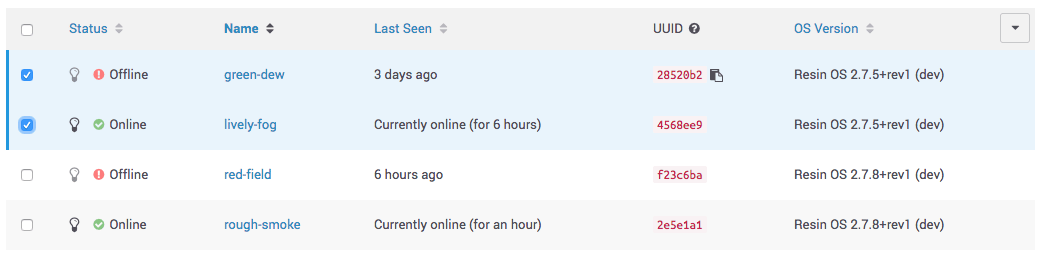
To kick things off, let’s take a look at the small fleet we’ll be using for demonstration purposes:
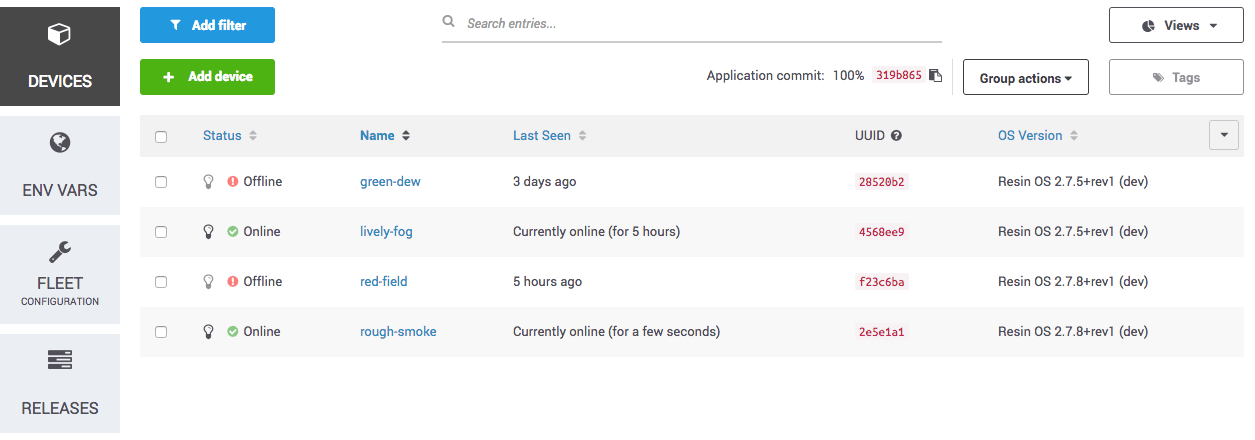
The fleet consists of four devices, two offline and two online. Within the fleet there are also differences in resinOS version, with two running v2.7.5, and two running v2.7.8. Each device has a unique name and UUID.
It is not terribly difficult to look at this device list and find out all we need about our fleet. Nevertheless, by assigning tags and creating filters, we can reduce the work required to perform repetitive lookup and maintenance tasks.
Simple filter
Looking at the list, we notice that some devices are offline, and we’d like to take a closer look at those devices. To do this, we’ll create a simple filter.
To create a new filter, we click the Add filter button in the top-left corner of the dashboard. This brings up the filter editing window:
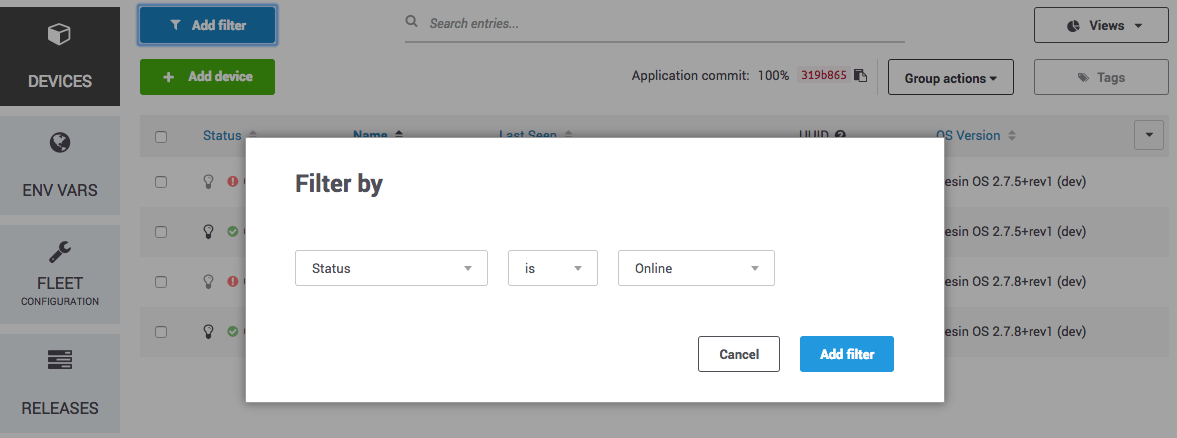
In this window, we have three fields. The first dropdown lists the device characteristics we can filter on. These characteristics correspond to the columns in our device list. The second dropdown has comparison operators appropriate to the device characteristic, such as is, contains, and matches RegEx. The third field is where we specify a value to filter on.
For our simple filter, we will use the defaults for the first two fields (Status and is), but change the value in the third field to Offline:

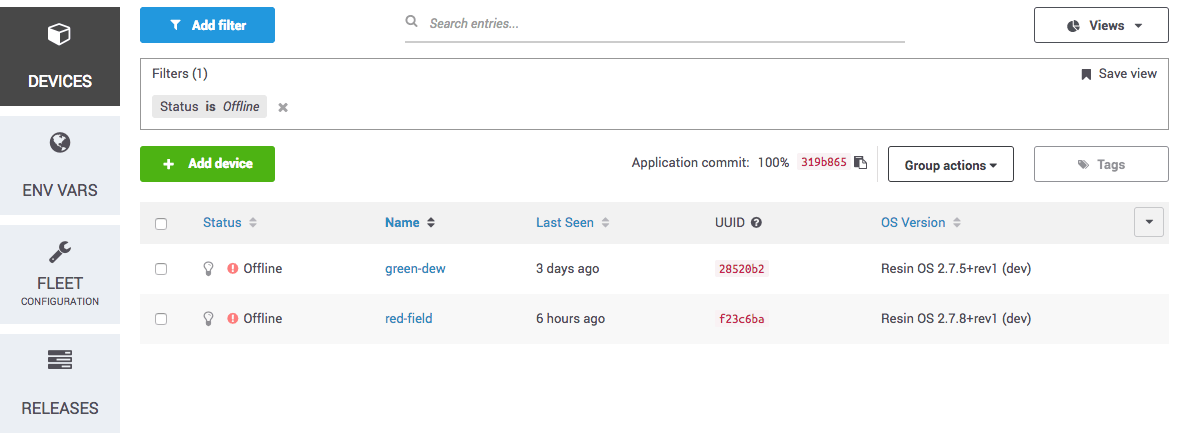
When we click Add filter it will apply our configuration. On the dashboard, the filter will appear in a new box below the Add filter button, and our device list will only show offline devices:
Multiple filters
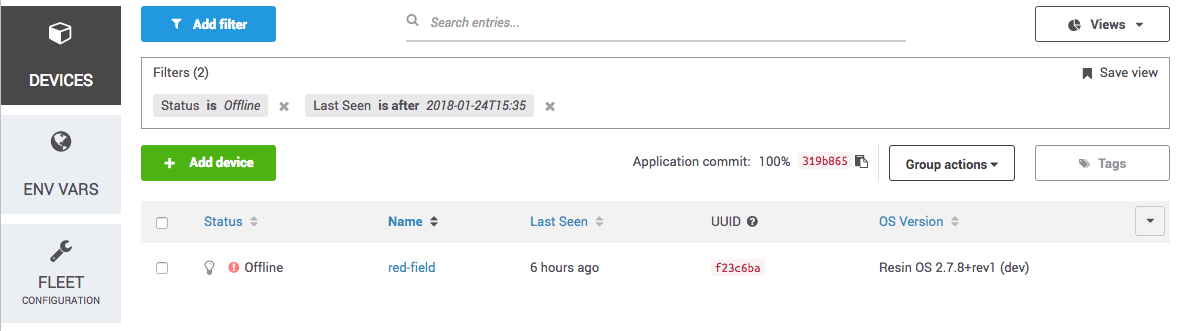
We want to refine our device list further by only looking at devices that have gone offline since a specific code deploy. To do this, we will click Add filter, select Last Seen in the first drop down, select is after in the second dropdown, and adjust the date and time to the time of the deploy (in this example, January 24th at 3:35 PM):

After clicking Add filter, the device list shows a single device:
Saved views
Reducing our device list to show only devices that have gone offline since the last deploy is something we’ll probably want to do again. While adding these filters is easy, we can make it even easier by creating a saved view. Saved views capture a specific filter or set of filters that we want to apply again in the future.
Note: Currently saved views do not persist across browser sessions or across different browsers. This feature will be added in the near future
To create a saved view, we click on Save view on the right side of the filter box. This gives us the option to name our view. We’ll call it Offline devices since Jan 24 deploy:

We click Save, and the Offline devices since Jan 24 deploy view is now accessible under the Views menu on the right side of the dashboard, complete with some information regarding the filters in the view:

Tags
Tags provide an easy way for us to include more information about our devices than what is already provided in the dashboard. With tags, we have the option to create key:value pairs that extend the available metadata for our devices. A device can be given multiple tags, and those tags can then be used when we create filters.
Our little demo fleet is deployed in two different store locations, uptown and downtown, and within each store there is one device for the front display and one device for the back. We can assign tags to our devices to keep them straight.
Before we assign tags, let’s clear the filters from the previous example by clicking the x to each filter’s right.
We now have our full device list. To add tags for the devices in the uptown location, we’ll click the checkboxes to the left of the first two devices in the list:
Next, we’ll click the Tags button in the upper right corner, opening the tag management window:

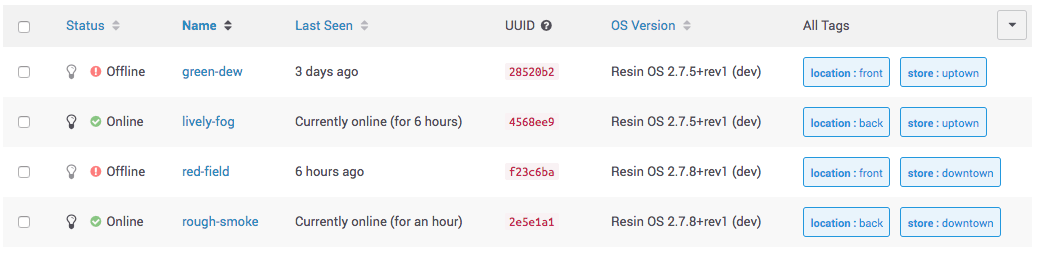
We’ll use store as the tag name, and uptown as the value. After clicking Add tag and Apply to 2 devices, a new All Tags column appears in our device list:

We’ll repeat the previous steps to assign a store to the remaining devices, as well as to assign an in-store location to the devices:
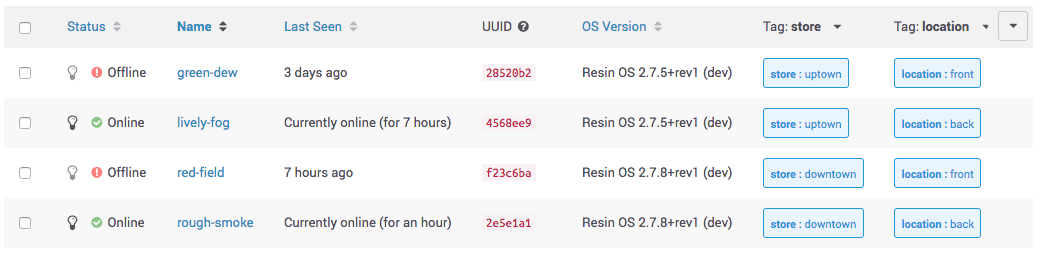
At this point, the All Tags column is getting a little crowded. Rather than having one column for all the tags, we decide we’d like a seperate column for each tag name. The All Tags column can be hidden by clicking the arrow on the far right of the device table header, and we can add columns for specific tags by selecting Add Tag Column:

Once we’ve selected the appropriate tag for each new column, our device list looks like this:
Group actions
It’s great to use tags and filters to make the device list easier to view, but it’s even better to use these tools together to handle maintenance tasks. Group actions allow us to perform tasks on a subset of our device list, which tags and filters can help us define.
In our scenario, we’ve learned that the uptown store has taken down both of their displays, and we no longer want those devices as part of our fleet.
Since we’ve already tagged the devices that were deployed in our uptown store, we can easily create a filter to find them:

Note that tags can be filtered by tag name, value, or both.
Now that we have our filtered list, we can click the checkbox in the list header to select all devices that fit our filter:

Once our devices are selected, we can click the Group actions dropdown to the left of the Tags button, followed by the Delete device option:
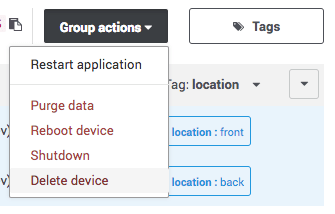
We’ll be asked for the application name to confirm we selected the correct option, and then we can remove both of these devices from our fleet.
Learn more
This simple example gives you a glimpse into the power of filters and tags for managing a fleet of remote devices. Make sure to check out our documentation for more information, and be sure to give us your feedback in the forums!