
In another blog post, we showed you how to build a Helium Data-only hotspot using balenaCloud. Here’s a way to add a practical gardening use case to the hotspot: monitoring the temperature and moisture level of plants outside (while mining a small amount of $HNT depending on the type of equipment you use!).
One of the main problems in my garden is that the tomatoes get dry or receive too much water. My solution is to install a soil moisture and temperature sensor on my tomatoes garden to take a more data-driven approach in order to water the plants. I also have goals of using as little power as possible while experimenting with Helium. Let’s begin!
Project requirements
You’ll need to create a Helium Data-only hotspot first, so please check out our other post to do that. Once you have one of those (or if you already had one laying around or coverage from the community), you can move onto the rest of the post.
I wanted to install a sensor that could have a long battery life and plug-and-play features. I don’t have electricity in the garden area and sometimes the WiFi signal is not strong. The solution that came to mind was to install a LoRa soil moisture sensor and provide LoRaWAN connectivity using the Helium data-only hotspot running on balena from my house.
In order to capture and visualize the data from the sensor, I’m going to use an IoT platform called DataCake. DataCake integrates with the Helium Console, which is great in the case of the Helium hotspot being the device the sensors will report to.
Connect the Soil Moisture sensor to the Helium Console
Getting started
Hardware required
- Helium Hotspot or Helium data-only hotspot running on balena
- SenseCAP Soil Moisture and Temperature Sensor
Software required
NOTE: The hardware and software requirements are a bit lighter here compared to other projects because we’re assuming you’ve already built one of these Helium hotspots.
Helium Console
The Helium Console is a visualization of the LoRaWAN Network Servers (LNS) managed by Helium. The Helium LNS requires an OUI (Organization Unique Identifier), and anyone can create an OUI to relay the data from their sensors to their own LoRaWAN Network Server instead of forwarding the data through a Helium network server. Read more about Helium OUIs here.
Once you have created your Helium Console account, you will receive 10,000 DC (1DC is a message of 24 bytes) to start connecting sensors and testing your projects. Once you create your account, you’ll be able to add devices, visualize data, and manage the integrations to forward the data to a third-party service.
Register the Soil Moisture and Temperature sensor
Our selected moisture sensor is the SenseCAP Wireless Soil Moisture and Temperature Sensor. It measures soil volumetric water content and temperature of the soil. It includes a battery that can send data for more than 1 year before it needs replacement. It also uses a weatherproof IP66 enclosure.

Get the credentials of your sensor
To add a device on the Helium Console, you will need a name, the Dev EUI, the App EUI and the App Key. In this case, for the SenseCAP Wireless Soil Moisture and Temperature sensor, you will need to request the App Key to a service that SenseCAP provides.
To do this, look at the sticker on the device, you will see EUI and KEY. Copy them, or scan the QR code and call this URL.
https://sensecap.seeed.cc/makerapi/device/view_device_info?nodeEui=<EUI>&deviceCode=<KEY>
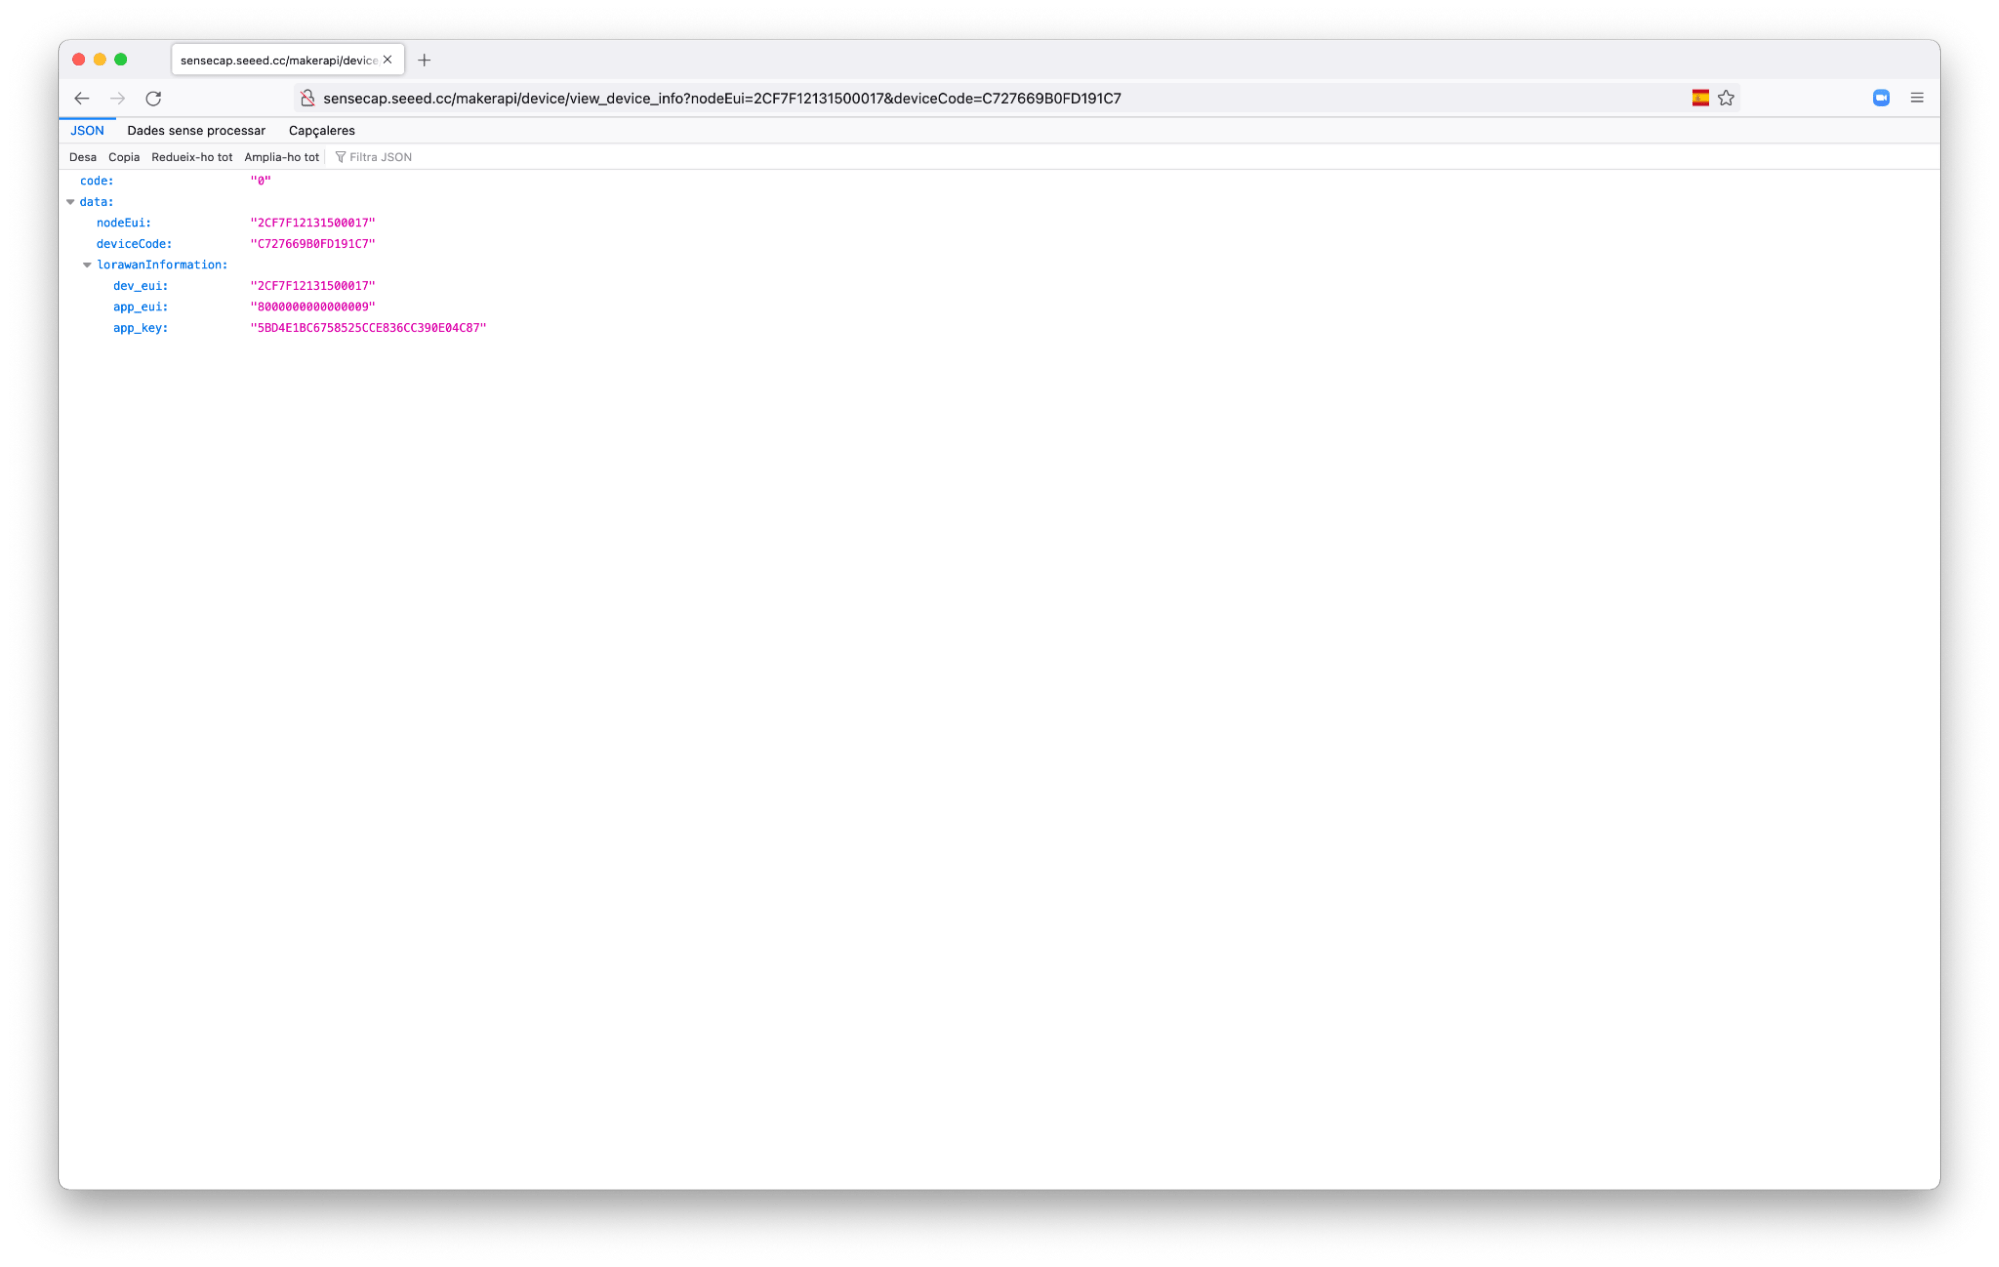
On the JSON result of your GET request, you will find the DEV_EUI, the APP_EUI and the APP_KEY that you need to register the device on any LoRaWAN Network Server.
Register the sensor on the Helium Console
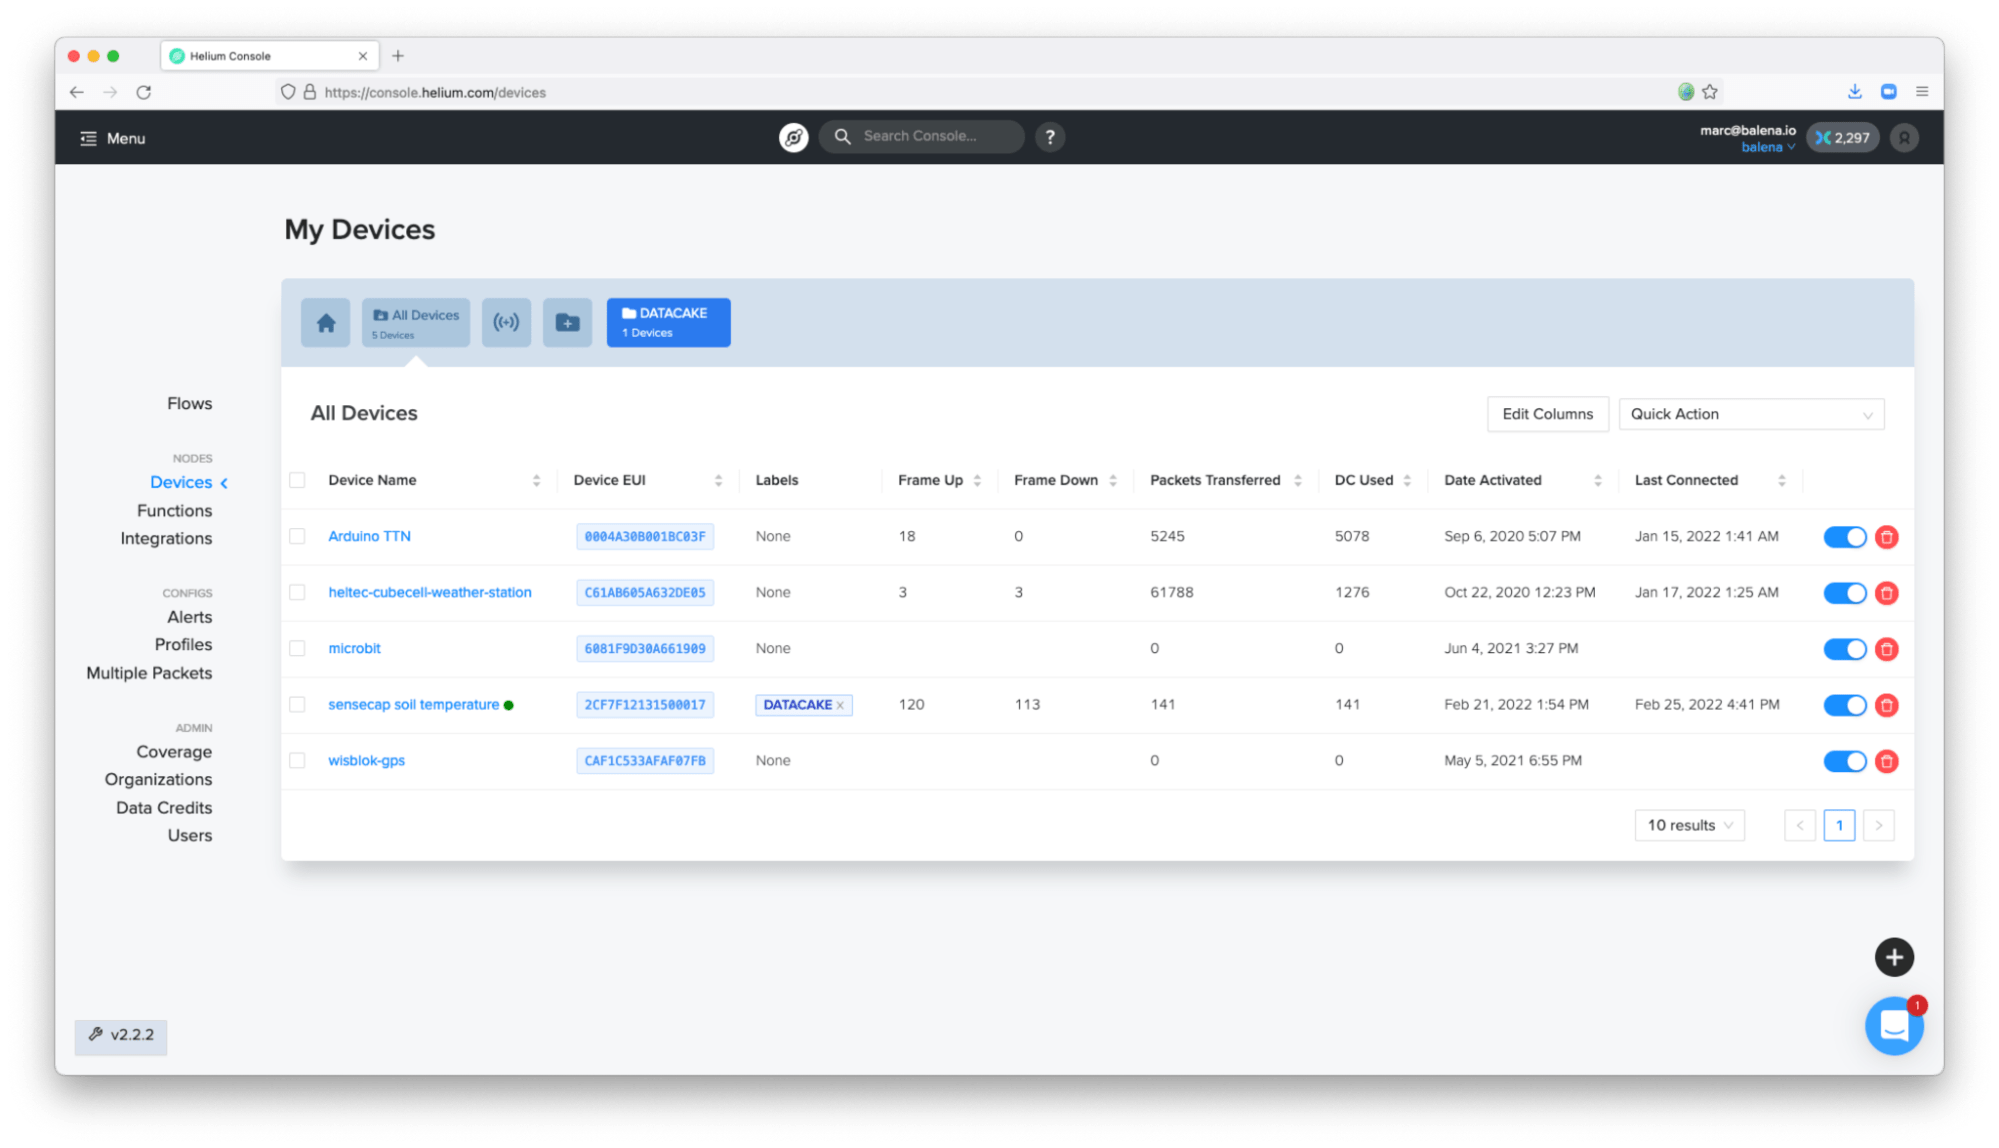
- Click
Deviceson the menu, and then click the+button to add a new device (check the tooltips of the buttons). - Add the credentials obtained from the previous step and your Soil Moisture sensor will appear on the Devices list.
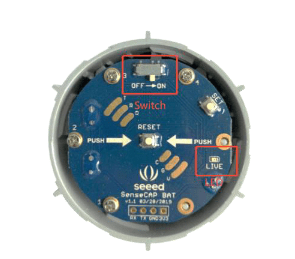
If the device is not online, disassemble the cylinder of the sensor, turning the cap counterclockwise. Check if the power is on or off and click the reset button.
At that moment, on the Helium Console, you might see something like this:
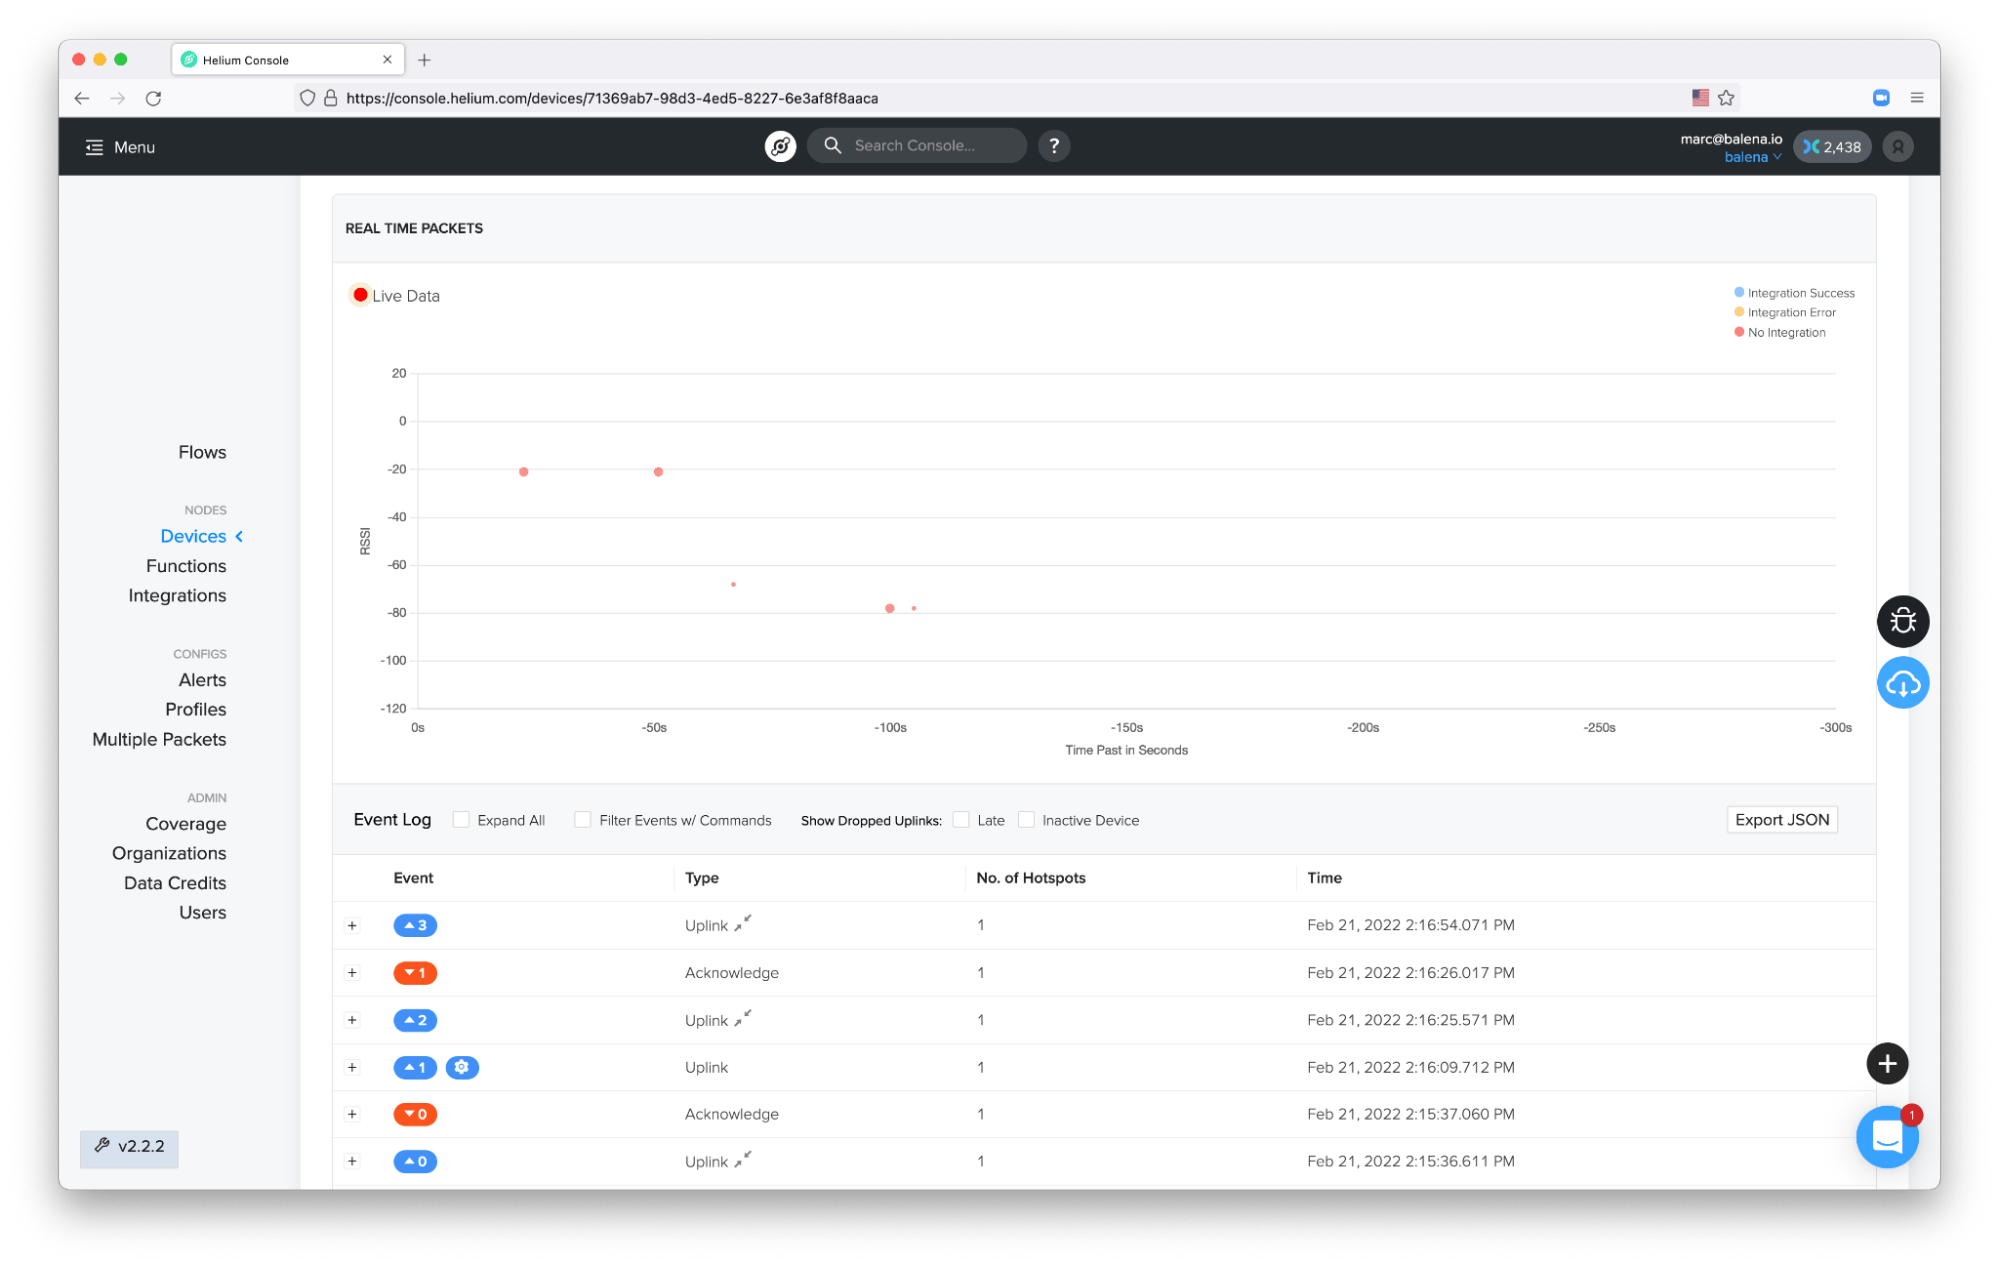
If you are running your own balena Helium Data-Only Hotspot, check the logs and you should see something like these messages from the packet-forwarder and the helium-miner services interacting among themselves:

Once the data is properly sent from the sensor and received on the Helium Console, it’s time to forward the data to an IoT platform to start visualizing the soil moisture and the soil temperature.
Visualize data on Datacake
As mentioned previously, to visualize the soil moisture and the soil temperature, I am going to use an existing IoT platform called Datacake. They have a direct integration with Helium and the sensor, so it’s pretty straightforward. You also can use other IoT platforms such as Ubidots or your own cloud services.
Datacake integration
Go to the Datacake dashboard and click + Add Device.
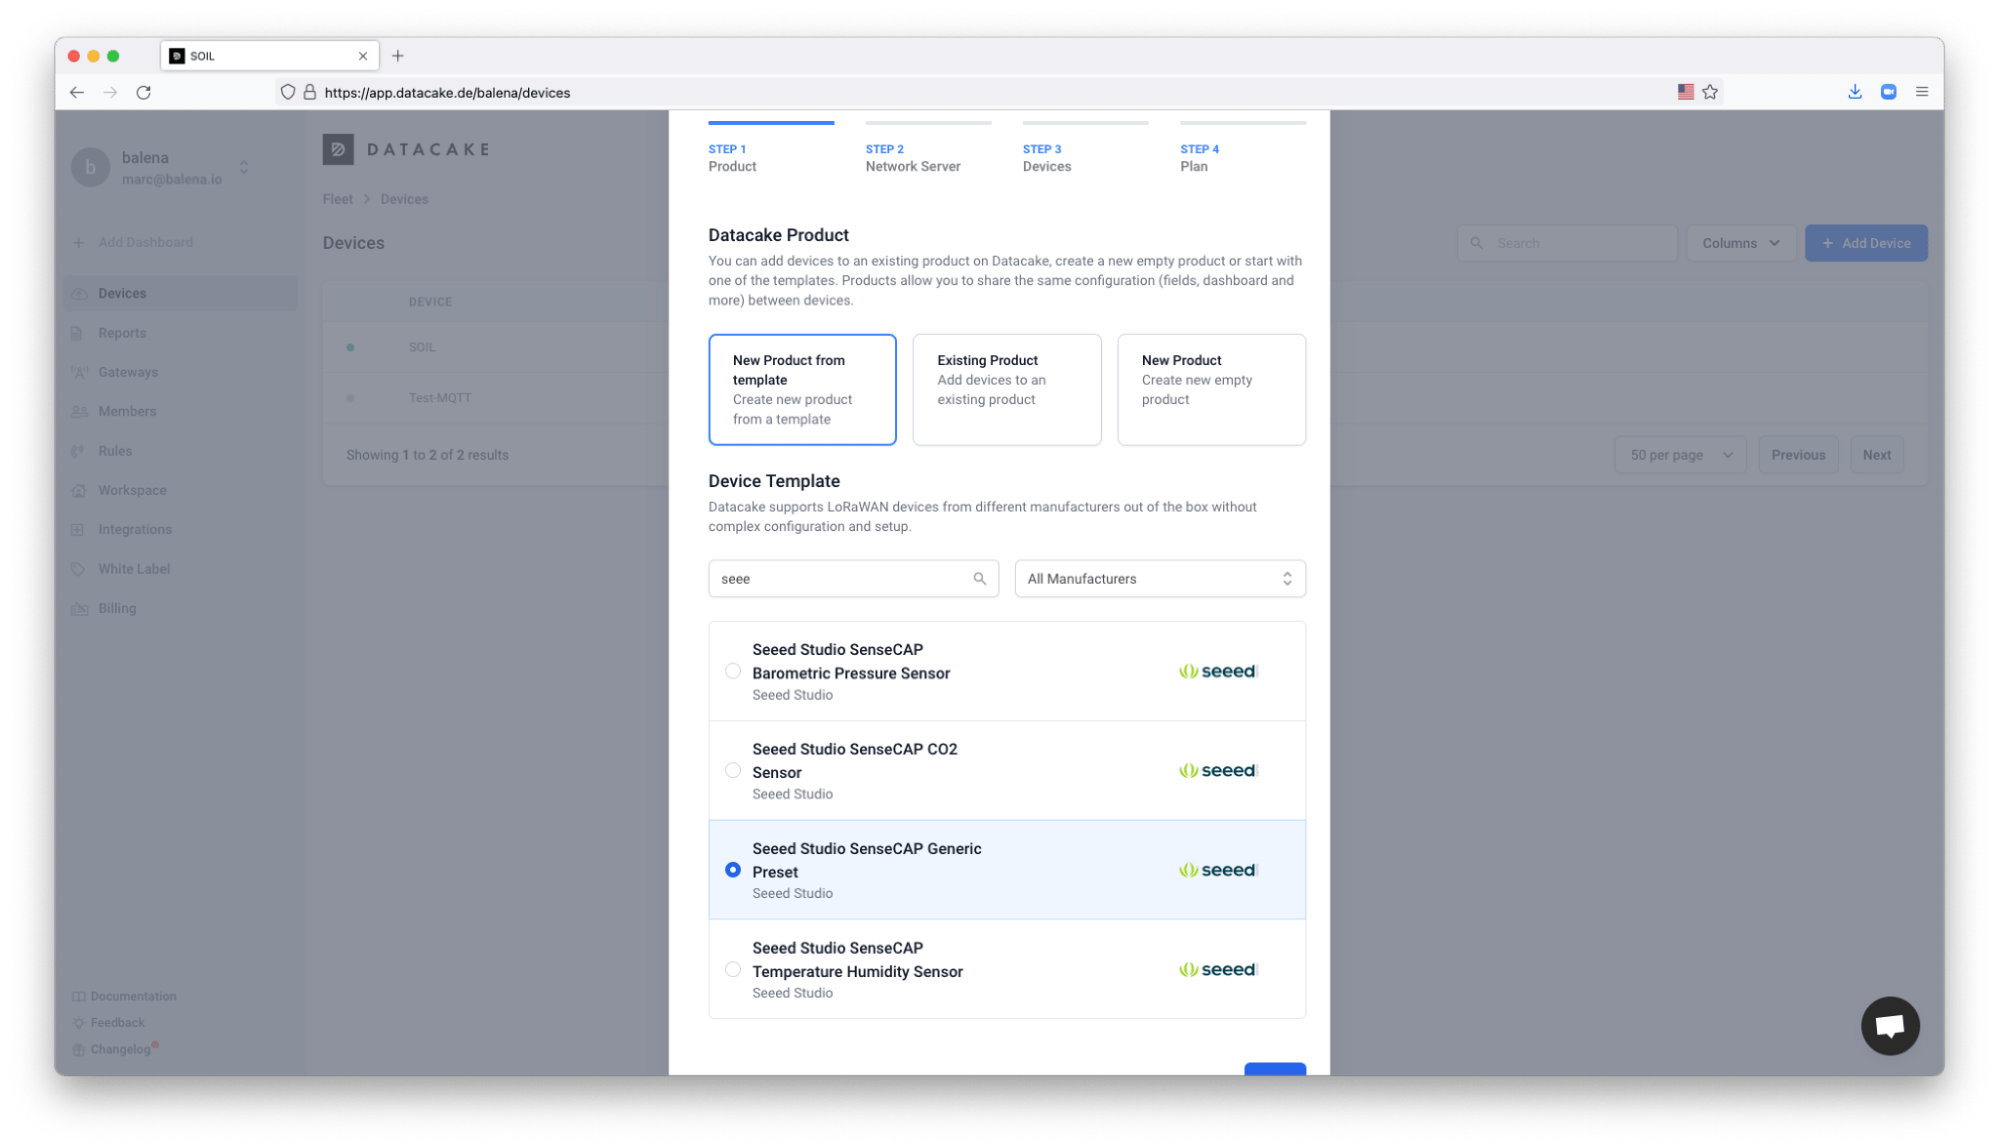
- On
Step 1, click onLoRaWANand then selectNew product from template. Then navigate toDevice Templatesfrom Datacake (I used the searcher for Seeed), and selectSeeed Studio SenseCAP Generic Preset:
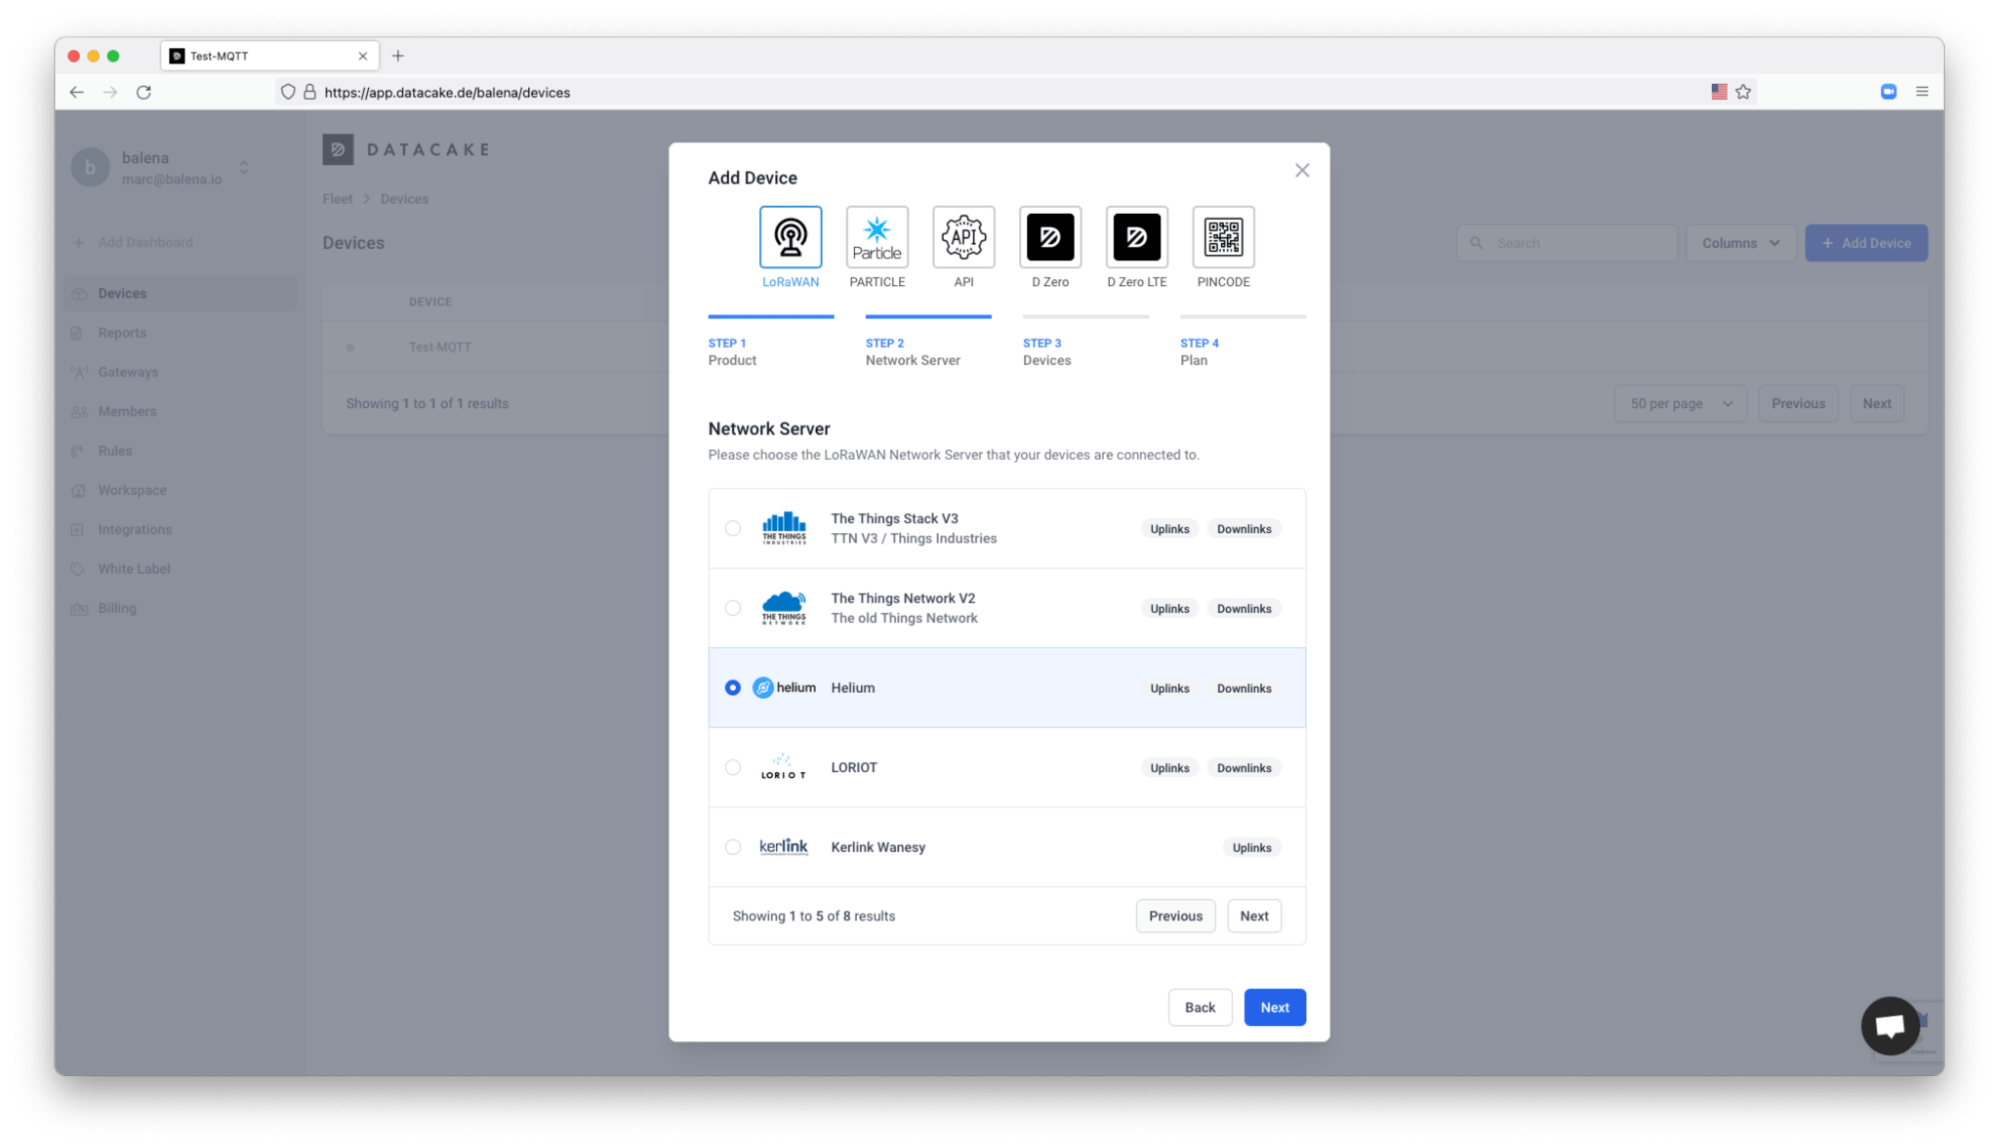
- On
Step 2, click on Helium, if you are using the Helium Console. Note: this might work with other LoRaWAN Network Servers such as The Things Stack:
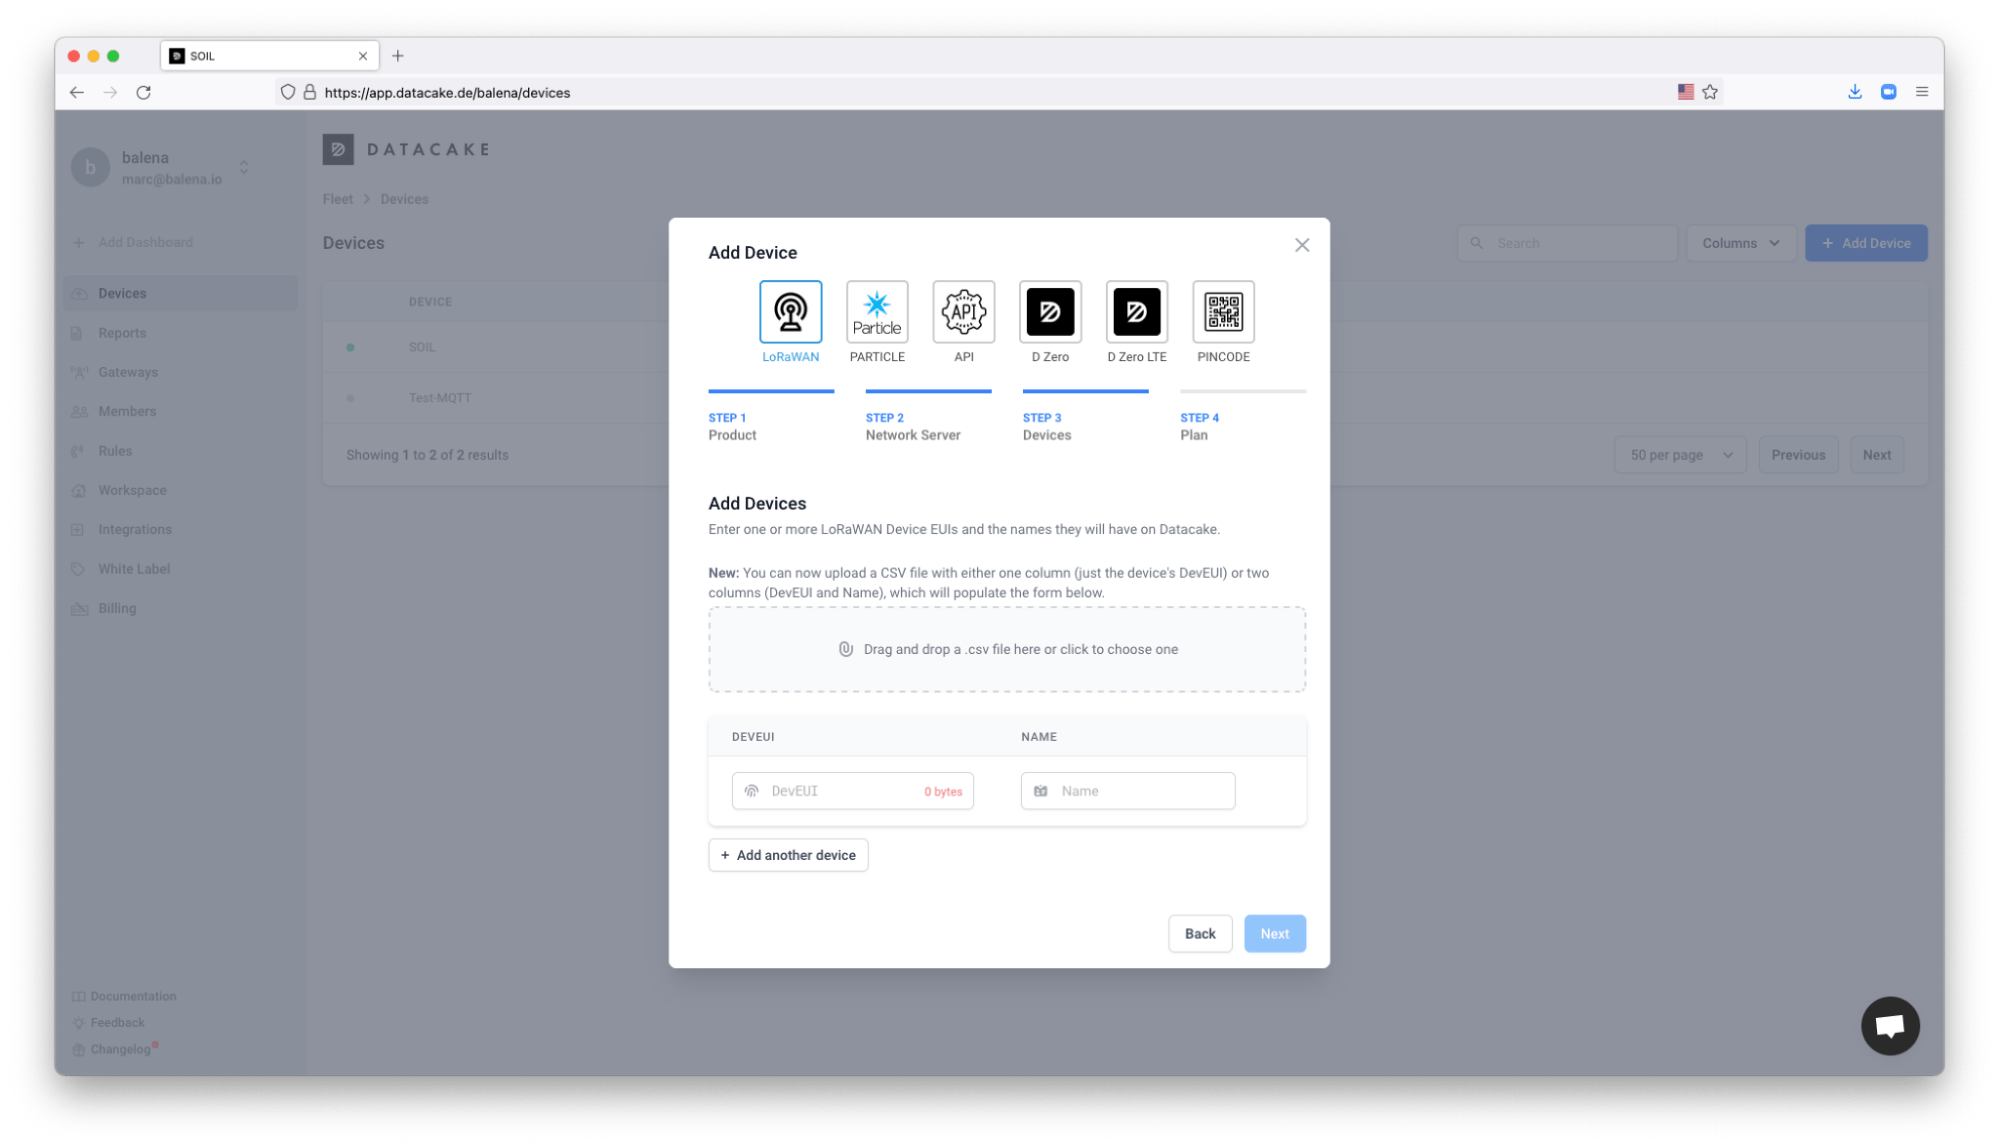
- On
Step 3, you will need to paste theDEV EUIof your sensor and add a name:
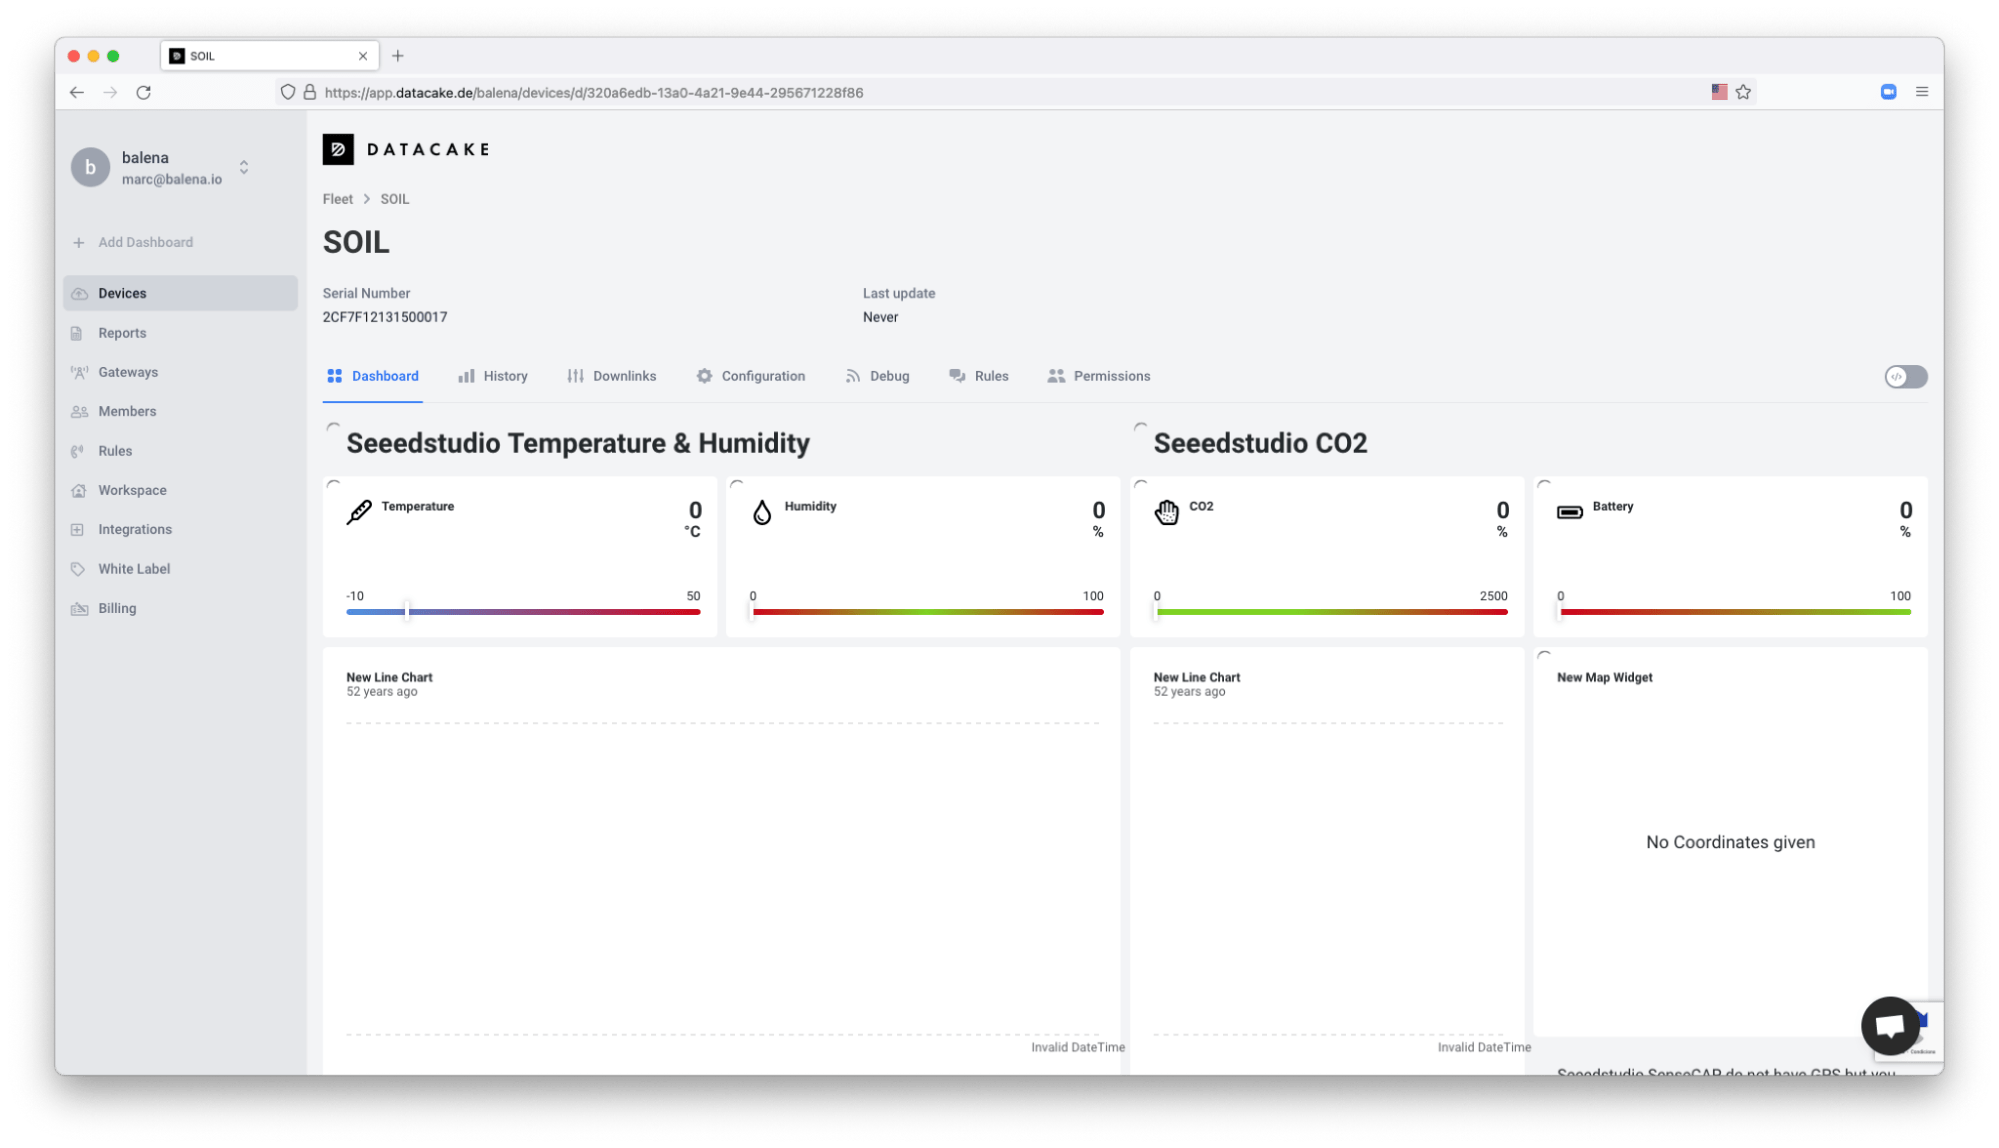
- Lastly,
Step 4requires configuring the billing plan. Datacake is free for up to 2 devices, so I’m using the free plan in this case. Once the sensor is created from the template, the sensor will appear on the list of devices. When you click on the list, a Dashboard will be automatically generated for that device:
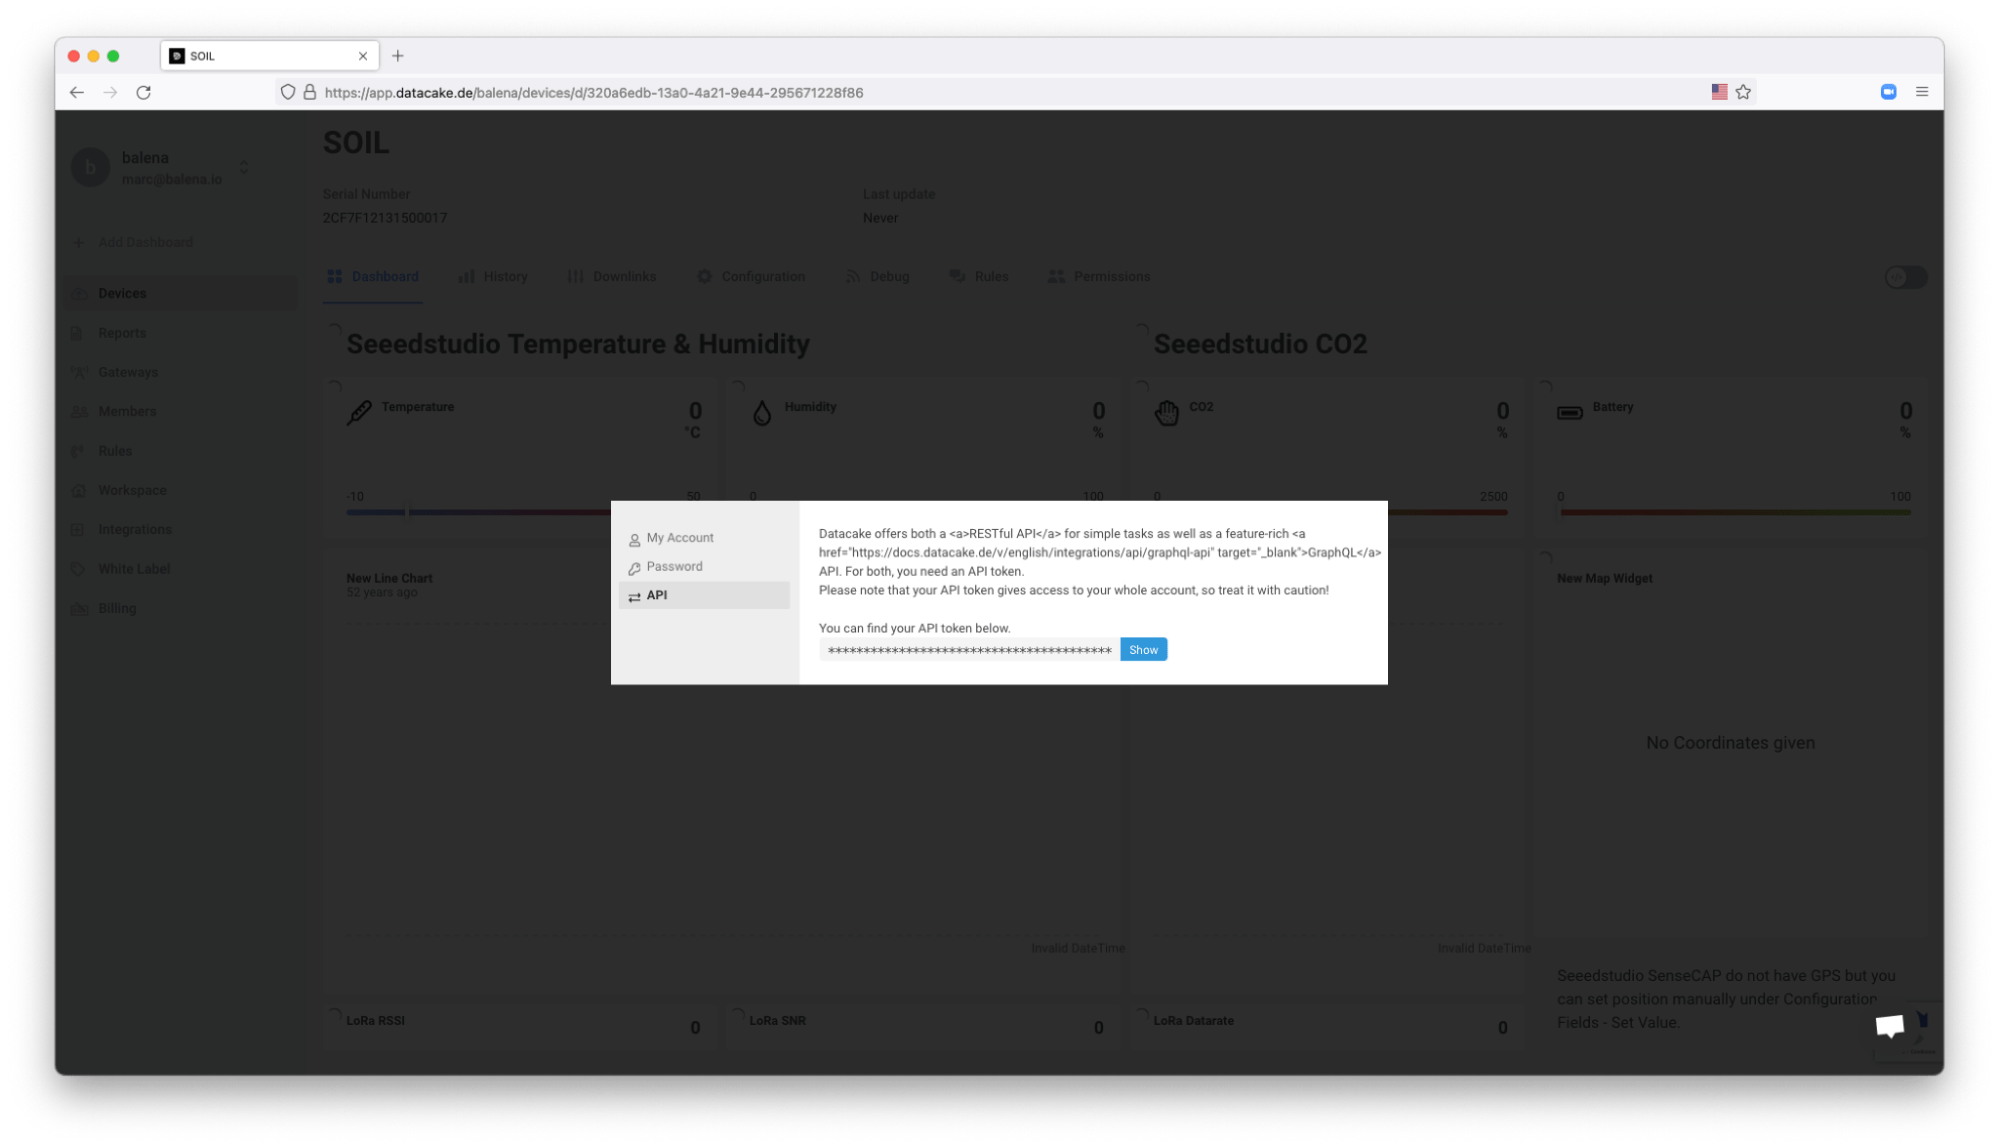
Now it’s time to integrate Datacake with your Helium Console account’s device. For that you will need the Datacake API token.
- Click on your organization name on Datacake and then click
Edit Profile. Now selectAPIand copy the API token:
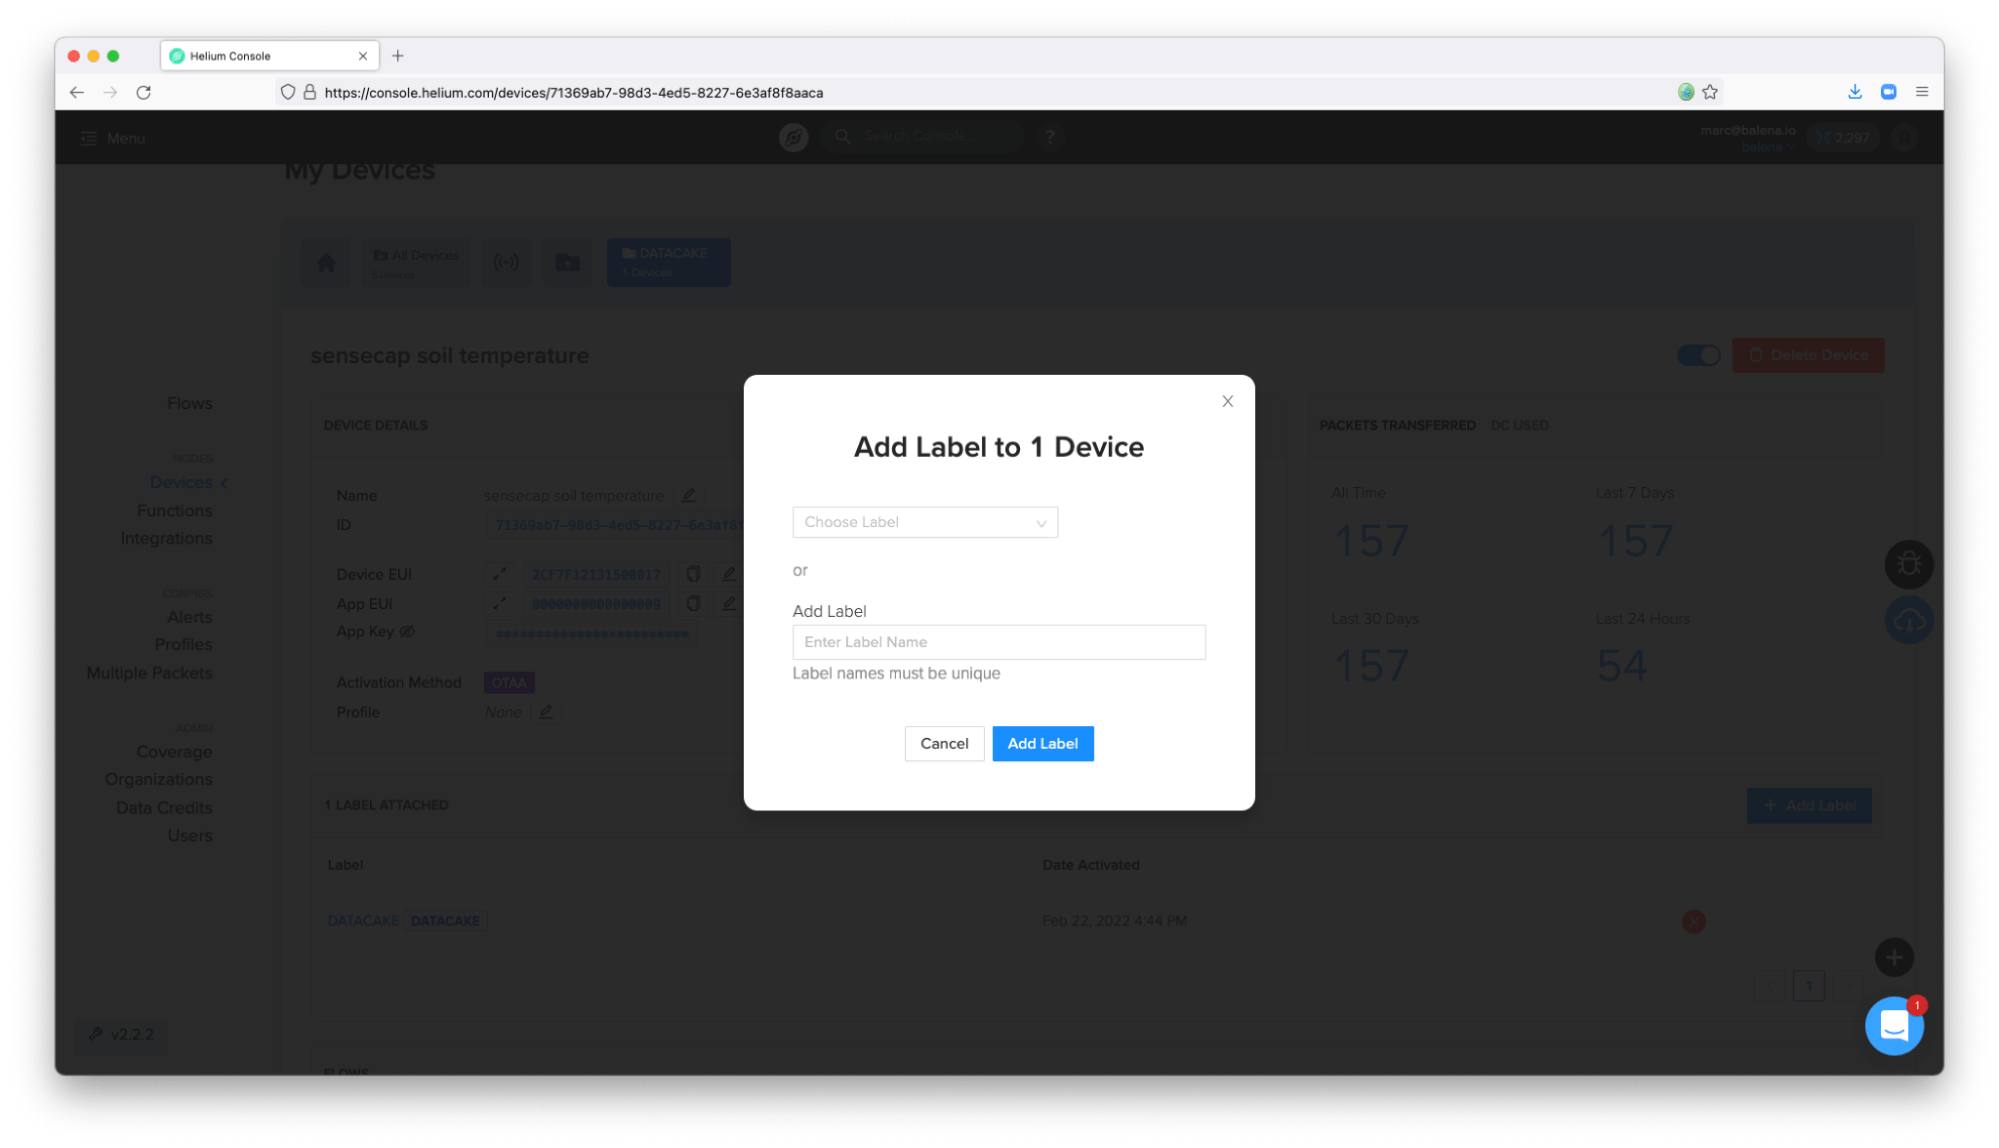
- Go to your device on the Helium Console, and add a new label to the device. In my case, I added the
labelDATACAKE:
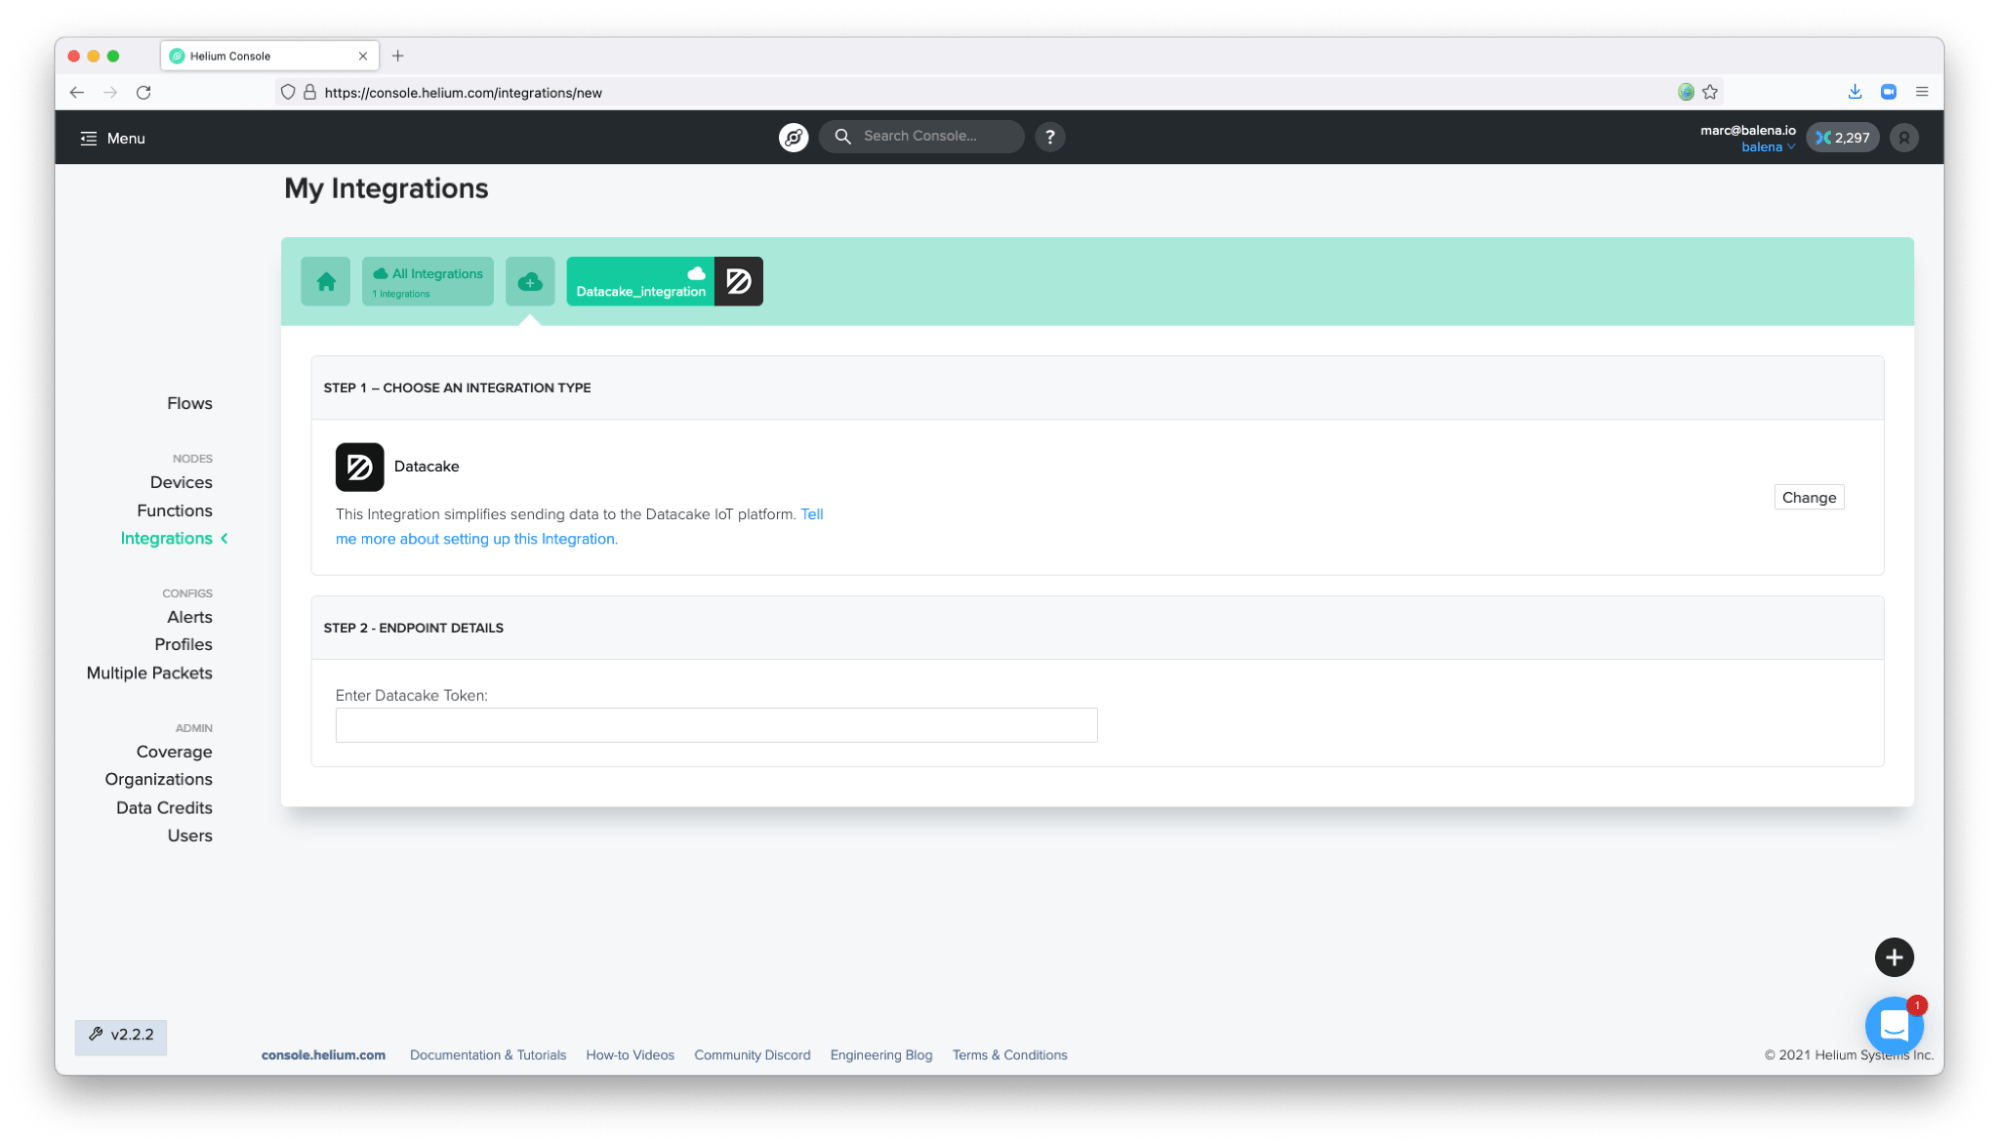
- Now click on
Integrations:
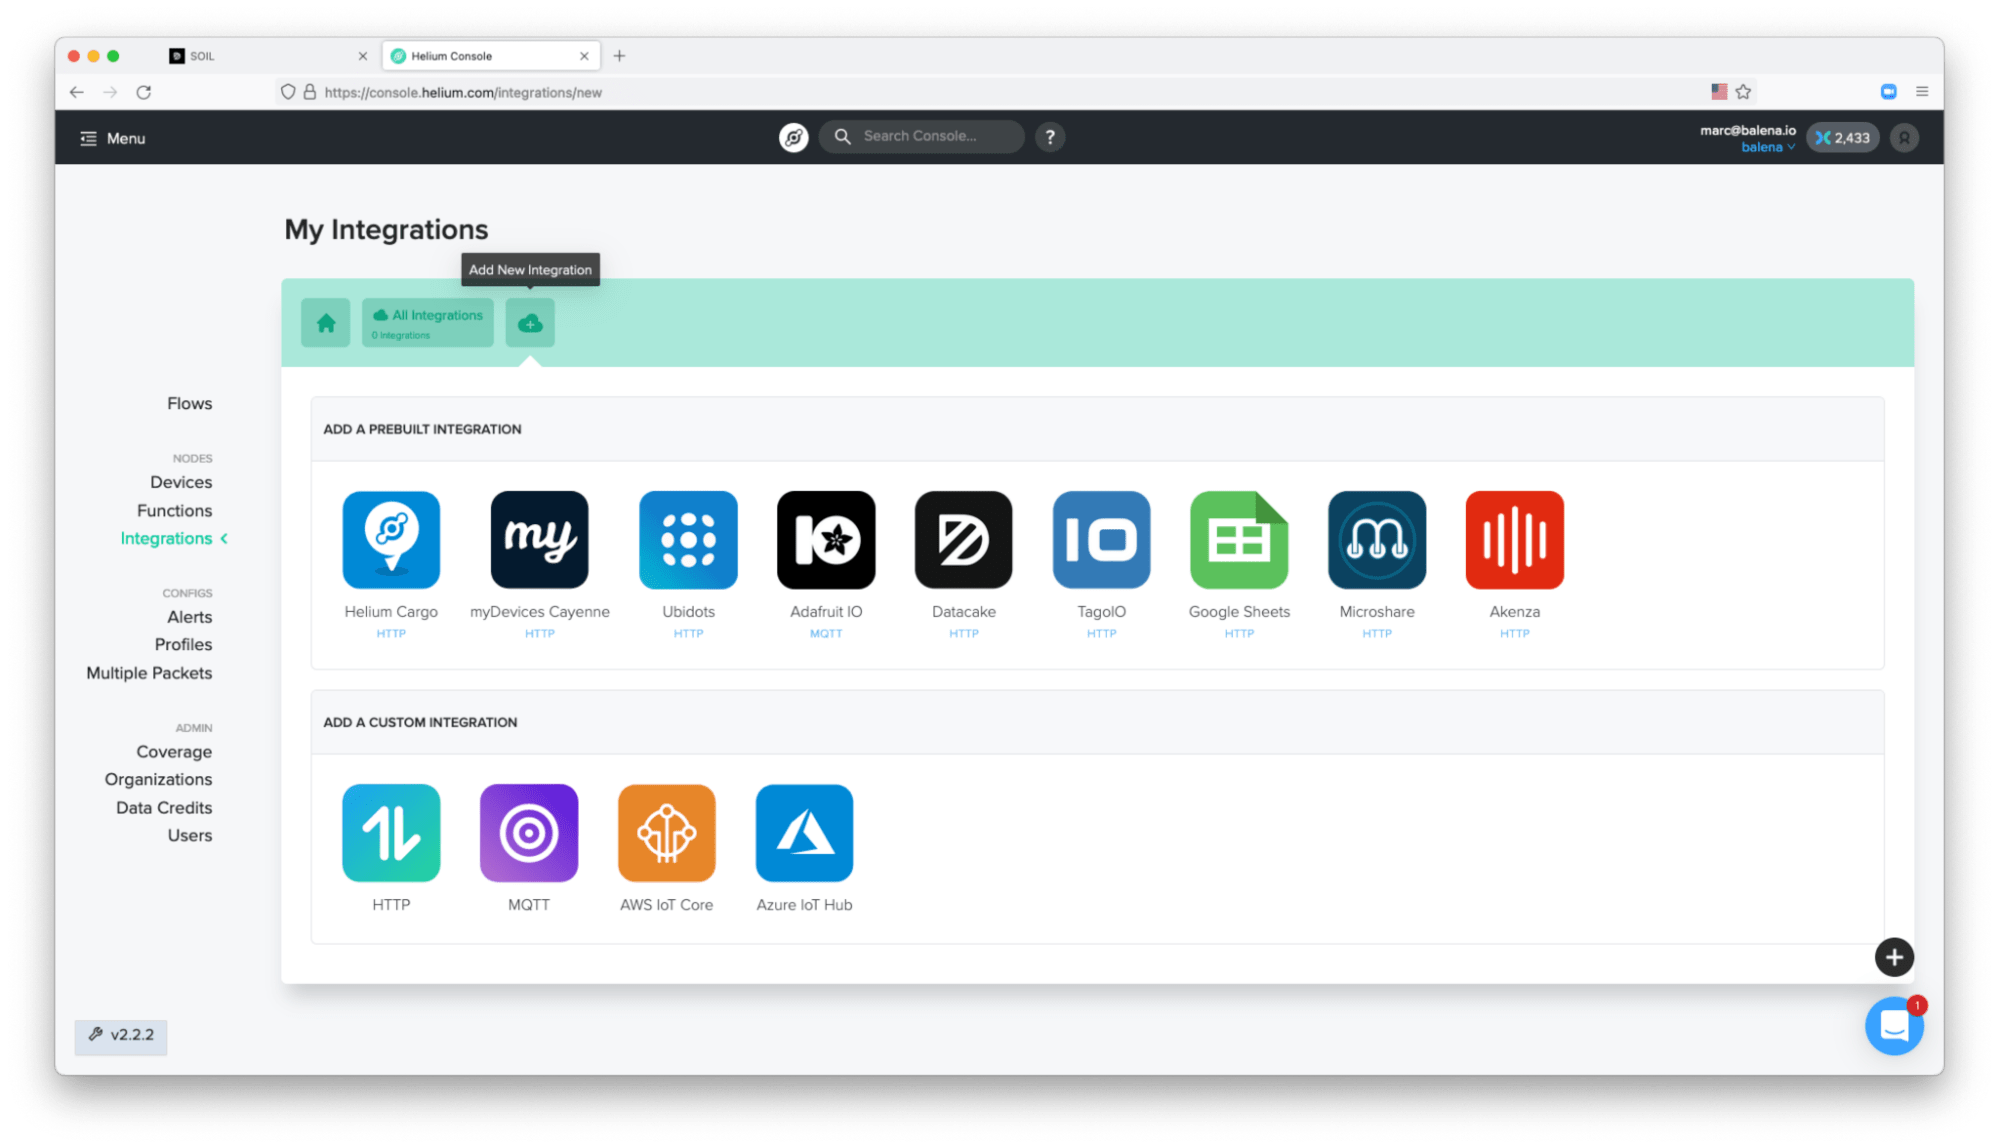
- Select the prebuilt Datacake integration that appears on the Helium Console. Paste the Datacake API key on the
Step 2 - Endpoint detailspart of the page. Finally, introduce a name on the integration:
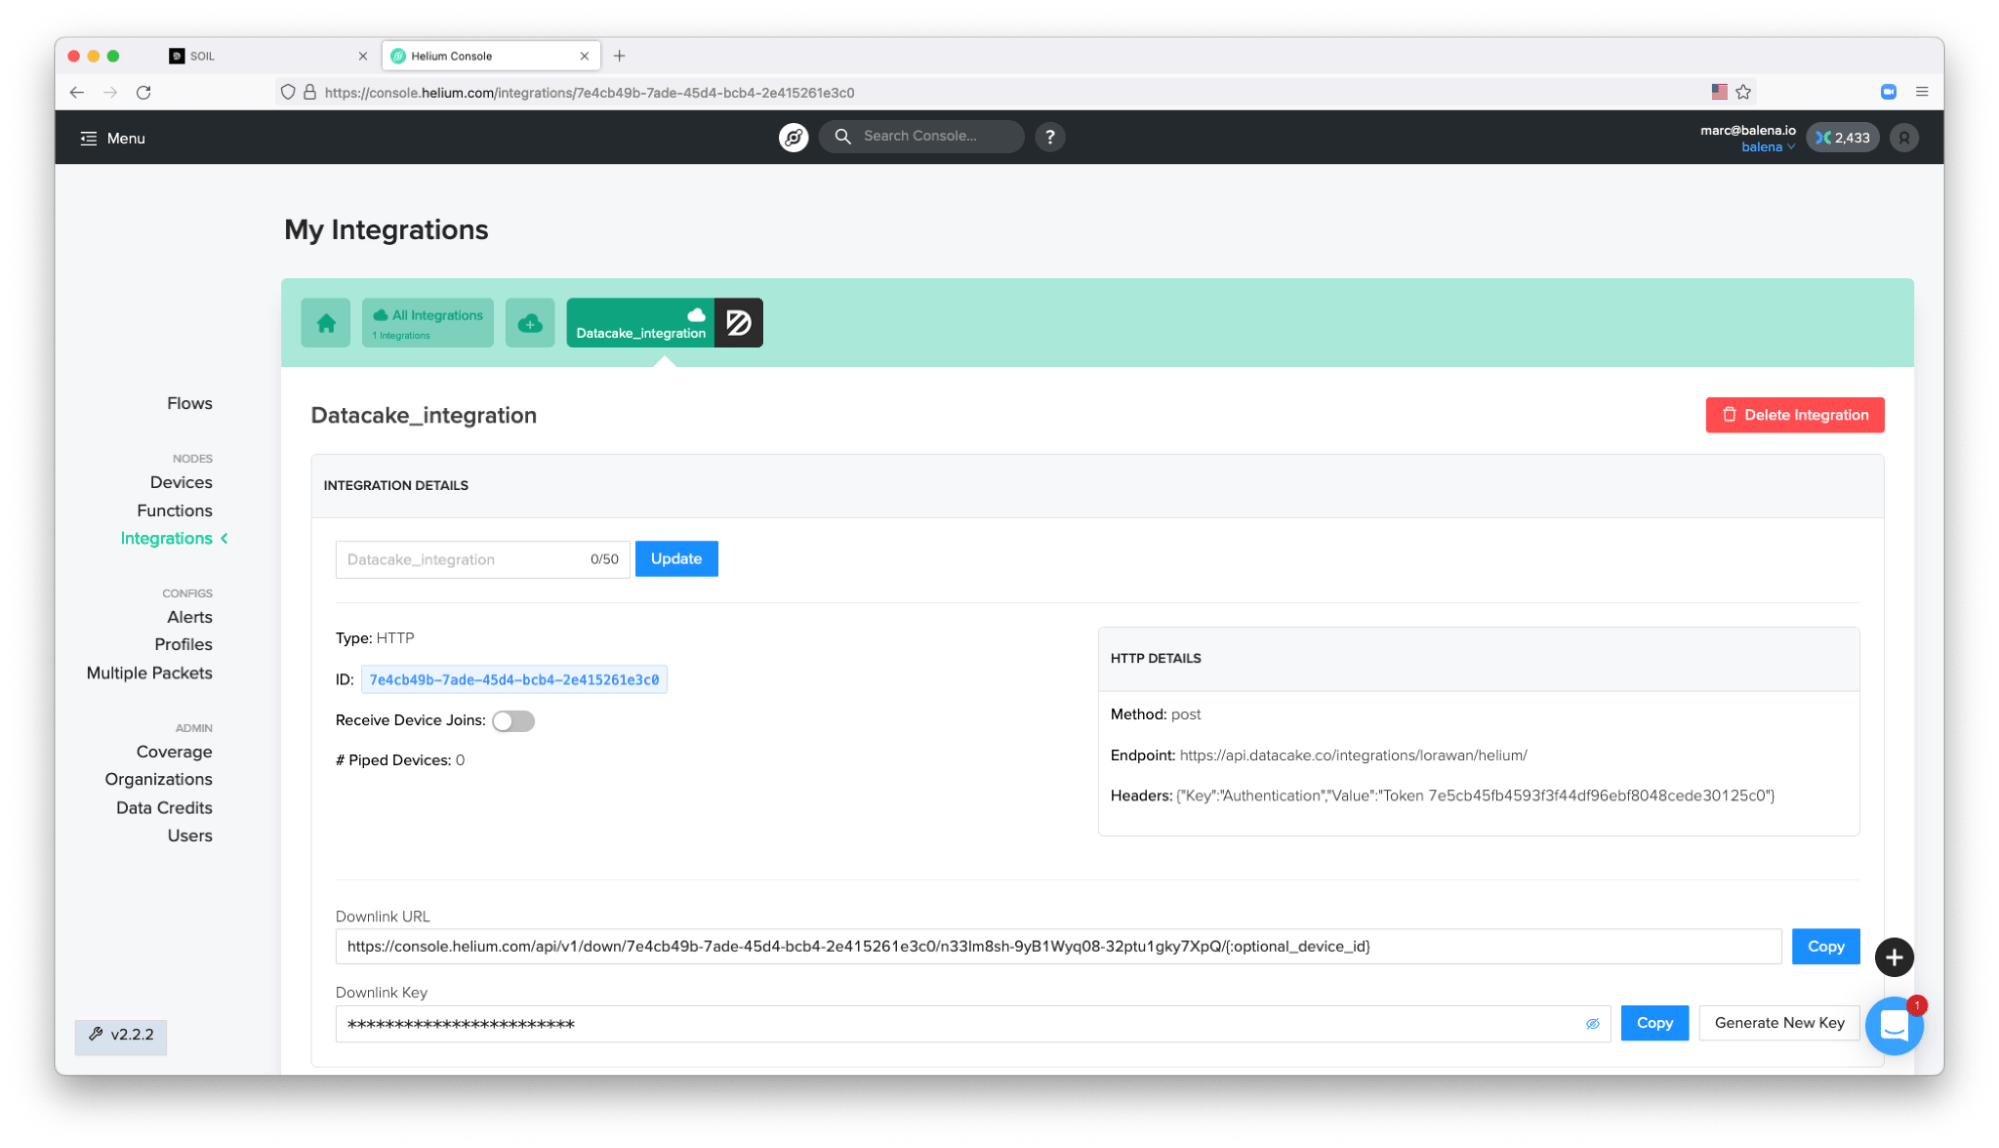
- This is the result of the integration block:
Once the integration is complete, click on the menu Flows. Helium has a no-code “flows” interface to build the integration connections among different services.
- Click on
Labelsand drag and drop the label created for your device in the middle of the flow.

-
Then click on
Integrationsand select the integration that you have created. Drag and drop the integration block next to the label associated with your device or devices. -
Now add an arrow to communicate both blocks. To create the arrow, point your mouse pointer in the tiny white circle of the block, drag and drop from there to the integration’s block:
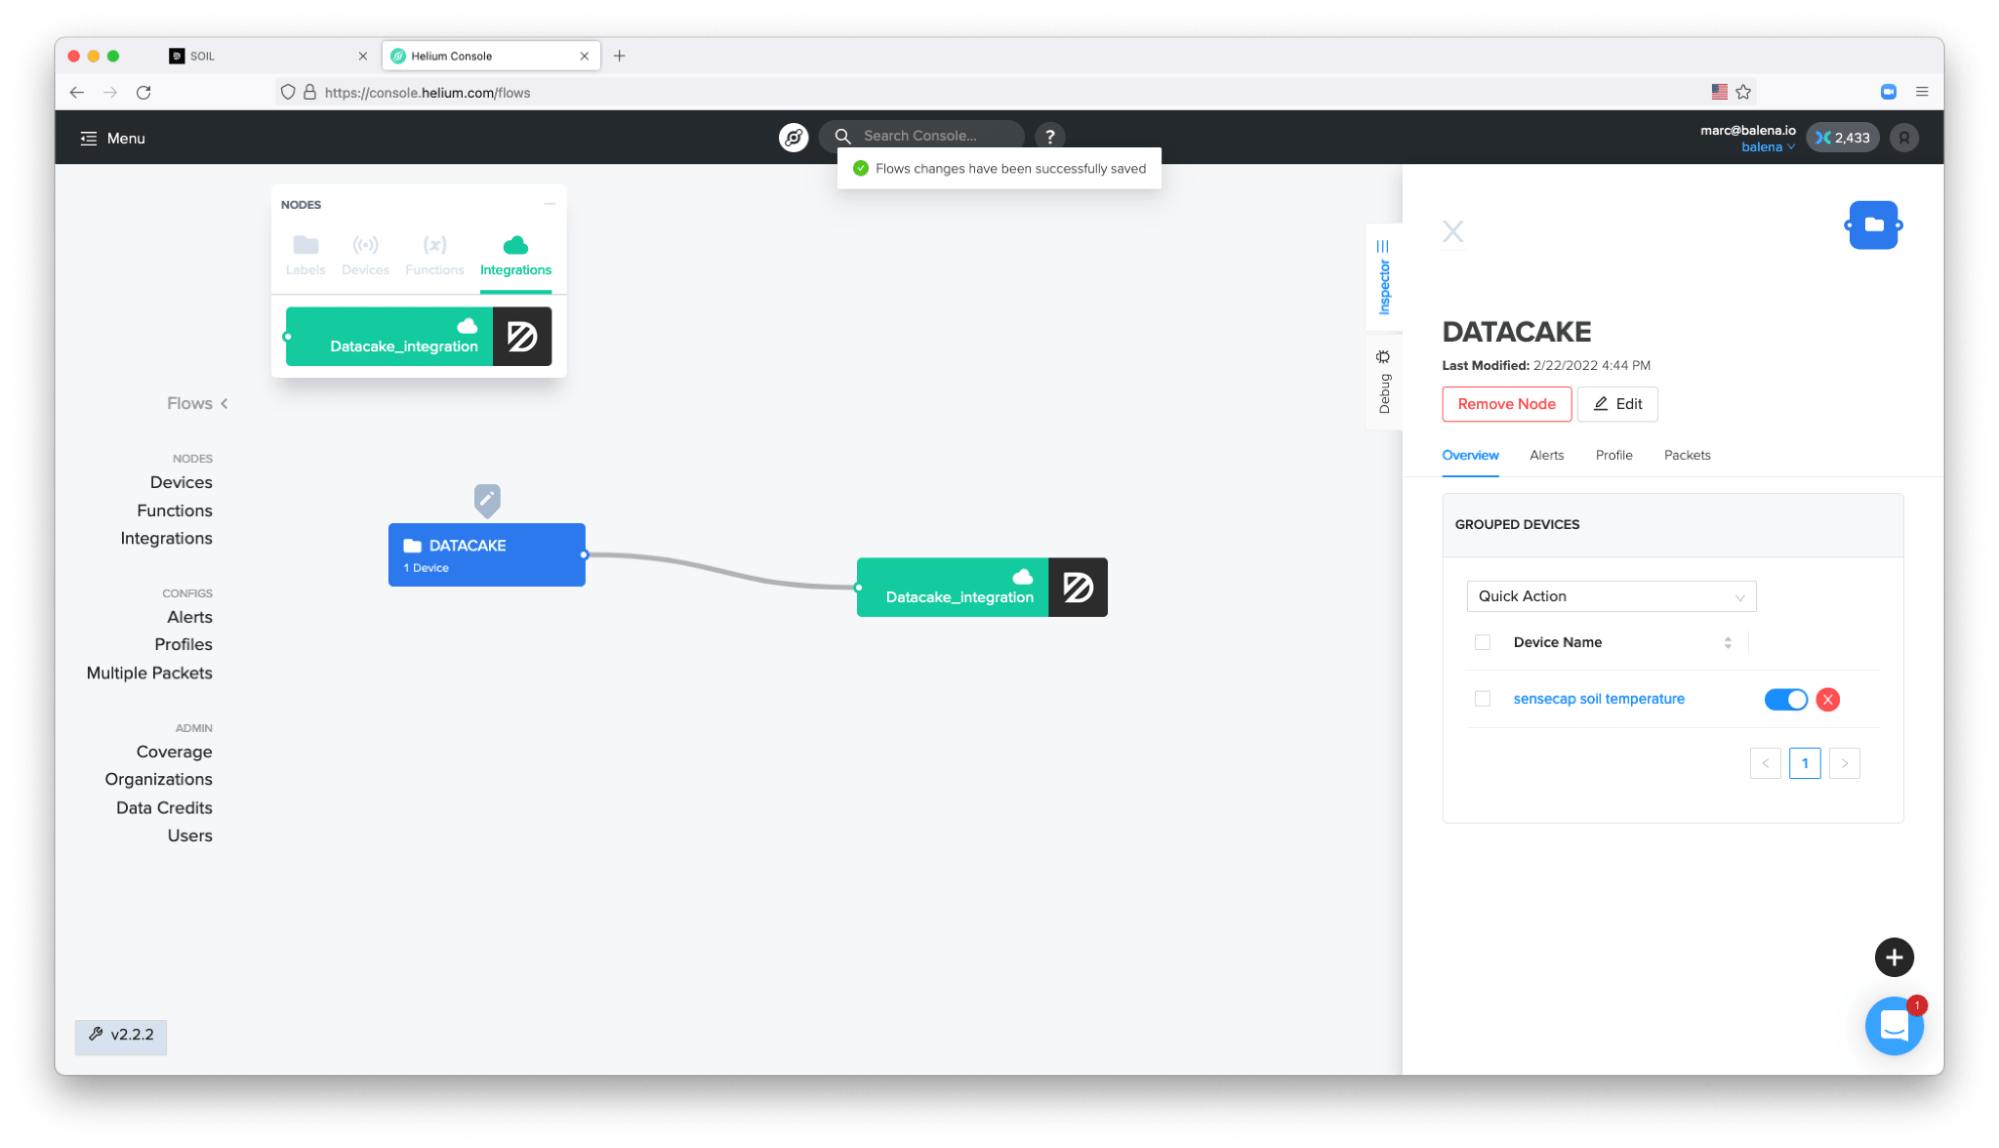
- At this point, when the flow is (automatically) saved, Datacake will start to receive data forwarded from the Helium Console:
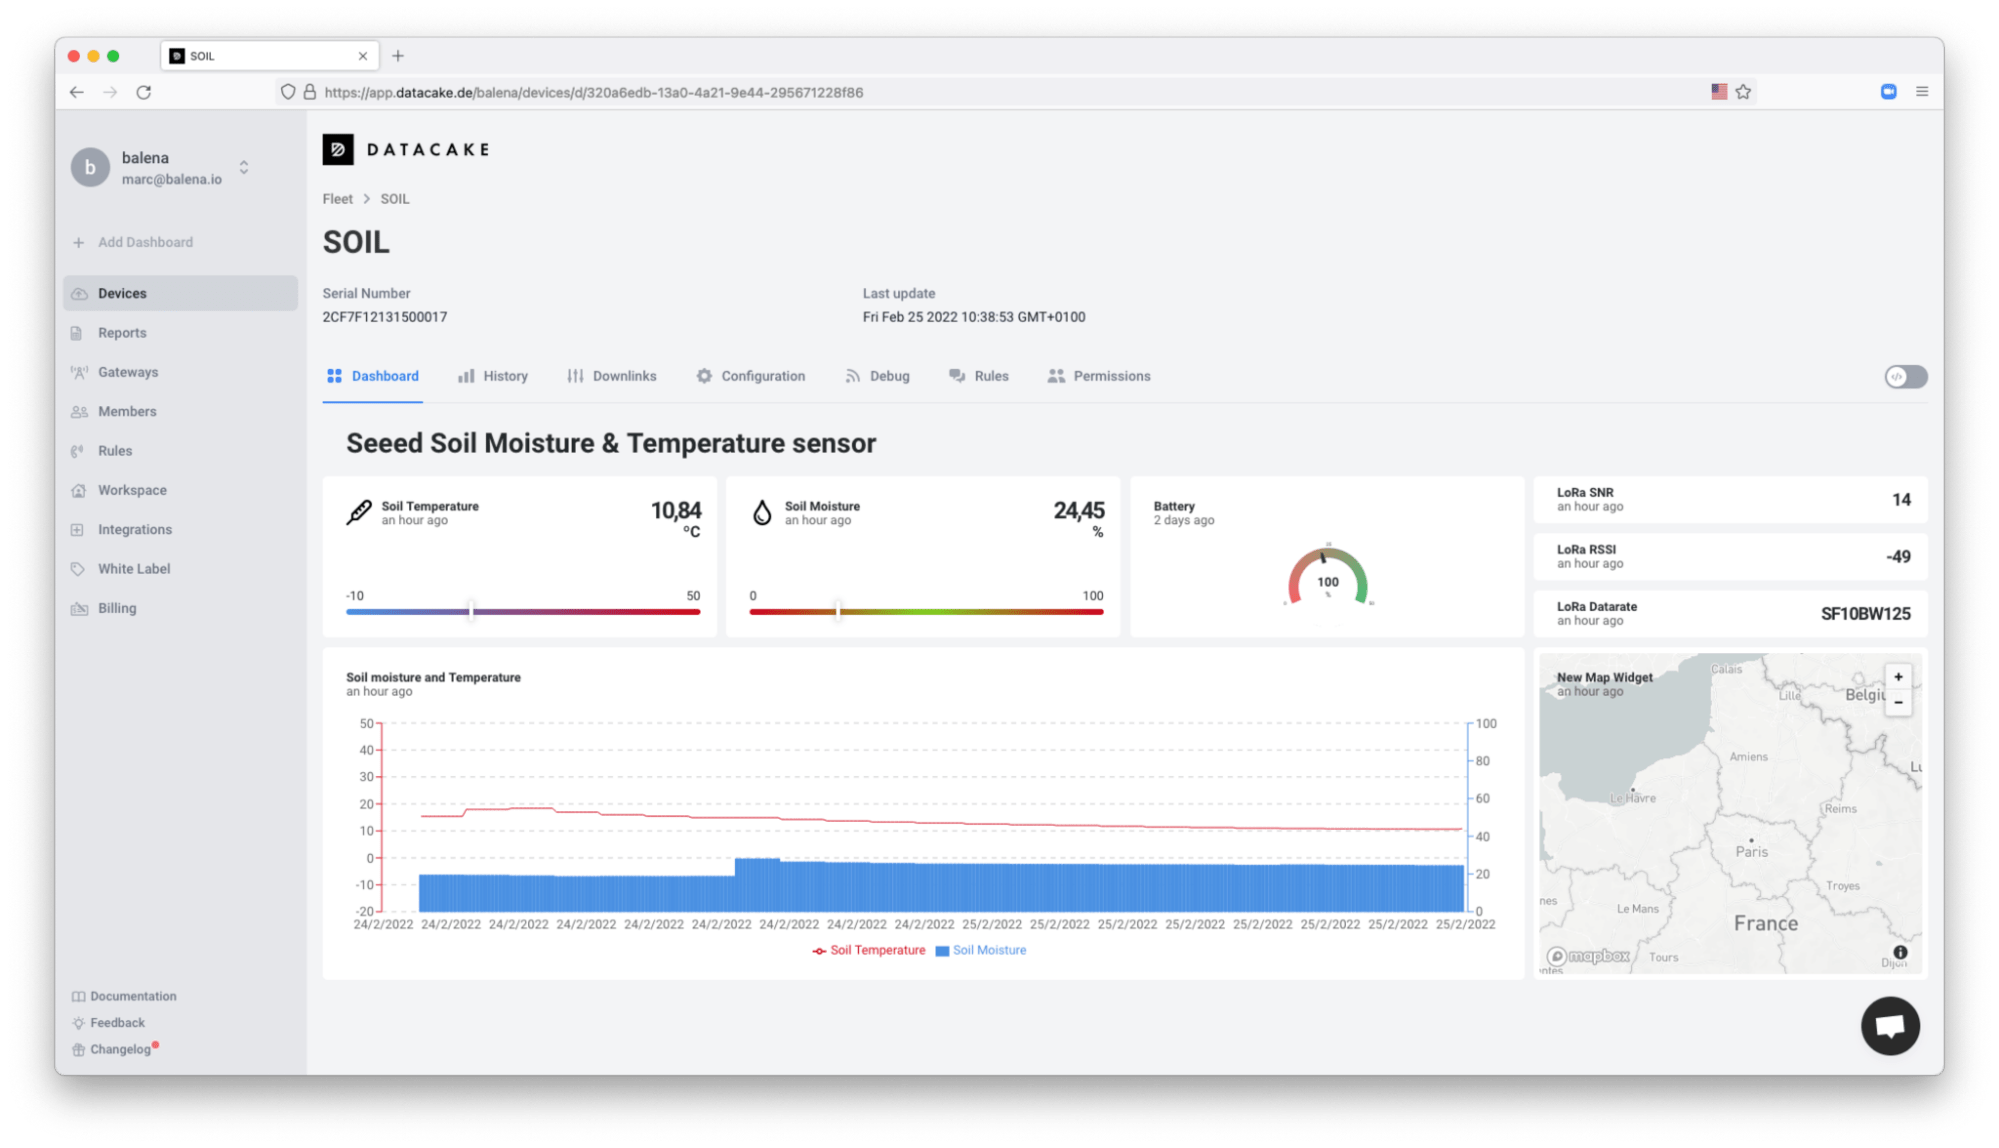
- Now it’s time to modify the Dashboard on Datacake, as there are other variables available. If you would like to get more insights about the information received and the parser code, go to the tab
Debugto check the raw data received:
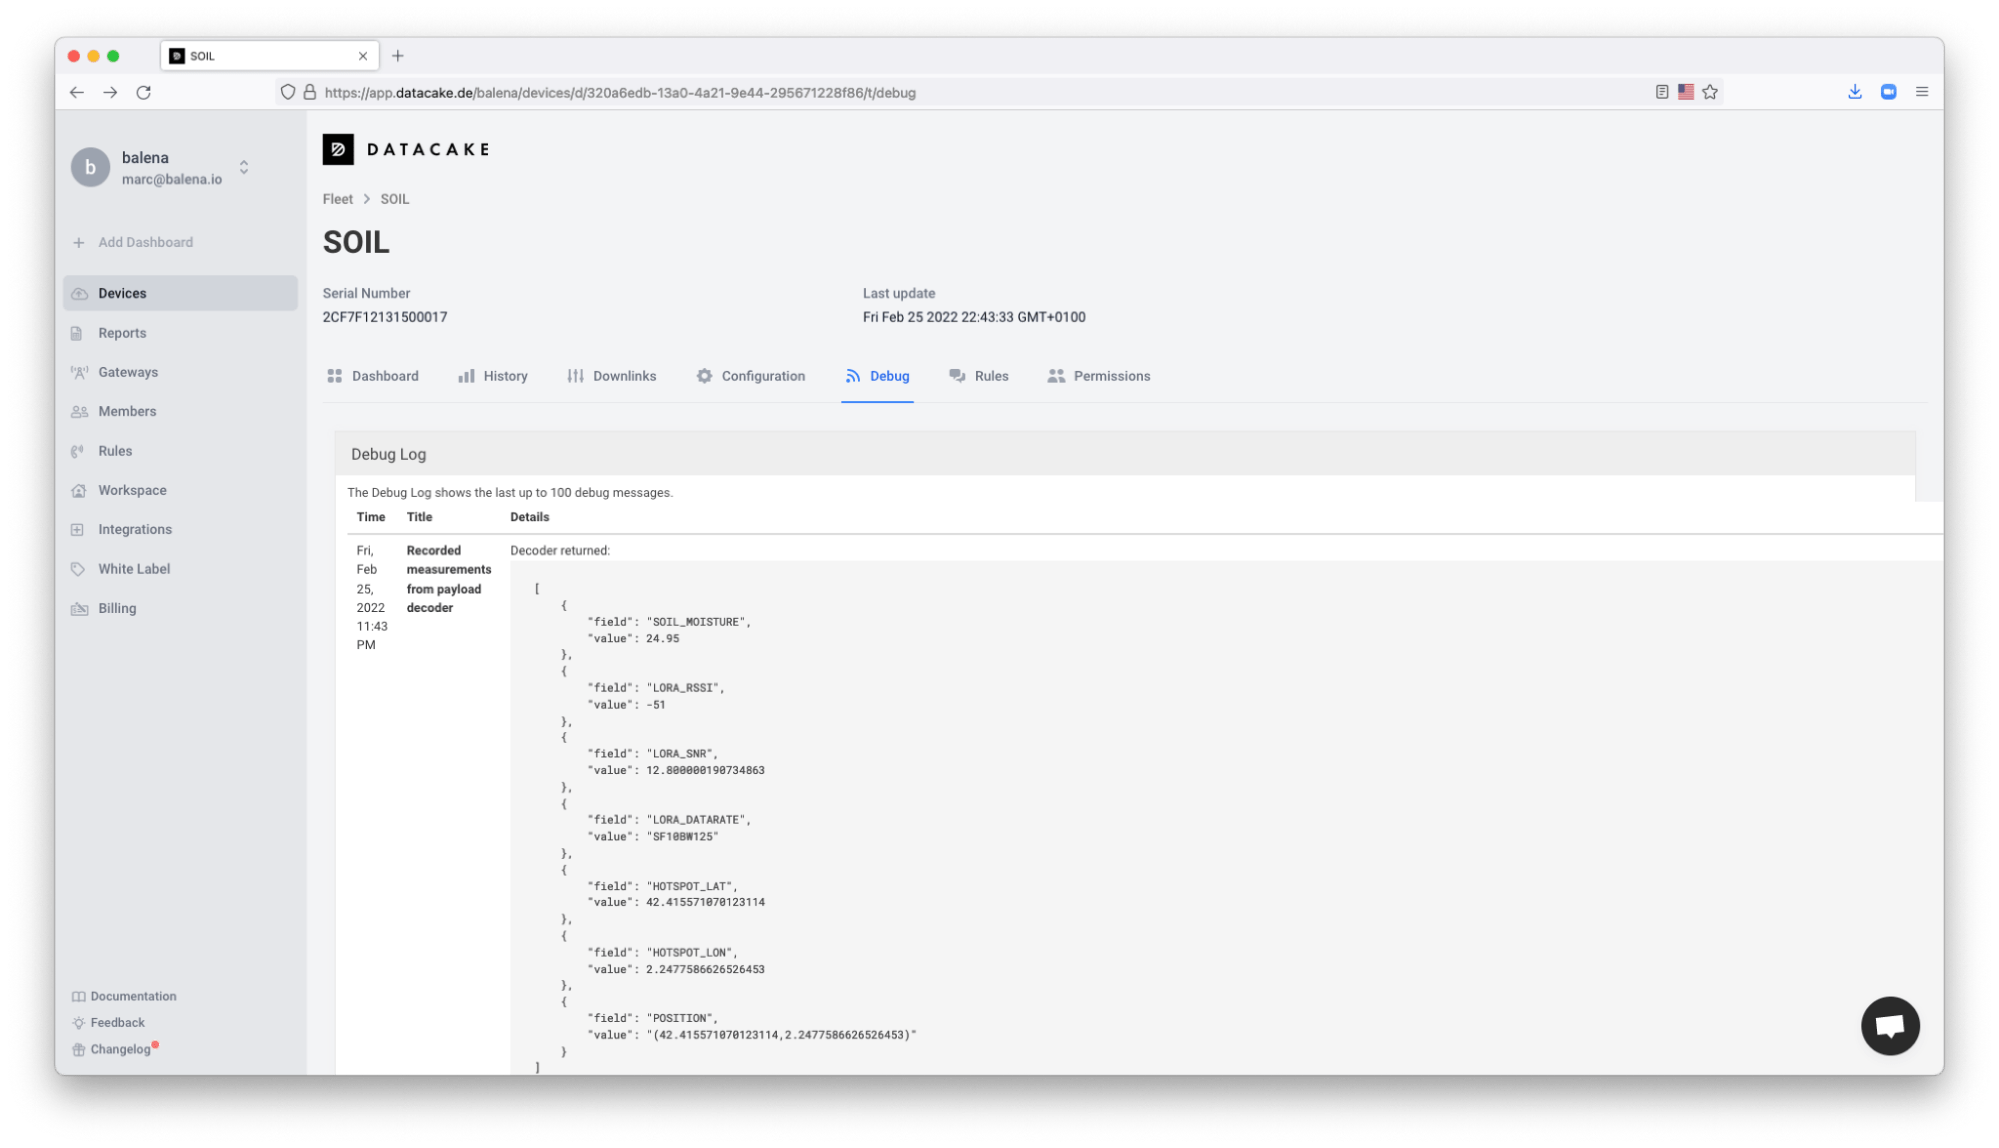
Add a new variable on the decoder
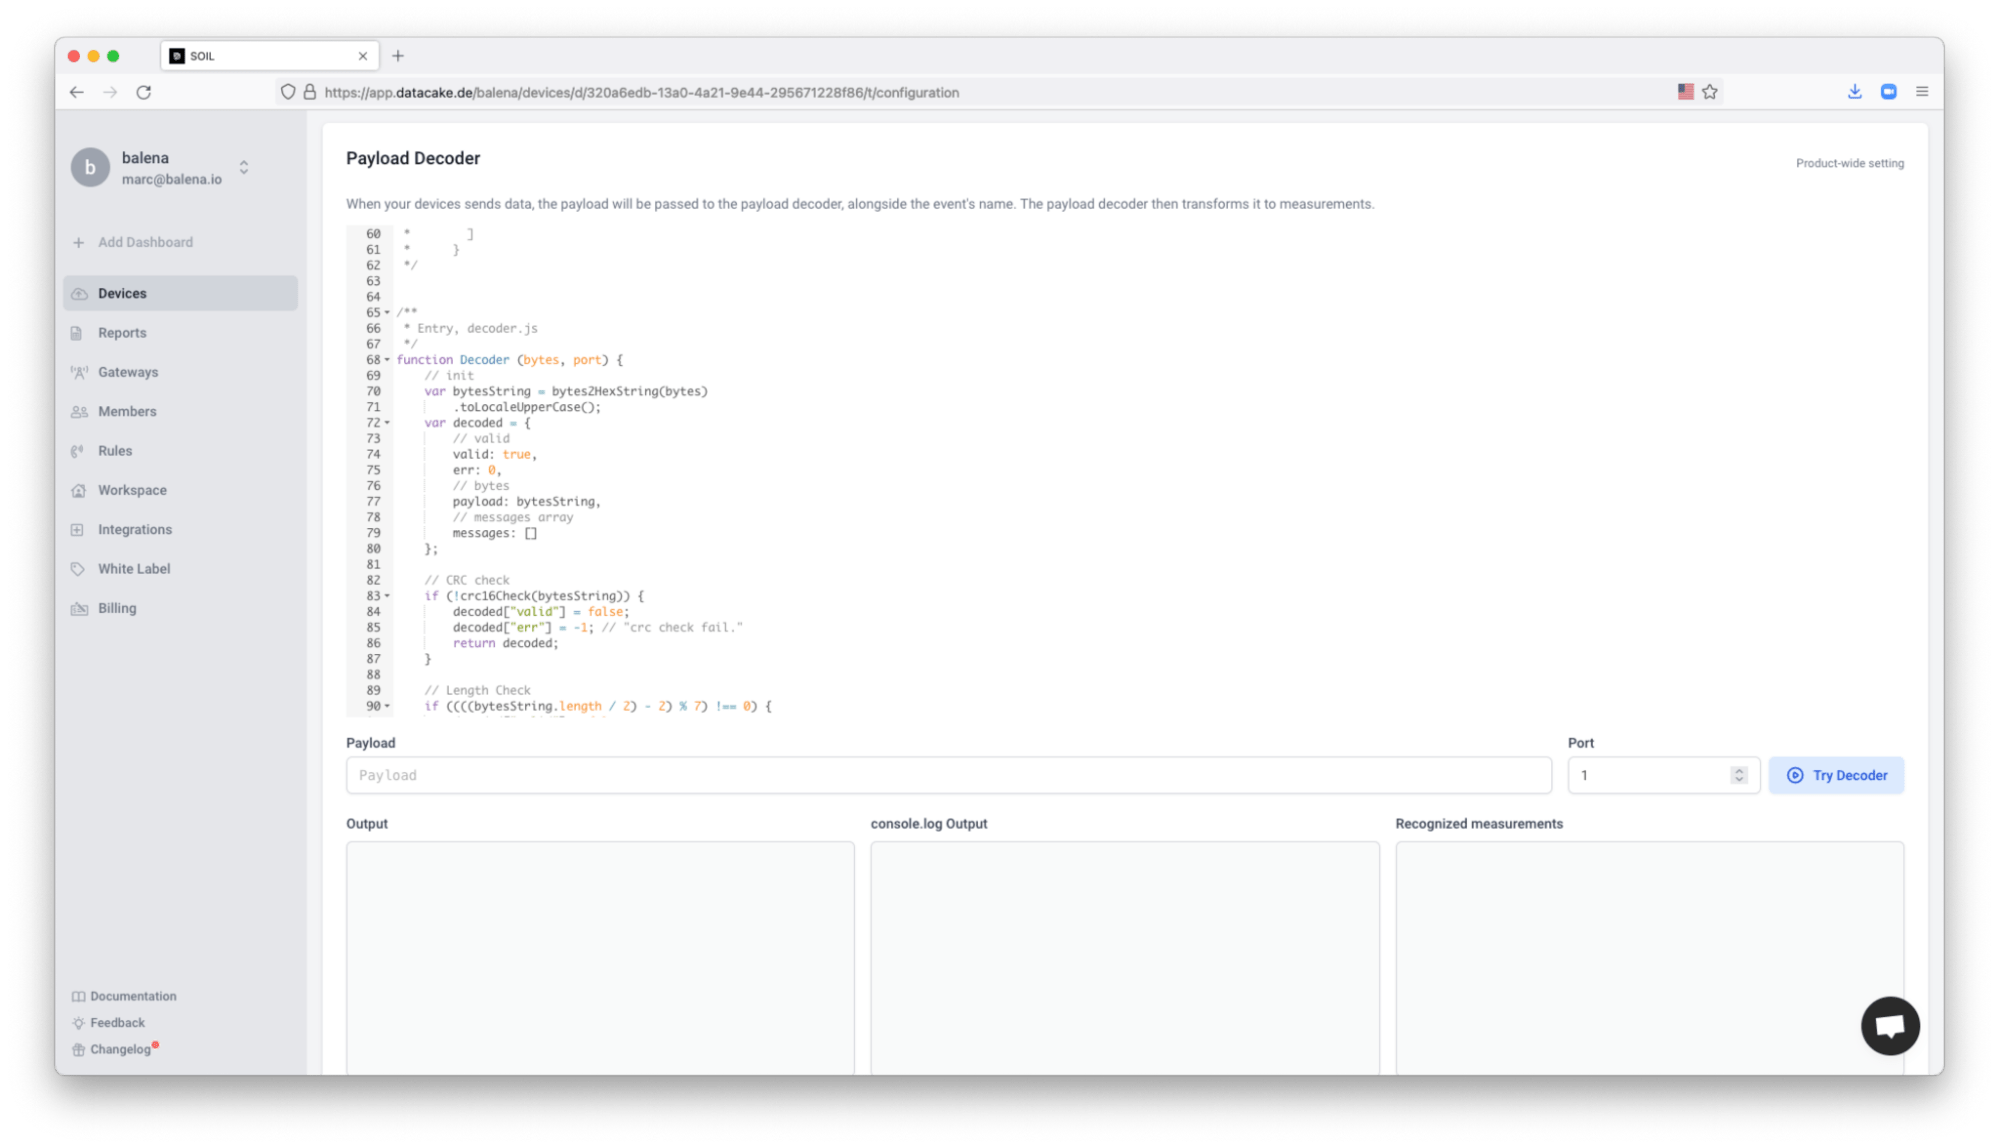
In my case, I added the latitude and longitude provided by Helium, which is the latitude and longitude from the hotspot that relays the data to the Helium Console.
var HOTSPOT_LAT = rawPayload.hotspots[0].lat;

var HOTSPOT_LON = rawPayload.hotspots[0].long;
{

            field: "POSITION",

            value: "("+HOTSPOT_LAT+","+HOTSPOT_LON+")"

    }
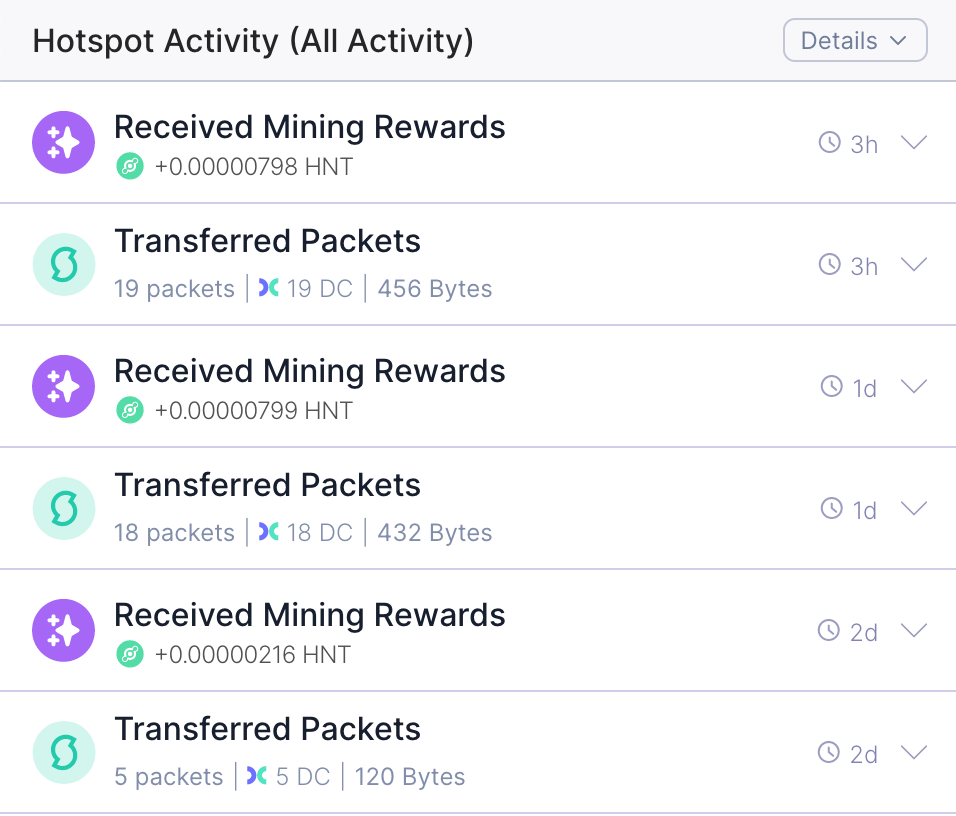
Check your Hotspot Activity
Once your Datacake dashboard is populated with the data, check on the Helium Console to see which Hotspot is forwarding the data from your Soil Moisture sensor.
If the hotspot that forwards the data first is the one made by you, then you will be rewarded. If you don’t know how to build a Data-Only Hotspot, check the previous example of the Helium Data-Only Hotspot running with balena.
Visit your hotspot page on Helium Explorer and you will see the Received Mining Rewards on your wallet.
https://explorer.helium.com/hotspots/<hotspot_address>
What’s next?
As for my plants, time will tell if this extra monitoring helps me take better care of them. As for setting up a small fleet of agriculture sensors connected to my hotspot, this is a great start. If you end up trying this project, please let us know in the comments.
Acknowledgements
Thank you Elaine from Seeed to provide the hardware and documentation to build the demo. Also thanks to the Datacake team for providing the blocks needed.
Start the discussion at forums.balena.io