
Last updated: 26th October, 2020
When we started the balenaDash project, the main goal was to make it easy and straightforward to deploy IoT devices that display information on a screen. We’ve updated the photo component into its own standalone project.

Build this project to create a photo slideshow hosted on Google Photo Albums, Dropbox Photo Album, or Apple Photos.
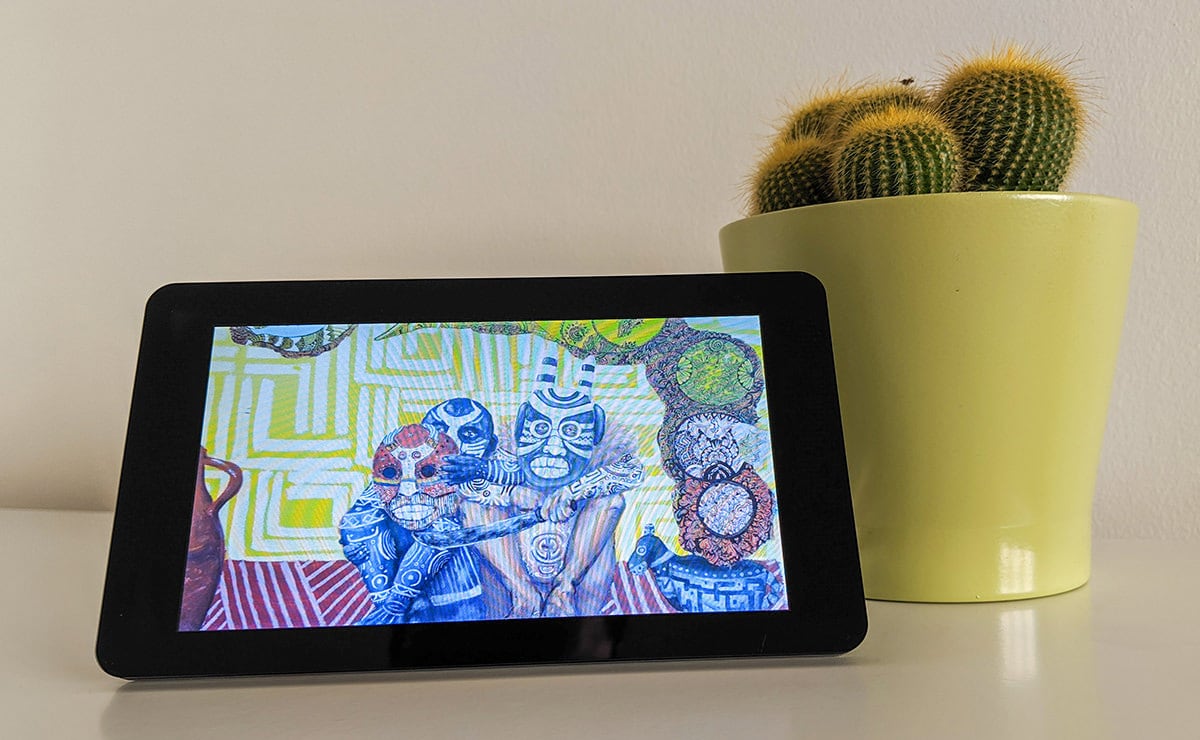
Photo Gallery is a physical photo album that is easy to build, configure, and maintain. Once configured, there is nothing else you need to worry about. If you edit the album, add or remove photos, the album will automatically update to display the latest photos.
This can be the perfect gift for family and friends. Give a smart photo album to your parents or grandparents so that they can keep up with your baby pictures, for example.
Recent updates
- 26 October, 2020: We’ve added the
Deploy with balenafeature to get you started quickly. This project now uses the Photo Gallery, formerly a service that existed within balenaDash.
What you’ll need
This project mirrors the hardware required for balenaDash. Here’s what you’ll need at a minimum to begin.
Hardware requirements
- A supported single-board computer, like a Raspberry Pi
- A high-speed, high-quality SD card (we recommend SanDisk Pro 32GB ones– can’t go wrong!)
- A supported PiTFT display
- Optional: A display and HDMI cable that can connect to your SBC
- Optional and really cool: You own custom case or frame to house the display
Software requirements
- a balenaCloud account (free and fully-featured for the first ten devices, no need for payment method to start)
- Optional: balenaCLI and a clone of the project repo if you want to use the CLI method.
NOTE: We use the Deploy with balena method in this project guide.
Installation and configuration
This project is based on the official balenaDash project. After numerous downloads, deploys, and troubleshooting by users like you, we decided to create a dedicated project and repo for the Photo Gallery.
Deploy it to your balenaCloud account with the following button:
Note: You’ll need a balenaCloud account to create this project. Your first ten devices are free and fully-featured, and there’s no payment method required to begin.
Add a device to your application
Once you deploy the project to your account, its build should begin (you’ll see a small notification in the status bar). While that’s going, add a device to your application.
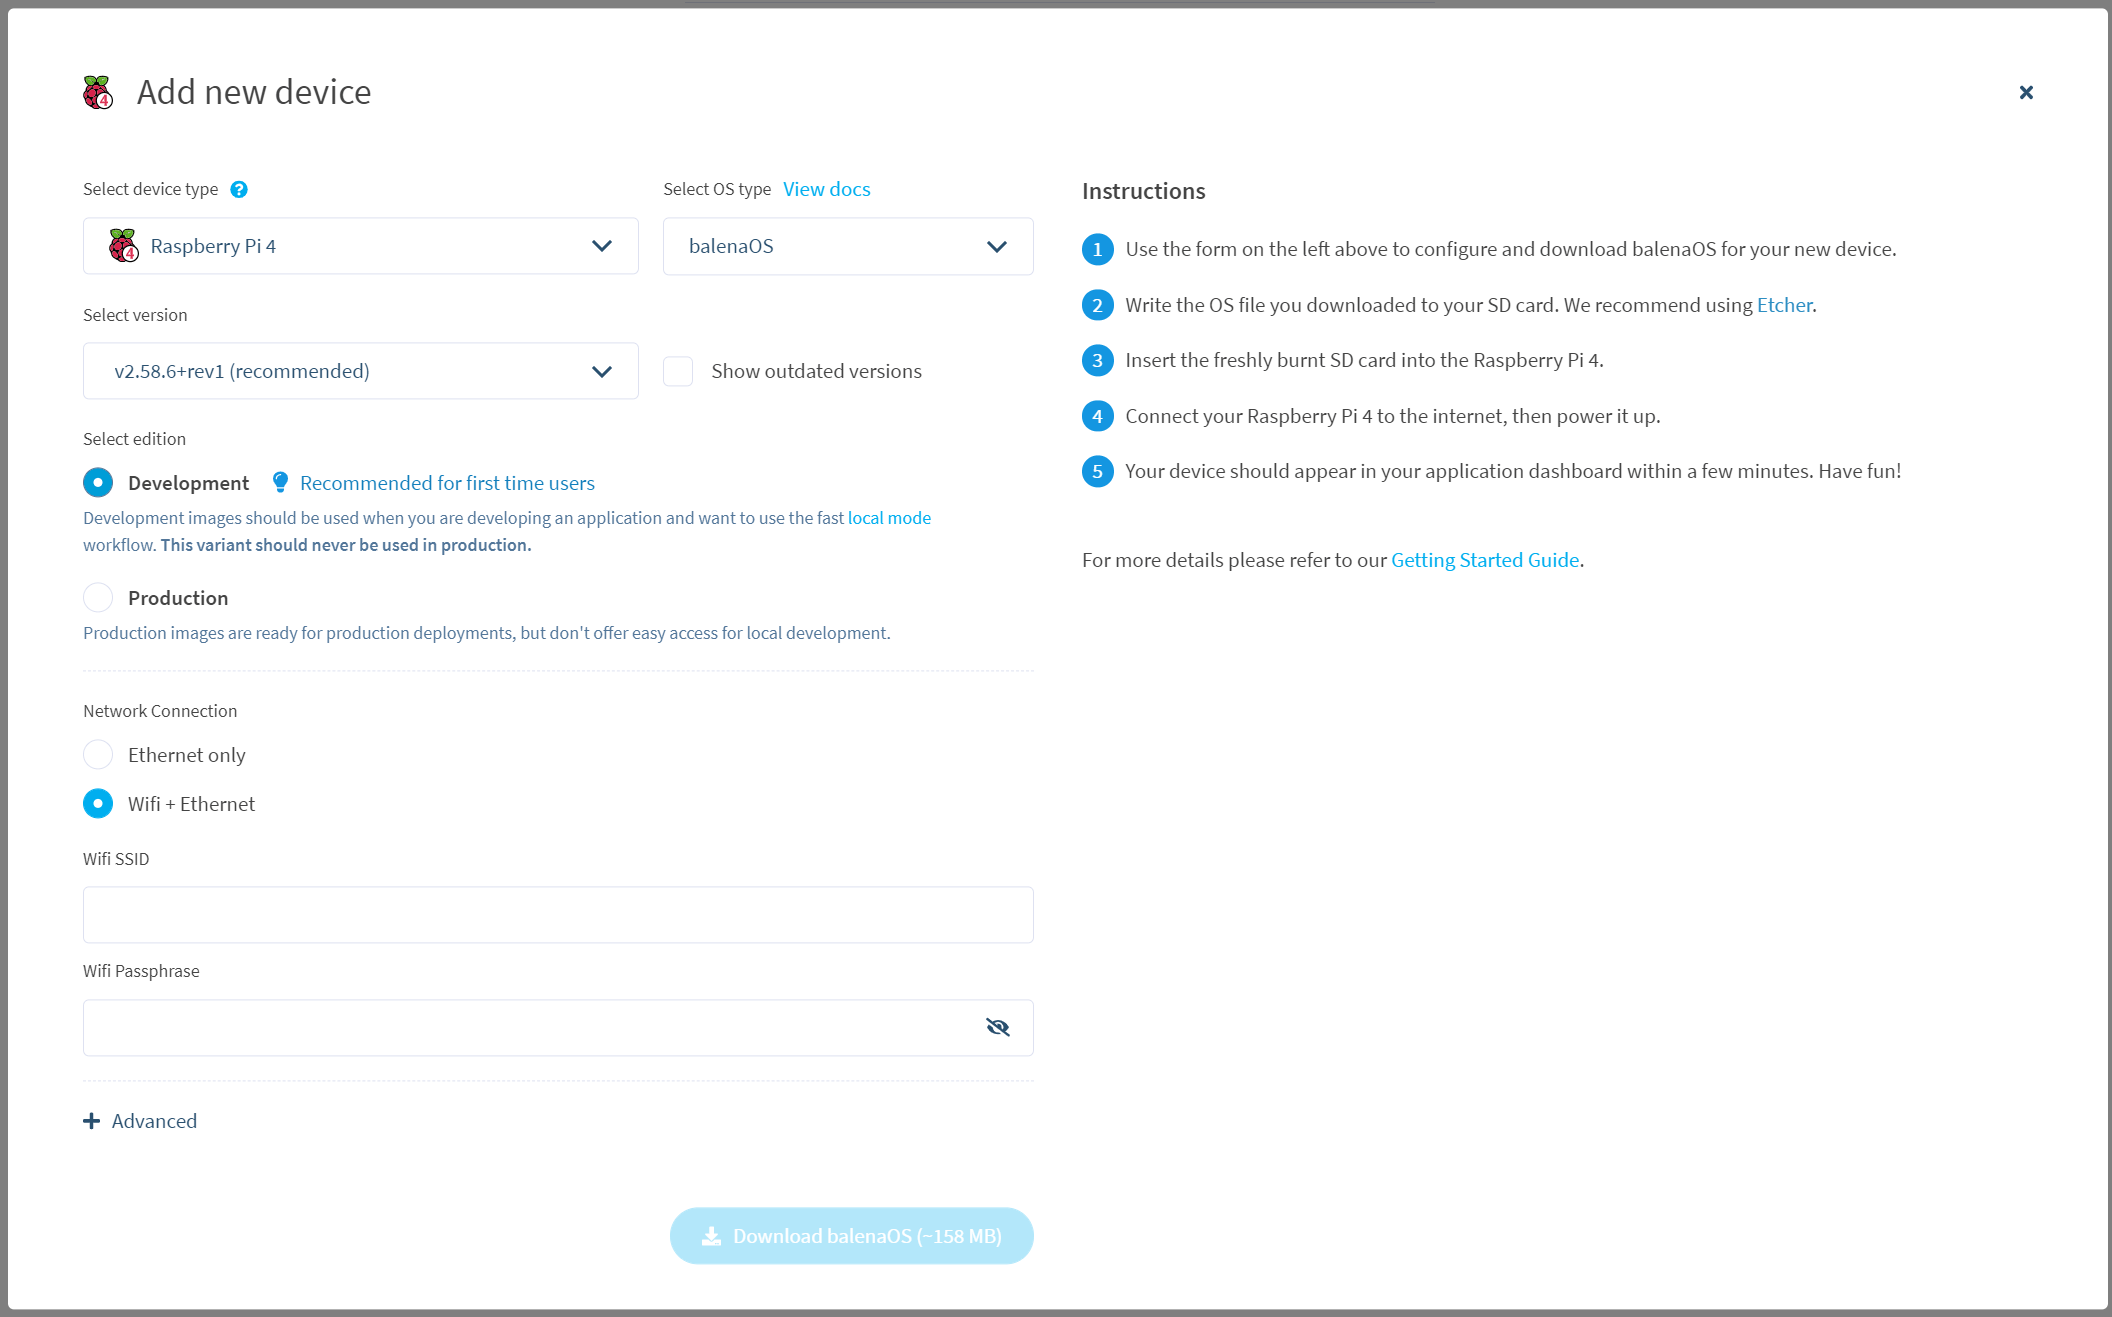
For first-timers or people still new to balena, we recommend building a development image. You can put in your Wi-Fi credentials here so that when you boot your device, it’ll connect to your wireless network.

Once complete, download the image and use a program like balenaEtcher to flash your image onto a SD card. Once your image is flashed onto the SD card, insert it into your device and power it up.
Within a few minutes, you should see your device appear under the application within your balenaCloud dashboard. Now it’s time to configure your photo slideshow!
Setting up the photo album

In your balenaCloud account, you’ll see a GALLERY_URL device variable that you can set to the value of the supported photo galleries listed below. Note that once you setup the GALLERY_URL variable, your device will restart to update the URL change.
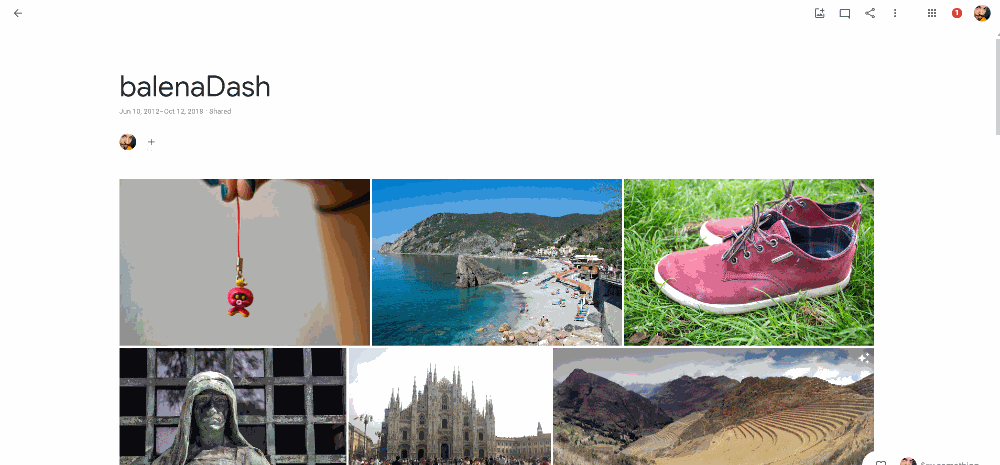
Google Photos Albums
To add a google photos photo album, go to https://photos.google.com and select the album you want to display on balenaDash.
Click on the share button at the top right corner of the screen and on the Create link button and copy the URL. This URL will be the one you should enter as the value of GALLERY_URL
Dropbox Photo Albums
On the Dropbox website, go to the folder that contains the photos and click on Share Folder and then Copy link. This is the URL you will need to add to balenaCloud.

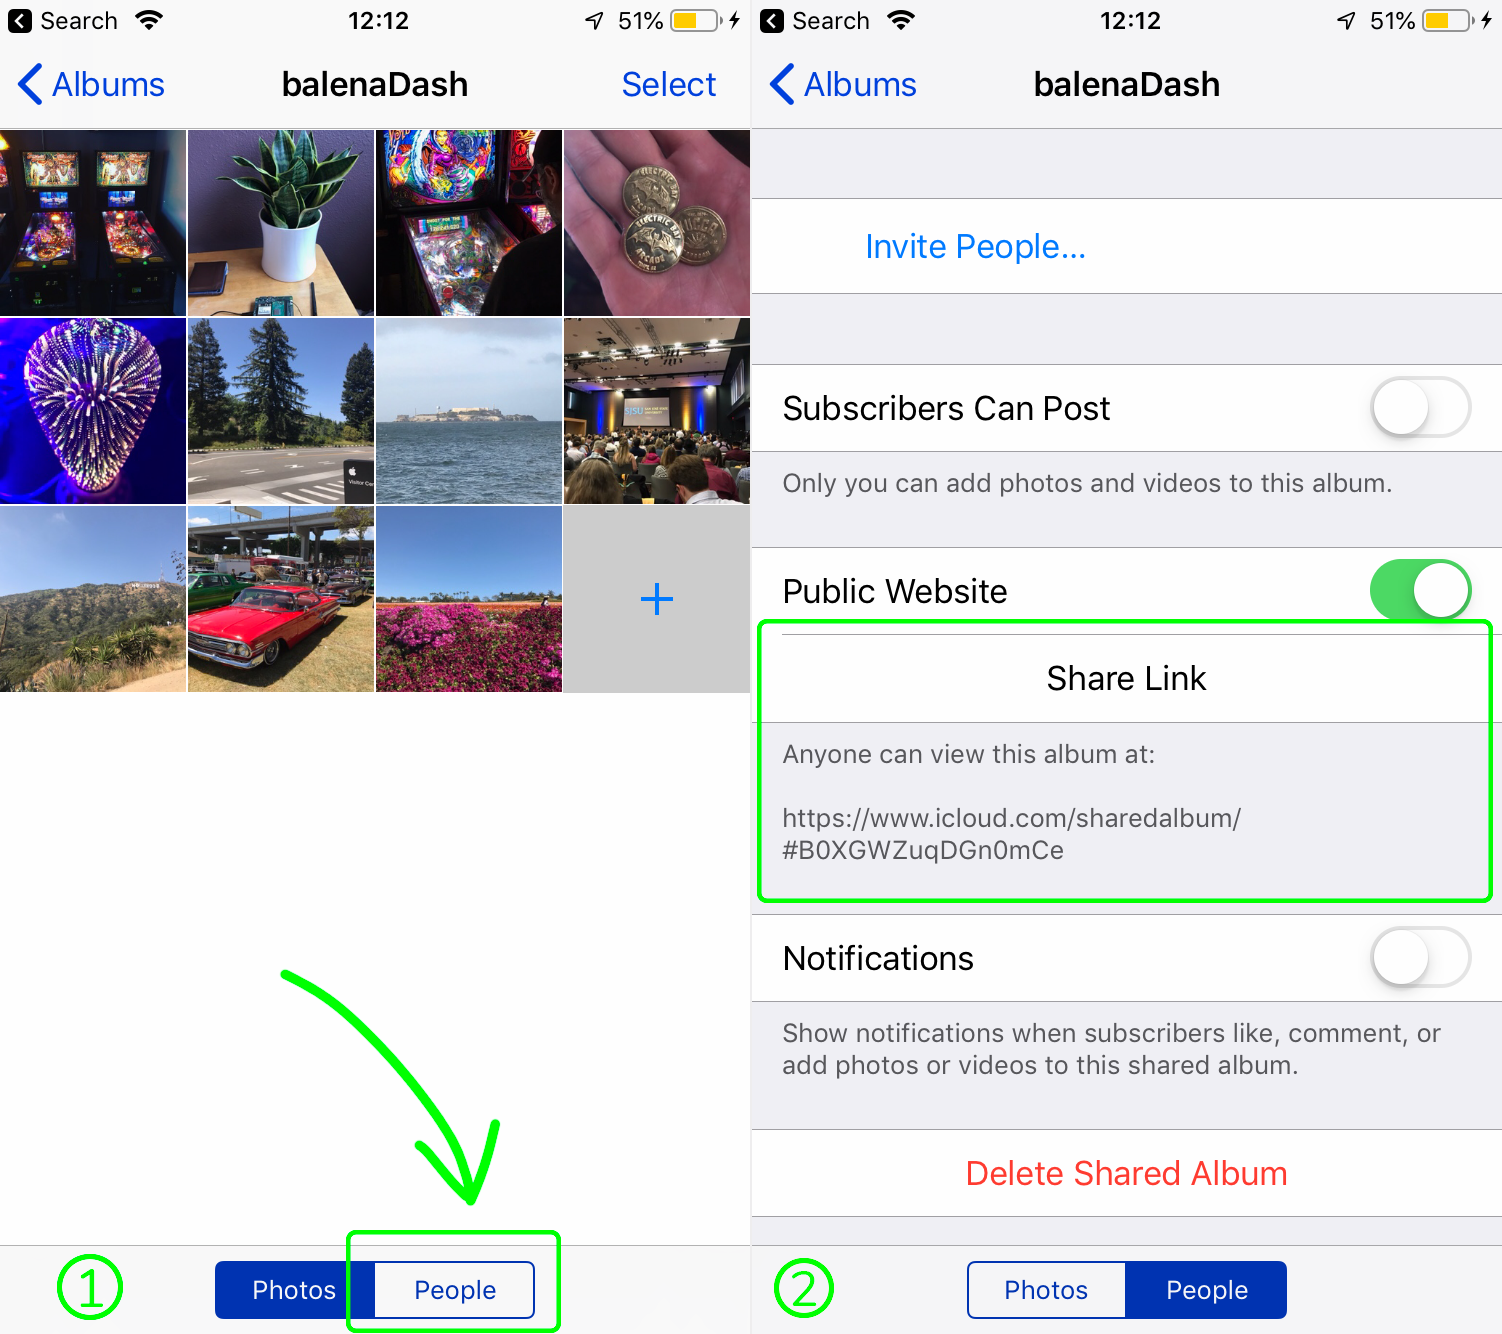
Apple iCloud Photo Album
Create a photo album and copy the share-url, similar to https://www.icloud.com/sharedalbum/#ALBUM-ID. You can do this from a Mac or iOS device.

Extra settings
Out of the box, as soon as you add the GALLERY_URL variable with the right URL, your device should automatically fetch all the images and start the photo slideshow. In case you want to further configure the gallery, you can add the following environment variables:
| ENV VAR | Description | Options | Default |
|---|---|---|---|
| GALLERY_URL | Gallery URL for google photos, dropbox images, or apple photos | ||
| GALLERY_SLIDESHOW_DELAY | Slideshow delay in milliseconds | 10000 | |
| GALLERY_IMAGE_STYLE | Contain shows the entire image on the screen. Cover zooms the image filling the entire screen. | contain, cover | cover |
| GALLERY_EFFECT | Transition effects | fade, horizontal, vertical, kenburns, false | fade |
| CRON_SCHEDULE | Cron scheduler to reload images to get changes | 0 */12 * * * | |
| RESIZE_WIDTH | * Resize image width or height (larger side) in pixels | 1000px | |
| COMPRESS_QUALITY | * Image compression | 0 – 100 | 90 |
* Variable only available for iCloud photos.
Note that after some performance tests on the Raspberry Pi 2 & 3, the combination of GALLERY_IMAGE_STYLE = contain and GALLERY_EFFECT = fade or kenburns can make the transition effects choppy. We are currently waiting for the support of the Raspberry Pi 4 in which we believe all the transitions will become smoother.

Thanks for reading! If you decided to build your own balenaDash photo album, we’d love to hear how it went, similarly if you got stuck or have any questions, let us know in our forums at https://forums.balena.io, on Twitter @balena_io, on Instagram @balena_io or on Facebook.