
Build your own UK train station platform departure display (next train indicator) with live data using a Raspberry Pi Zero/Zero 2, OLED display and 3D printed case – a cool (and practical!) desktop gadget. It involves a bit of software, a bit of soldering, and some 3D printing too.
Introduction
A while back I came across this tweet by Chris Hutchinson, he’d started a project to pull data from Transport API and display live train departure information on a small OLED display to mimic those signs seen on station platforms in the UK.
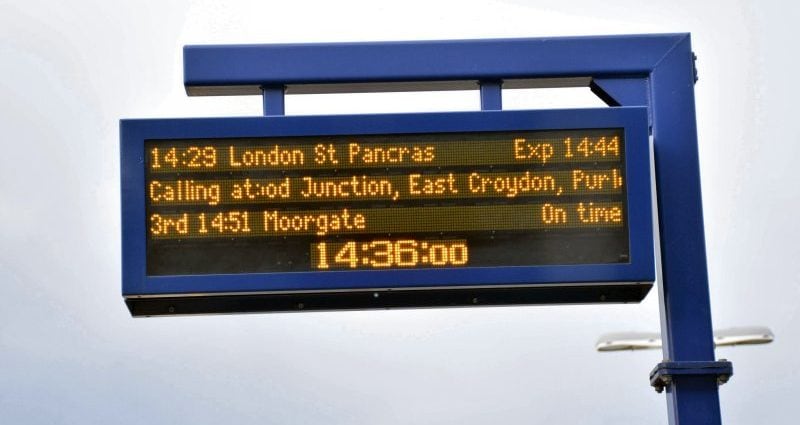
I really liked his work so decided to build my own and make some changes along the way, notably to change the software setup to run in Docker on balenaCloud to make it easy to deploy and configure. Additionally, I reworked the display layout to achieve 1:1 pixel mapping of the fonts and avoid any scaling in order to look more like the dot-matrix LED displays of the real thing.

I’m all done and really happy with the result so this is just a quick writeup to document the process and enable you to build your own. If you do build one I would love to hear about it!
Hardware required
The hardware requirements for this project are minimal, this is what you’re going to need.
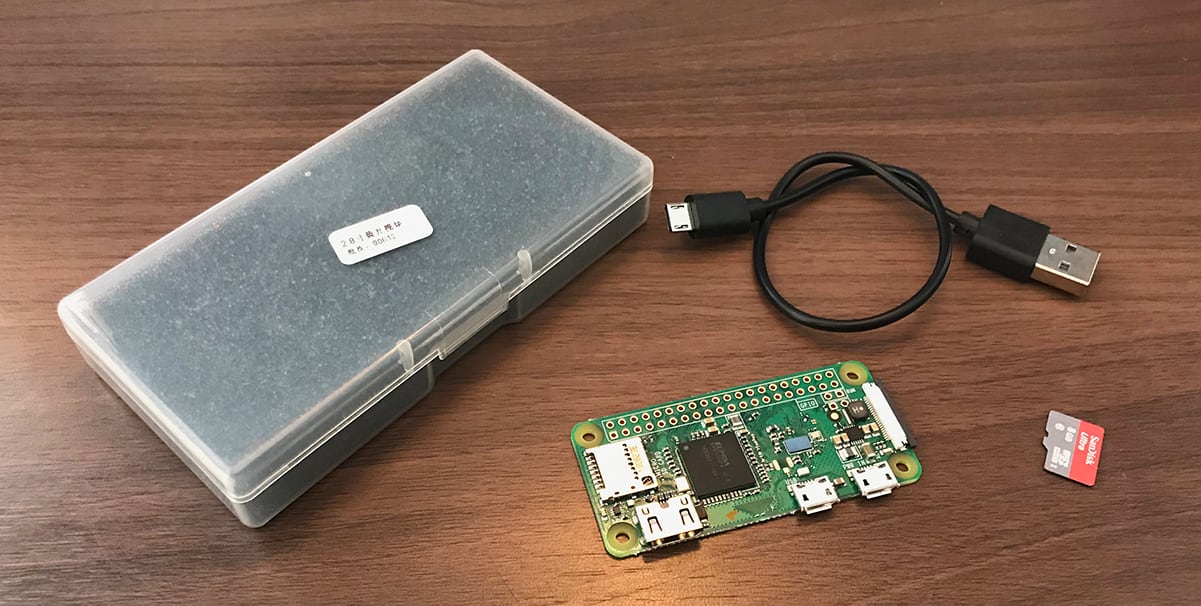
- Raspberry Pi Zero W (or Zero 2 W) – I used the version without headers in order to fit it into a smaller case, but others will work too
- SD card – 8GB is plenty
- USB cable (for power)
- SSD1322 OLED display – I used this 2.8” one in yellow from AliExpress
- And, if you want to print your own case, a 3D printer or 3D printing service.
Software required
The project has been built to run in a Docker container on balenaCloud; this means you can deploy the project with only a couple of steps, saving any time-consuming manual package installation or configuration. So you’ll need:
- Software to flash an SD card (balenaEtcher)
- A free balenaCloud account to setup and manage the Pi
The code for the project is available from GitHub, but it’s not necessary to download this as we’ll install it directly onto the Pi later.
Putting it together
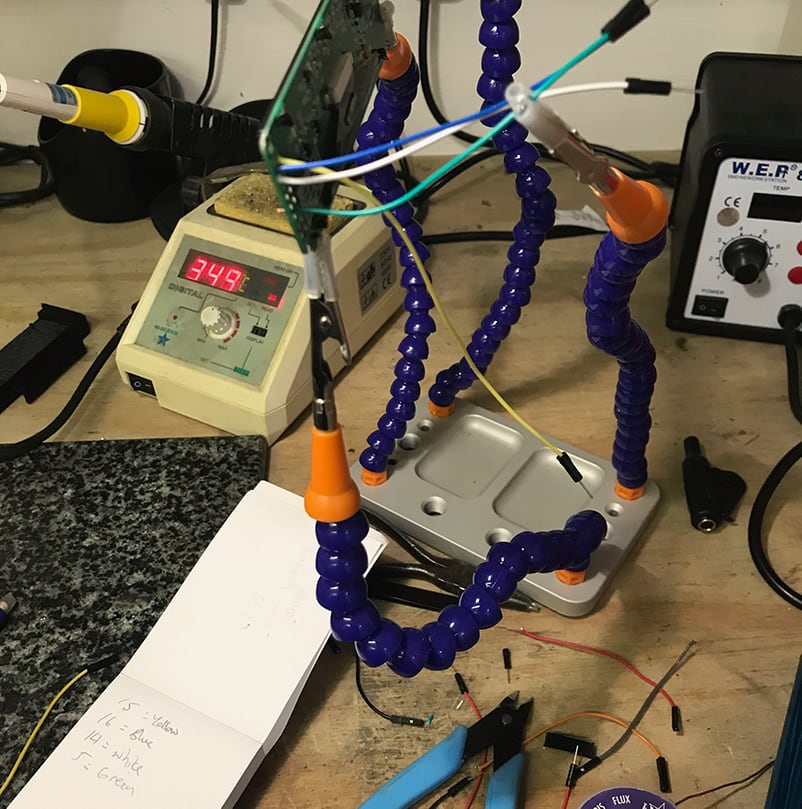
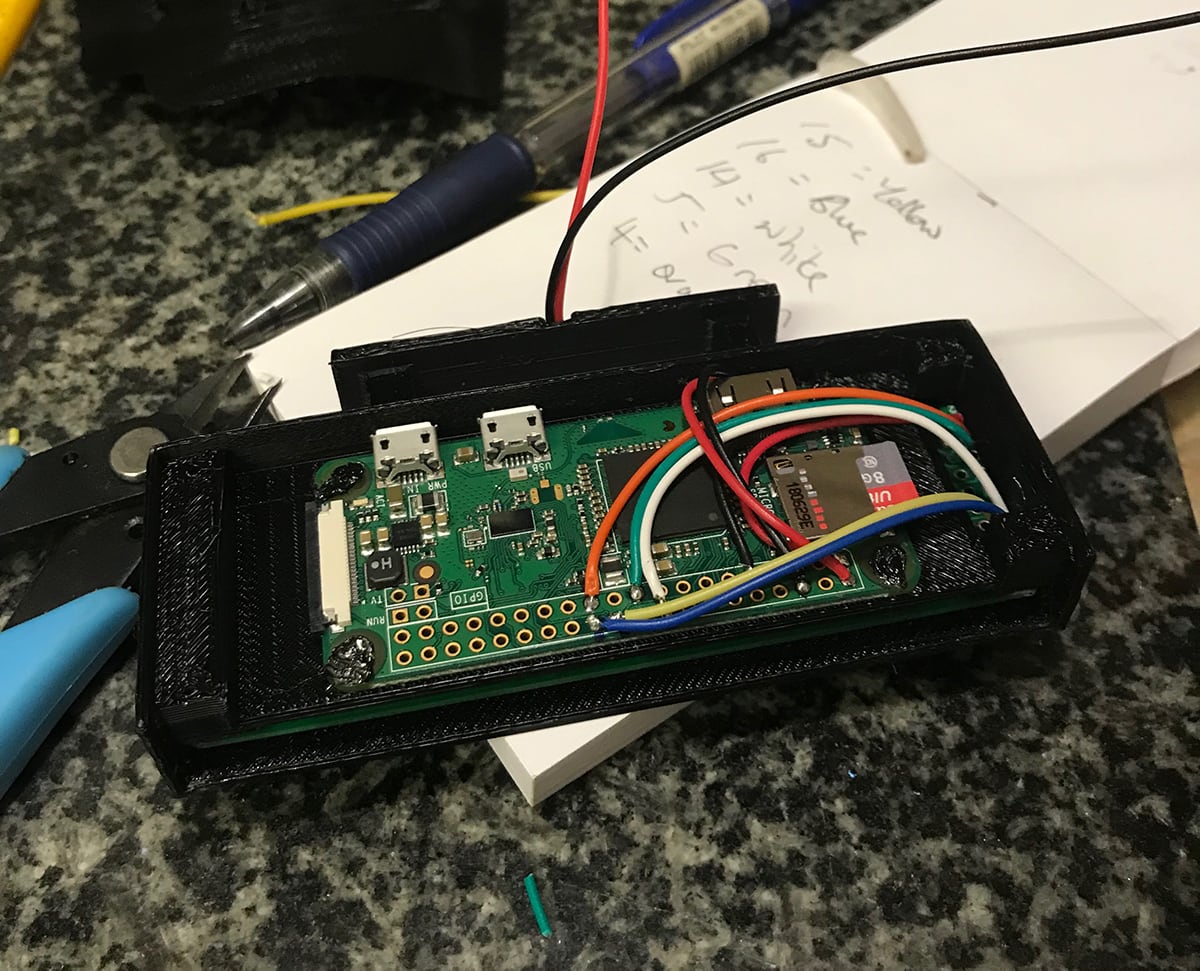
The first task is to connect the display to the GPIO header on your Raspberry Pi. I used a Raspberry Pi Zero W which is supplied without pin headers, this meant that I was able to fit it in a much smaller space, but does mean I had to solder wiring to the Pi. Note: if you’re using my case design you’ll have to solder the wires to the Pi after the display is inserted into the case.
I’ve included the pinout below which is for the 2.8” display that I got from AliExpress. Other SSD1322 (or even other controllers) based displays will probably work fine, you just need to be a bit careful of the pinouts and double-check that they’re correct before powering on.
Important note, if your display isn’t working check this first!: Some displays have a solder-blob or zero-ohm resistor jumper on the back of the board that you may need to move in order to enable the display for SPI communication. If you don’t get any output, check this first! In the case of my display it meant moving R6 to R5 to enable 4SPI as dictated by a small data table printed on the back of the display board.
| Display | Connection | Raspberry Pi |
|---|---|---|
| 1 | Ground | 6 (Ground) |
| 2 | V+ (3.3V) | 1 (3v3 Power) |
| 4 | D0/SCLK | 23 (BCM11 SCLK) |
| 5 | D1/SDIN | 19 (BCM10 MOSI) |
| 14 | DC (data/command select) | 18 (BCM24) |
| 15 | RST (reset) | 22 (BCM25) |
| 16 | CS (chip select) | 24 (BCM8 CE0) |
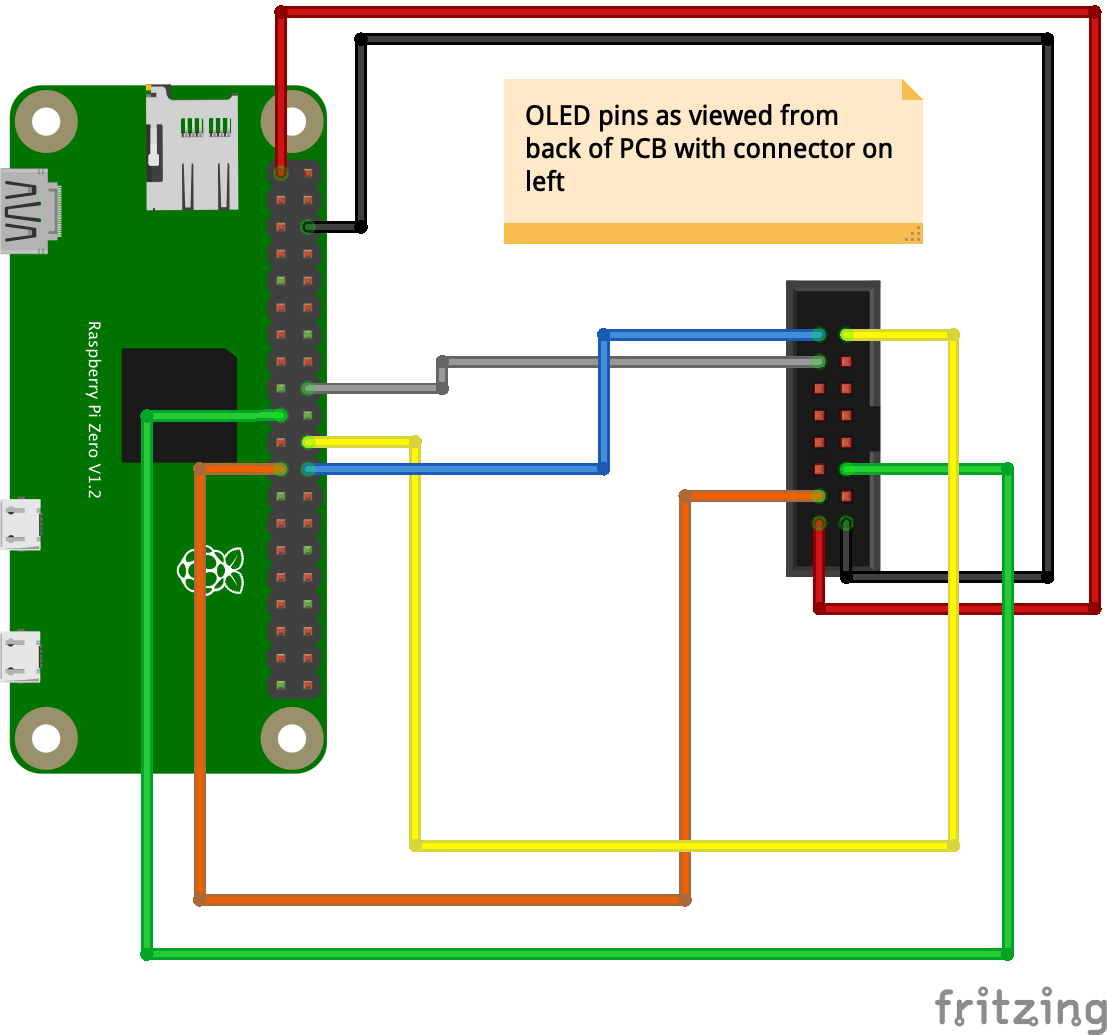
Regardless of if you’re soldering directly to your Raspberry Pi or not, you’re almost certainly going to have to solder wires to the display. When I first developed the project I used some of the usual male Dupont/jumper jerky cables cut in half so that I could easily connect them to a Pi with headers and correct any mistakes with pinout should they occur.
Set up the software
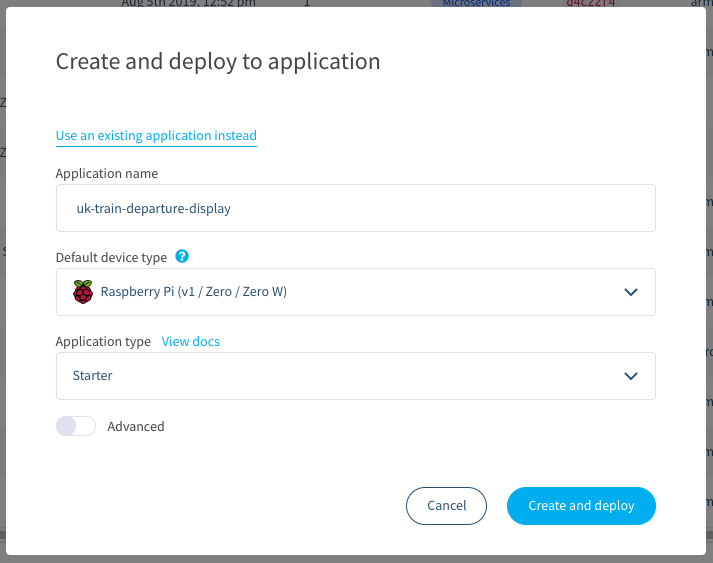
The process of setting up the software has been greatly simplified by the use of balenaCloud, Docker, and the Deploy with balena (DWB) button. This means you don’t have to manually install or configure packages, you just have to click the button below to create an application, add a device, and flash your SD card.
Deploy the app with balenaCloud
If you don’t have one already, sign up for a balenaCloud account. After this, click the DWB button below; this will take you through the steps of creating an application and automatically copy the train sign code from GitHub to your application ready for your device to download.
If you’re just starting out and this is your first project using balena we recommend using the DWB button above, but if you know your way around you can still customize and push the project with our CLI tools. if you need more detailed information we have a detailed deployment guide available in our docs.
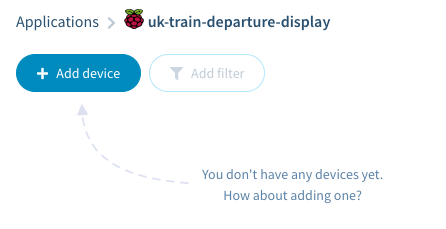
Add a device and download the OS image
Now you’ve added an application, you need to add a device to that application. Here you can preconfigure your WiFi settings, too.
Flash your SD card and power on the device
Use Etcher to flash your SD card with the downloaded OS image.
Insert the SD card into your Raspberry Pi and boot up the device. Within a few minutes it should appear in the balenaCloud dashboard.
Add/update configuration variables
Instead of manually editing configuration files, you can set up your sign and change any variables at any time using the balenaCloud dashboard. We have great documentation on how to set environment variables if you need it, too.
The list of required environment variables for this project is on GitHub. If you used the DWB button above, you should find that your configuration variables have all been added and preset, you’ll just need to update them.
Sign up for the National Rail Enquiries OpenLDBWS API, which will generate an token for you to use as the API key.

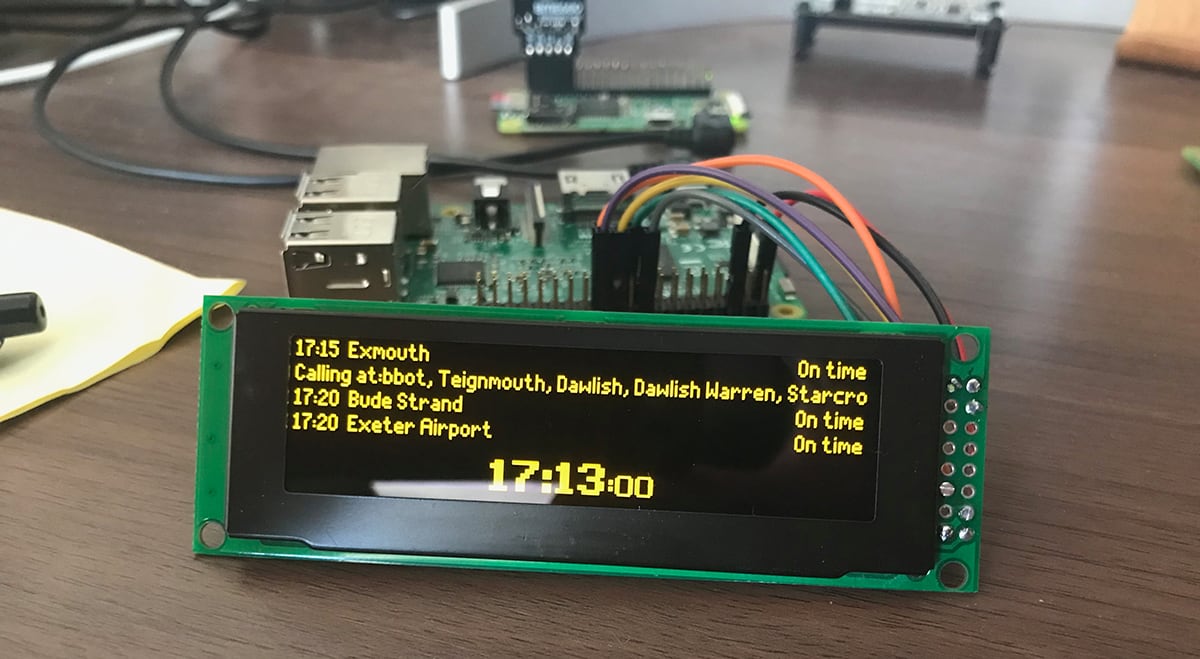
At this point everything should be working and you should get your first glimpse of the working display!
Build a case
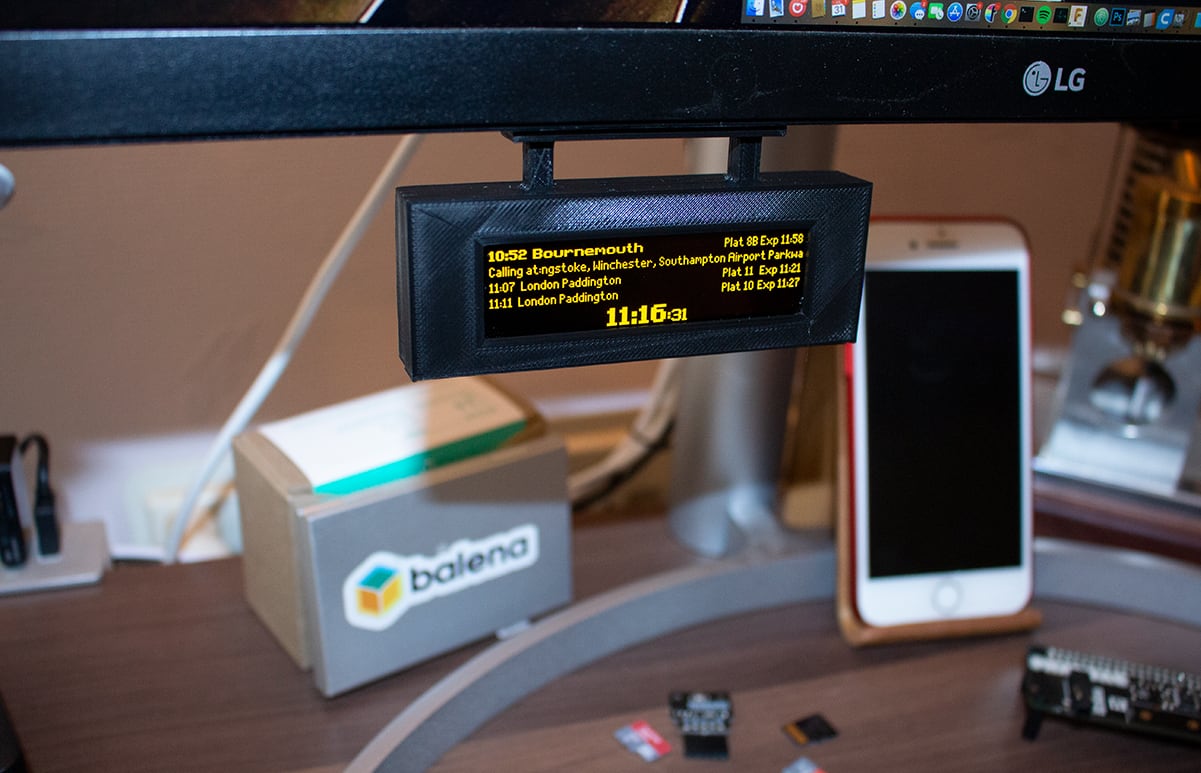
Now, to have the display just sitting on your desk is pretty cool, but I thought it would be even better to make it look like the real thing, or at least somewhere close.

I designed a case to house both the display and Raspberry Pi Zero, ready to stick onto the bottom of my monitor. I wanted to make the case in such a way that it didn’t make everything too bulky, and so focussed on keeping everything tight together and not wasting too much space. I’m sure improvements could be made but I was happy with this as a first draft.
I use Autodesk Fusion 360 and a Creality Ender 3 (via Cura) printer. The models for this case are available on the balena Thingiverse page. It requires supports to print and I had the best results printing in the orientation below:
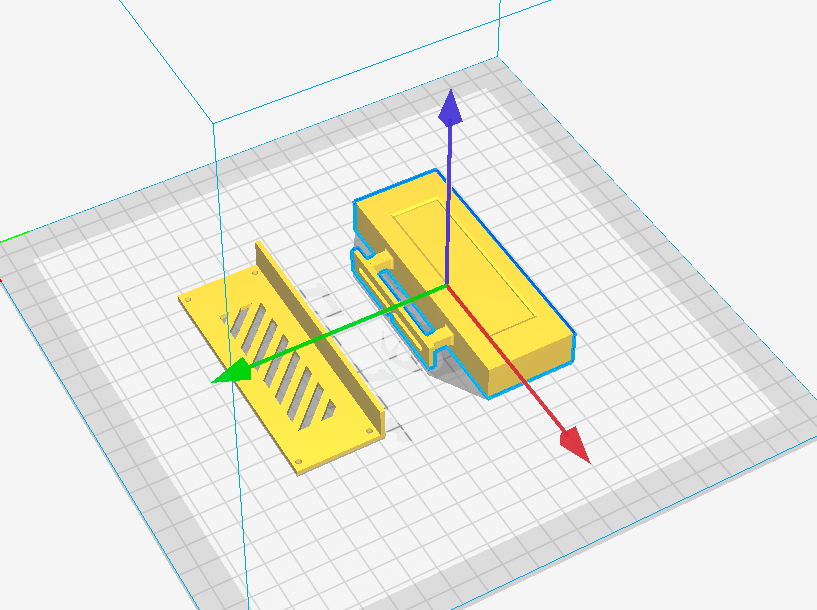
In my case design the display slots in from the bottom and the Raspberry Pi Zero is fitted to pins at the back which are then melted down to secure it in place.
A rear cover is then added with 4 M2 6mm cap head machine screws straight into the plastic.
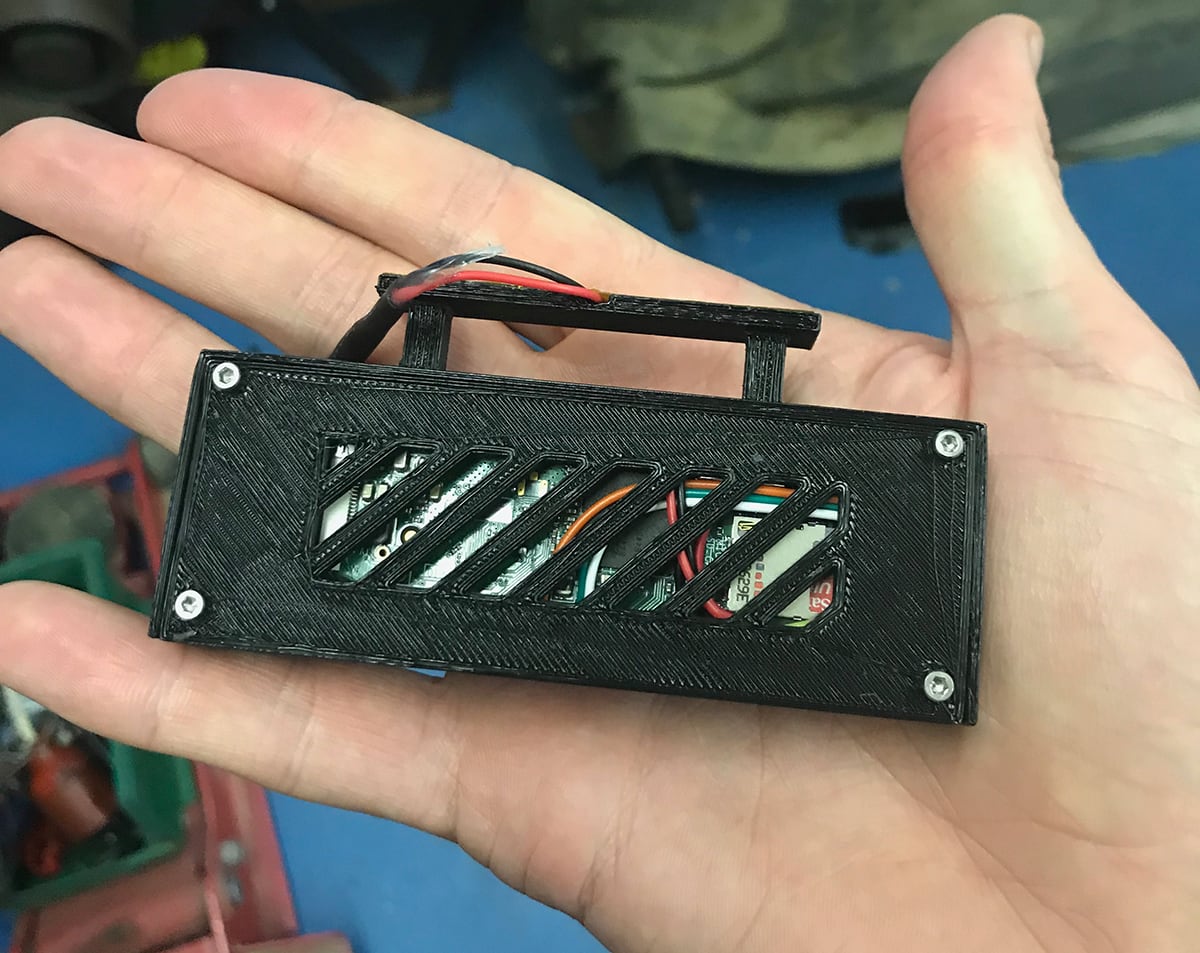
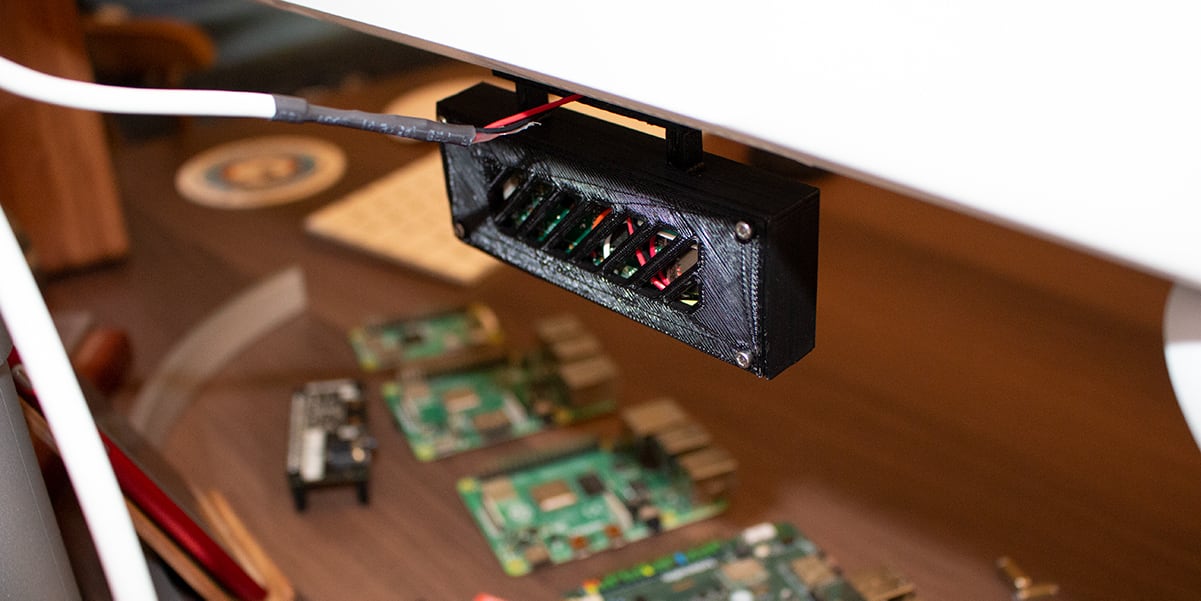
My monitor includes USB ports on the back, so I cut up an old USB cable to provide power. When I make a connection like this using thin cables, I use heatshrink tubing on both conductors, then add hot glue before putting larger heatshrink over everything. The process of shrinking the large tubing melts the hot glue and squeezes everything tight to provide a robust joint.

Cables for power are routed out via the mounting at the top for a clean look and the display is mounted to the bottom of my monitor using double-sided adhesive tape.
Finished!

A big thanks to Chris Hutchinson who originally started this project and inspired me to develop it further. Blake made some further improvements and this project was forked from there.
The fonts used were painstakingly put together by DanielHartUK and can be found on GitHub at https://github.com/DanielHartUK/Dot-Matrix-Typeface – A huge thanks for making that resource available!
At this point you could modify the project to show whatever information you want! The OLED is very sharp and crisp in person and would make any sort of status display look pretty.
Anyhow, thanks for taking the time to check out the project, I hope it’s inspired you to build something of your own, and if you do I’d love to hear about it! You can always find us on the forums at https://forums.balena.io, on Twitter @balena_io, on Instagram @balena_io or on Facebook.
Hello @gh_deedee2110 ! Thanks for joining our Forums!
If you want the fastest way to get going with balena, I recommend following the build guide closely and using Deploy with balena and your balenaCloud account.
If you’re more interested in downloading a version of balenaOS to check out, you’ll find all our latest ones here: balenaOS – Run Docker containers on embedded IoT devices
Thanks for all the info, I’ve had a quick go at making this departure board with the Ali Express screen and a Pi – all good.
Just wondering if this project can be modified to show London Underground stations – the STAND BACK TRAIN APPROACHING would be quite cool to see? I’ve set mine up purely on the Balena platform, and haven’t edited any files to make it work. I’ve got a bit of Linux knowledge, so could potentially make something else work. Thanks.
Hello @davidf welcome to the balena community!
That should be doable if you plug the London Underground API (exist?). Check this uk-train-departure-display/trains.py at e6aa90ea77796cf548f5c3382bca03138dd2898c · chrisys/uk-train-departure-display · GitHub and let us know if you make it happen
This project is great. I’ve built my first sign with the 2.8inch display, but want to go bigger. Has anyone tried this with a larger SSD1322 screen. Would love some advice on working screens (seen a couple 5.5inch SSD1322 variants).
Hello @googanhiem welcome to the balena community!
I have on my to-do list to test different width and heights. Check here train-departure-display/main.py at 49d24c7bd1c8bba9384f72c1958d708e4cc22f74 · chrisys/train-departure-display · GitHub
let us know if you can successfully get results
@Green welcome to the forums and thanks for trying my project
Have you tried filling in the operating hours? Admittedly if it doesn’t work with it blank there’s probably a bug to fix, but try putting in something like
8-23in that box (which will mean the sign runs from 8am to 11pm.Edit: would also love to see a photo of your sign in-situ when you get it working! I redesigned the whole case last year and haven’t seen anyone replicate it yet.
Hey @CuriousMuggle welcome to the forums and thanks for trying my project to you too!
At the moment it only supports national rail stations but in the future I’d love to add support for the underground (amongst other stuff), but just haven’t got around to it yet. The perfect thing to do would be to make the interface generic so it’s possible for users to add plugins to any of the local transit systems around the world.
@Green another thing that may help is to share the logs from the terminal on the balenaCloud dashboard – there might be something there that indicates what’s going on?
Oh interesting, I’ll see if I can reproduce this on my side and resolve it. Thanks for coming back with the fix!
There should be no difference between
mainandAll servicesin this case since there is only one service in the app. In more complex apps it’s possible to have the same variable name with different values on a per-service basis but as I say, it shouldn’t make a difference here.Do share your lego case here too when you get it done
Hi @jacksamthompson and welcome to the forums!
If it’s been a couple of years I’d suggest re-installing the software again from scratch – it shouldn’t take long. I’d recommend using the ‘Deploy’ button straight from balenaHub here: balenaHub: an easier way to find and publish fleets, apps, and blocks for edge devices
However, it does sound like you are trying to use a Pi v1, which I’ve personally never tested the project on. I can’t guarantee it will work, but in theory it should, it’ll just be a bit slow – that device is quite old now.
Keep me posted on how you get on!